5 Accent Wall Ideas and Tips
This post may contain affiliate links which won't change your price but will share some commission. Read more here.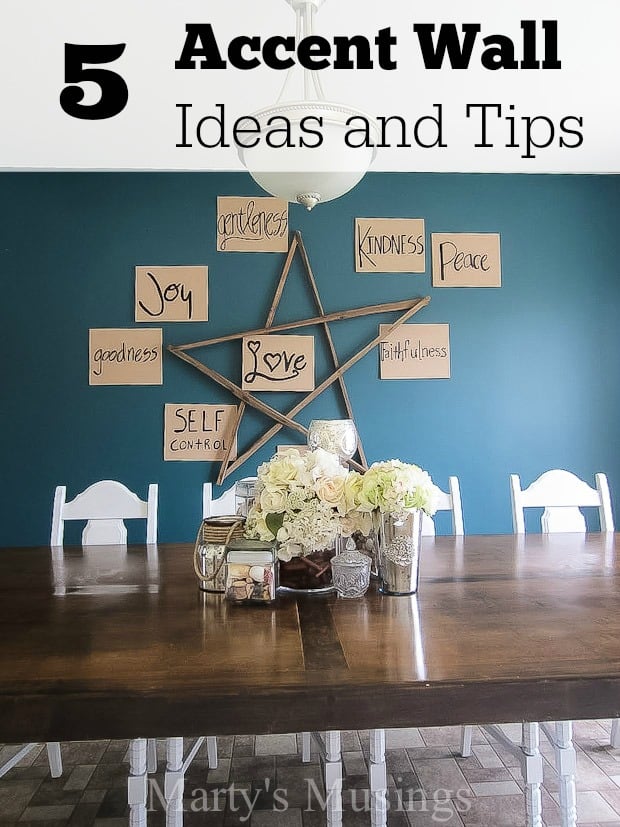
When you have a dad who is a painting contractor and handyman and you move into a new house, you are hopeful that your dad will do a few “little” projects for you.
And if your mom is a blogger who writes about all things home you want that room to look extra special. Just in case she wants to put it on her blog!
That’s a little bit of pressure, but my daughter Rachel can handle it!
I guess I kinda feel like I’ve arrived since Rachel sent me a picture of her completed dining room and asked if it was staged okay! I can’t begin to tell you how unbelievable that question was!
For all those years raising children, homeschooling and pouring my life into theirs, there was not one area in my home that was blog worthy! Real, yes. Pinterest perfect? Absolutely not.
So when my daughter sent me the picture seeking my opinion you have to believe me when I tell you that’s a high compliment!
And seriously, if I can learn how to thrift, paint, style and bring a room together, anybody can!
Here are a few accent wall ideas and tips on how you can transform your own home with just a little bit of paint and courage!
Tip #1 Pick one wall that will be the focal point.
You don’t have to paint every wall. The beautiful thing about this is the accent wall will get the majority of the attention.
Don’t worry about every single detail. Let that one focal wall be what you focus on.
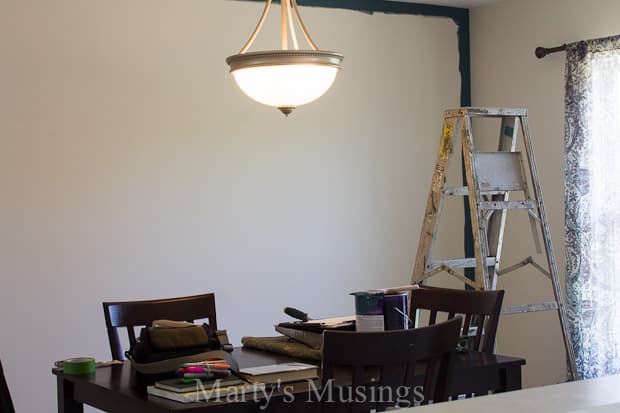
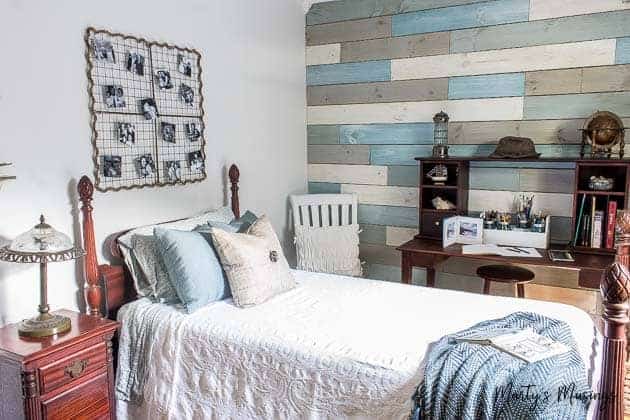
Rachel and Donny bought a practically new foreclosure and builder beige was on every single wall.
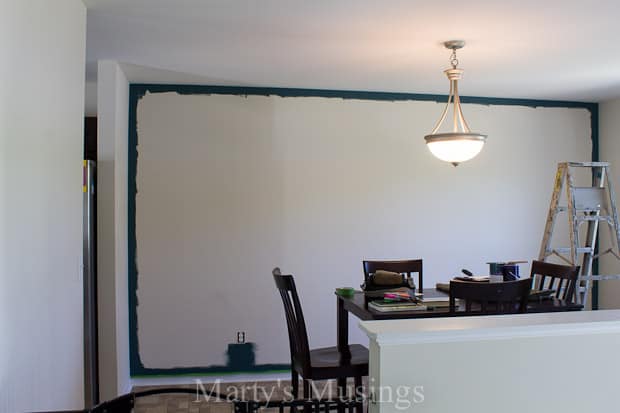
You may not have a painter dad to help so start out small and you can get a taste of the color without committing to a total room overhaul.

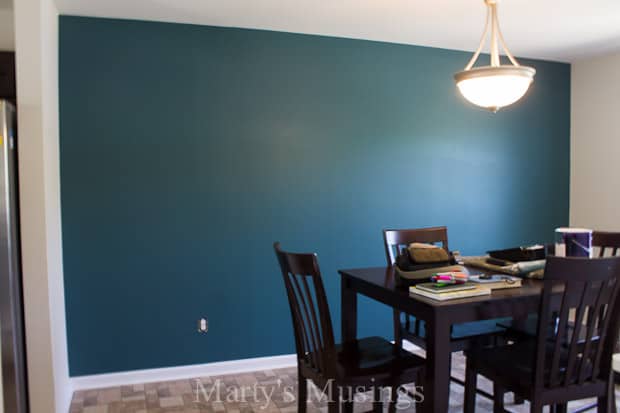
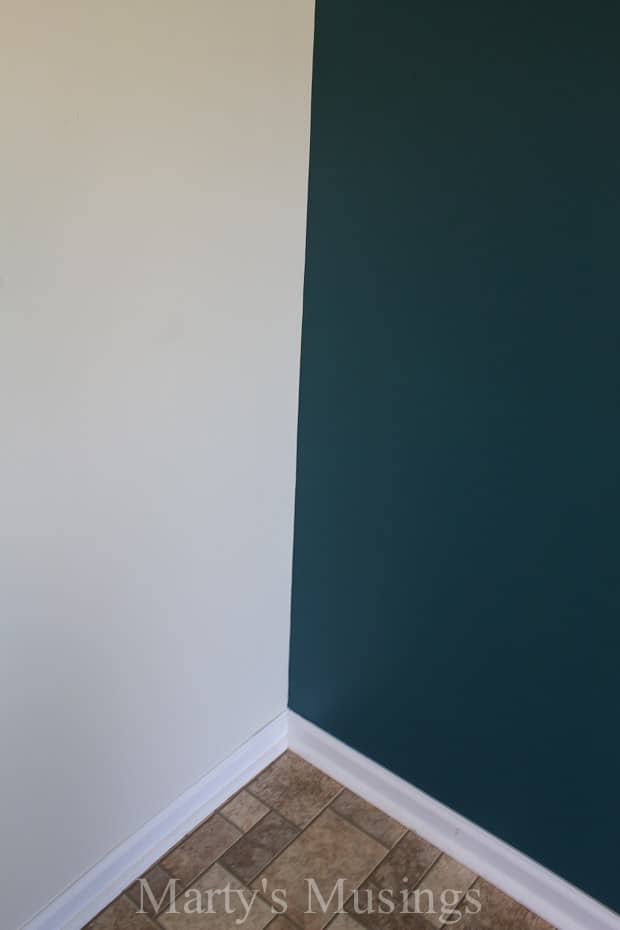
Tip #2 Don’t be afraid to use a bold color.
When I decided on Perpetual Purple for an accent wall in my craft room my whole family thought I was crazy, especially my husband. He nicely painted the wall for me anyway, and I love it! It may not be your style, but one wall isn’t going to change your entire home.
Take a risk and be brave!

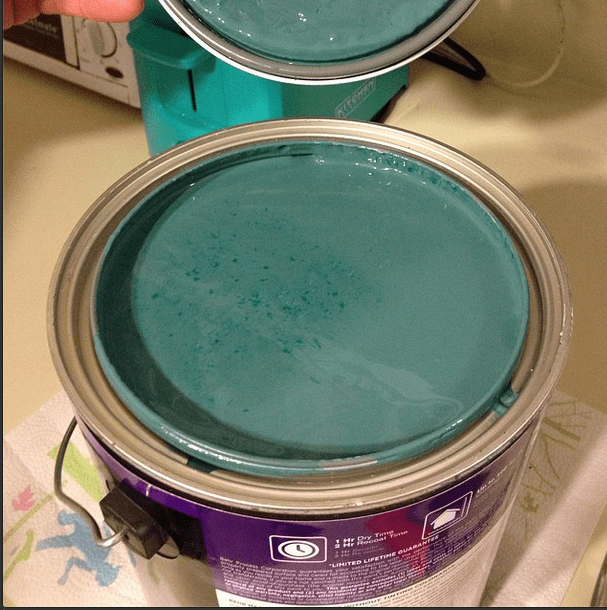
**The paint is Behr Marquee Interior Eggshell Enamel Walk Me Home MQ6-2.
Tip #3 Use your home decor furnishings to compliment the wall color.
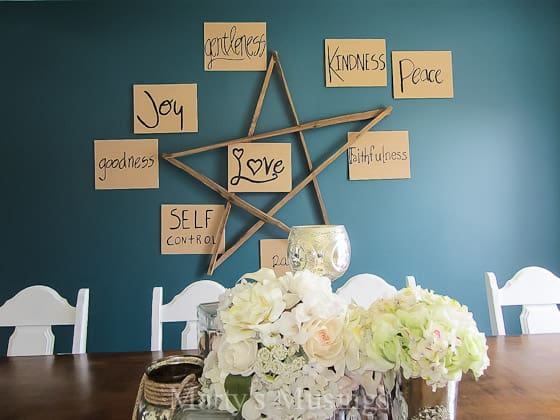
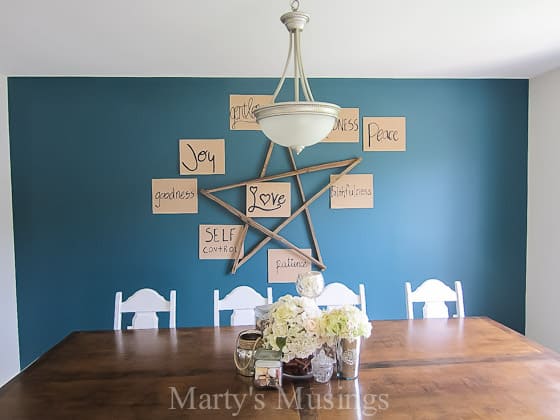
Rachel got a steal of a deal on this dining room table (which I’m totally coveting) which seats 10 and will last them for years to come.
She painted white the four chairs she found at a yard sale and has a bench for the other side of the table. She still wants another couple of chairs but she is good to go for now.
I love the wall arrangement she made using a thrift store wooden star and the fruits of the spirit free handed on craft store clearance burlap panels. I taught my daughter well!
The wall doesn’t look quite so bold when the room is accessorized.
Tip #4 Use a good quality paint.
We love Behr Paint products (see all the colors we’ve used here) and the Marquee line from Behr is a welcome entry into the crowded field of competitors. Easy to use, superb coverage, beautifully rich color choices, and fabulous results, the Marquee line is for all you weekend warriors that want to get in and out of a room as fast as possible!
Tip #5 If you don’t like it, pick another color!
Isn’t it better to stretch outside your comfort zone with a little bit of paint rather than committing to matching furniture and accessories where the price tag is so much higher?
Besides, painting only one wall takes a lot less time and money!
What do you think? If you could paint one accent wall in your home what color would it be?
More Painting Tips
Practical painting tips for the home that anyone can use, including chalk painting, accent walls and choosing the right colors.
My favorite “color” room of all time was my bedroom when I was 10. My mom let me paint it lavender. Sixty years ago that was a wild choice! I had white curtains and a white chenille bedroom. I loved my little sanctuary.
Sadly, my parents lost that house to foreclosure a year later and we entered a very dark and sad time in my life that included homelessness and many other terrible things. But, in my mind, that little lavender room will always be a ray of sunshine!
Hi, Gayle. I’m so sorry for your hard times. I know personally how trauma effects everything. So glad you have the memory of your lavender room to encourage you!
Looooove. I bought this paint colour for my dining room too. It’s attached to my living room and kitchen, so it’s really just the equivalent of about 2 walls, so I consider it an accent against the rest which is light neutral. When trying to pick a colour, I started out really light, muted and safe..but found I just was not satisfied, and kept darkening and deepening until I scratched that itch. I had no idea I’d find myself with such a rich colour, but I’m so happy I went for it. I looove the rich browns with walk me home. So warm, even though it’s techincally a cool colour! I am seeing this colour and variations of it everywhere now! And how are you old enough to have a daughter that has her own place lol? Ah I know how it is, when my son is move-out age, I’ll only be 35 (hopefully:-p).
Great tips! I love a bold accent wall as well. Such a simple yet great way to add some colour & a bit of drama!
Thanks, Tash! We have one accent wall in our home and my daughter has a couple in her home as well. You’re right. It adds a little bit of drama with only a little bit of effort.
Great tips! That color looks fantastic and so does your wall art.
Thanks, Megan. It was fun watching my daughter decorate and see how she pulled it together. Love that I passed down my love of thriftiness!
Love the simplicity of your accent wall. You used one focal point rather than over decorating, and it really works for me. As for accent walls – I’ve used red (http://www.hometips4women.com/kitchen-remodel-in-100-year-old-victorian) and then a bold blue as my husband had enough of the red. Now moving to Arizona & think I’ll use some bold green to make up for living in the middle of the desert
H, Tina. Since you’re moving to Arizona you’ll have a new home and new colors if you wish! Sometimes I think it would just be best to start over with a fresh palette. Thanks for visiting my blog!
I really adore this. The table is something out of my dreams. Perfect for the space, too. I love the white chairs with it, too.
And that wall. Perfection. The color is really awesome. And I love the star, too.
Just so well-done. Pinning.
I know, Kim. I love my daughter’s table as well. She did a great job of pulling it all together! Thanks for pinning!