Built-In Bathroom Storage
This post may contain affiliate links which won't change your price but will share some commission. Read more here.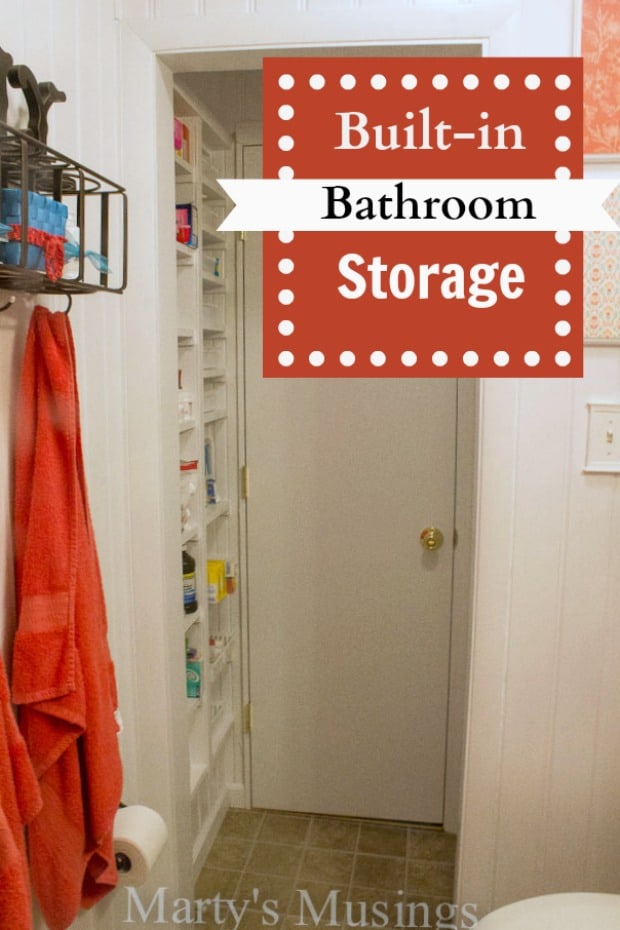
If you’ve followed along in recent weeks you’ll remember that we have shared our small bathroom remodel as well as the DIY shower makeover with Bondera Adhesive and a great tutorial how to install beadboard paneling.
This bathroom has been our most challenging makeover ever but it sure has kept us busy sharing all the great ways we have maximized our small space.
I’m going to turn it over to my DIY hubby who shares this terrific source of unclaimed space with built-in bathroom storage.
From Tim; “Necessity is the mother of invention.” This part of our tiny bathroom makeover was born from this old saying! We desperately needed extra storage for all our bathroom junk paraphernalia overflow stuff and I definitely had to invent some storage somewhere. This wall caught my eye and we began to consider our options.
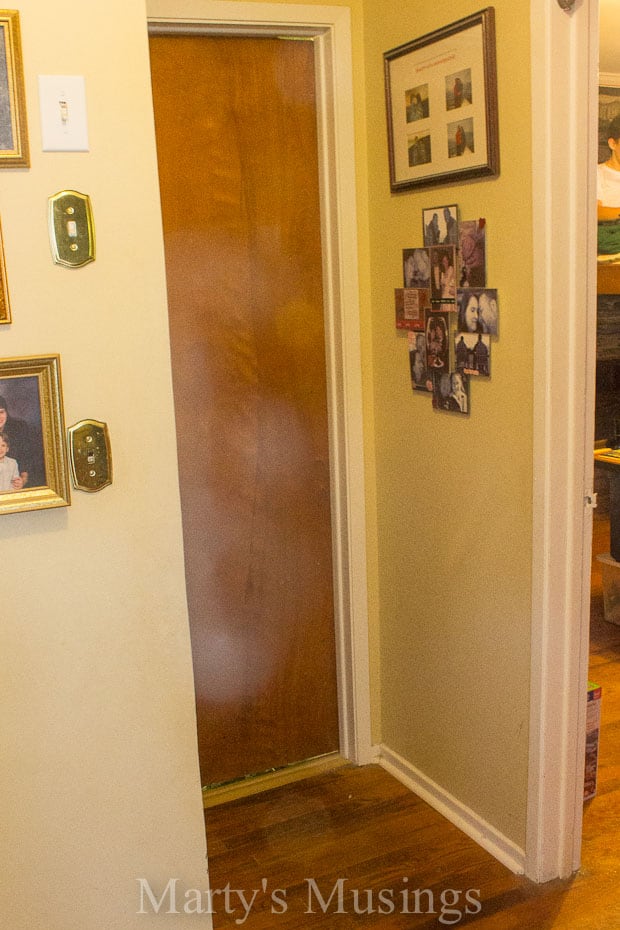
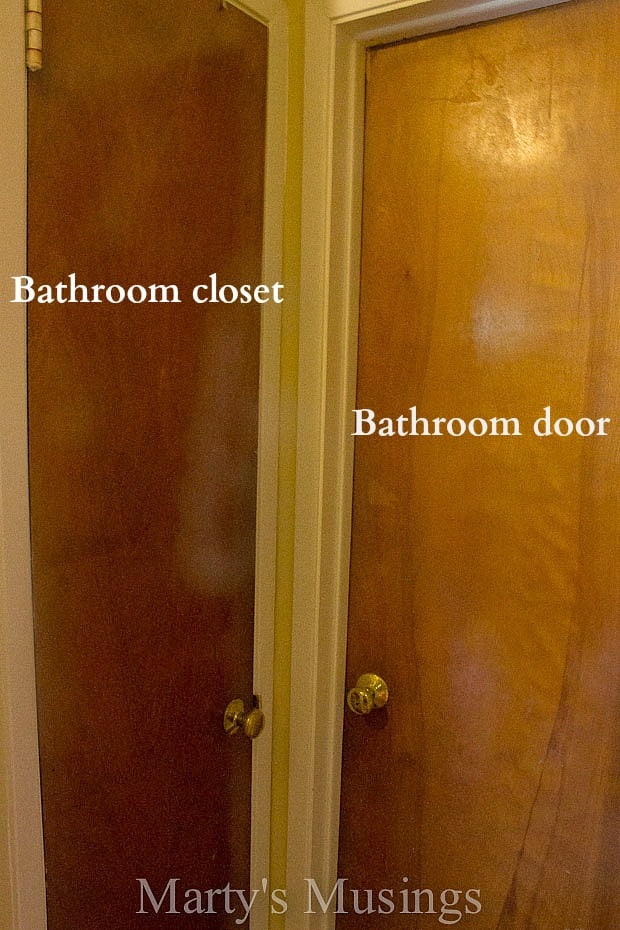
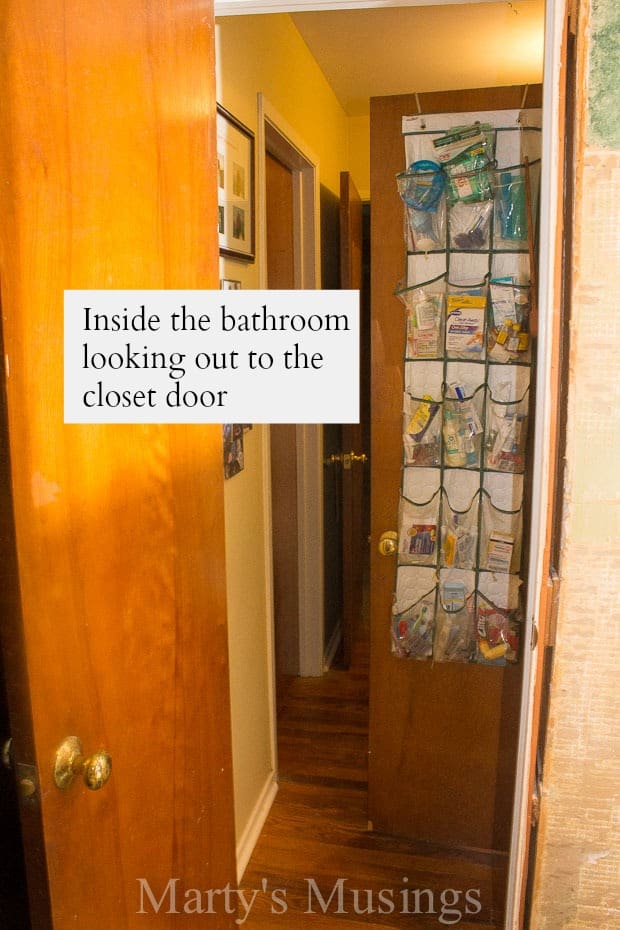
To fully appreciate the genius of my solution (hardy-har) it’s necessary to orient you with the before and after. These are the original doors in their original places; the closet door would eventually be removed and replaced with an accordion door and the bathroom door would be completely removed and a new door and casing installed 3 feet into the hallway, away from the bathroom. This would open up the bathroom a bit and also make the closet part of the bathroom.
Here is the target wall, but at this point I have no idea exactly what I will find when the sheet rock disappears and I have to work with whatever is left. We are fearless!
Don’t you feel claustrophobic?! Too many doors in such a small space, and you can tell from the re-purposed shoe rack on the back of the closet door that we really had outgrown that little storage space.
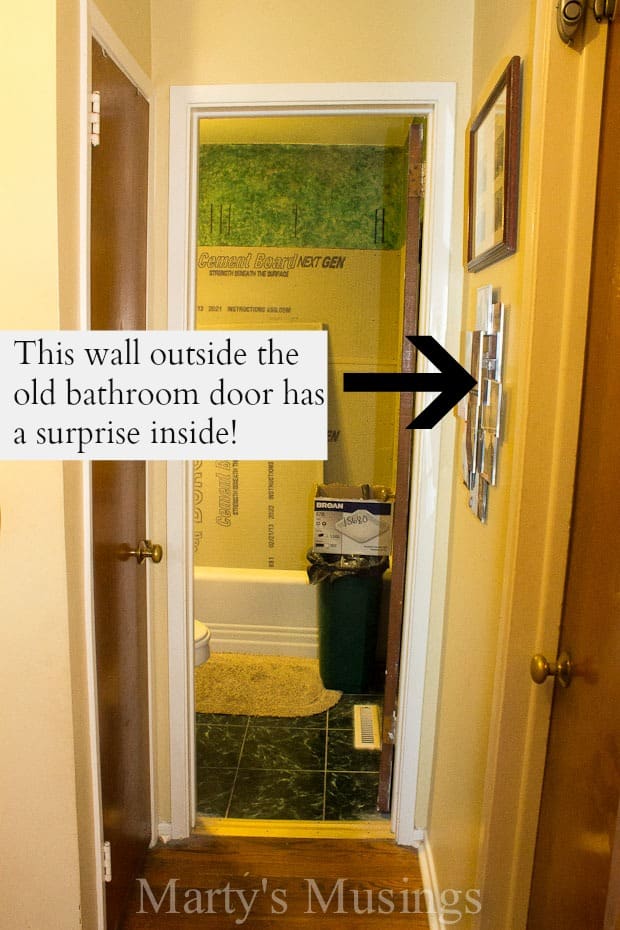
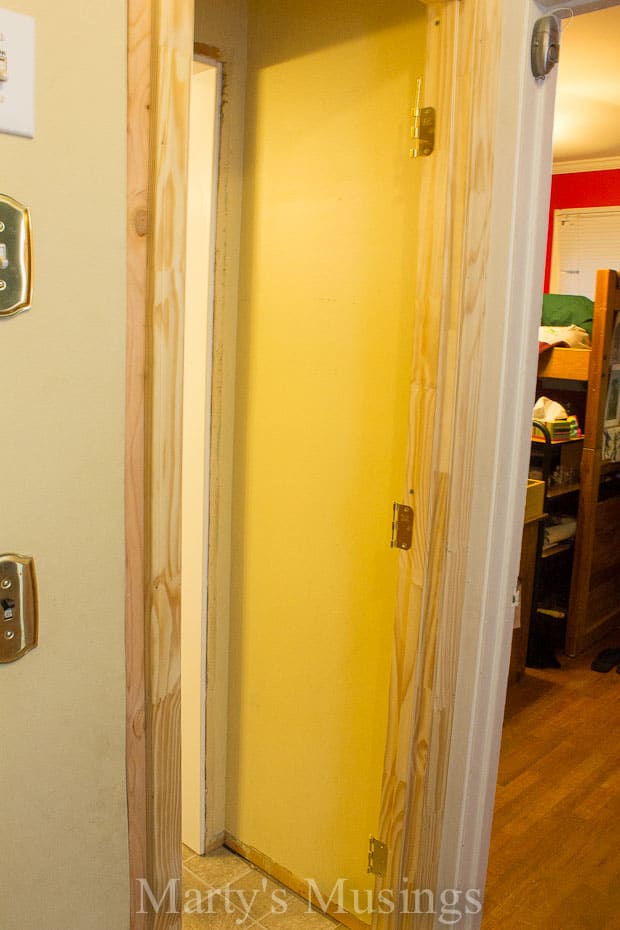
So here the bathroom door and casing has been removed and the new door and casing installed. Still no idea what lies around the corner…except the fire red in my son’s bedroom. Wow!
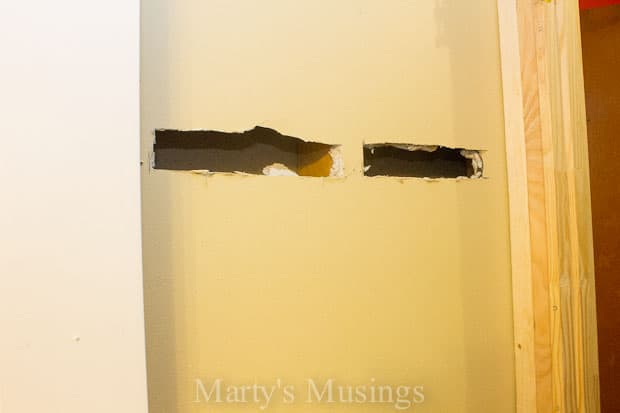
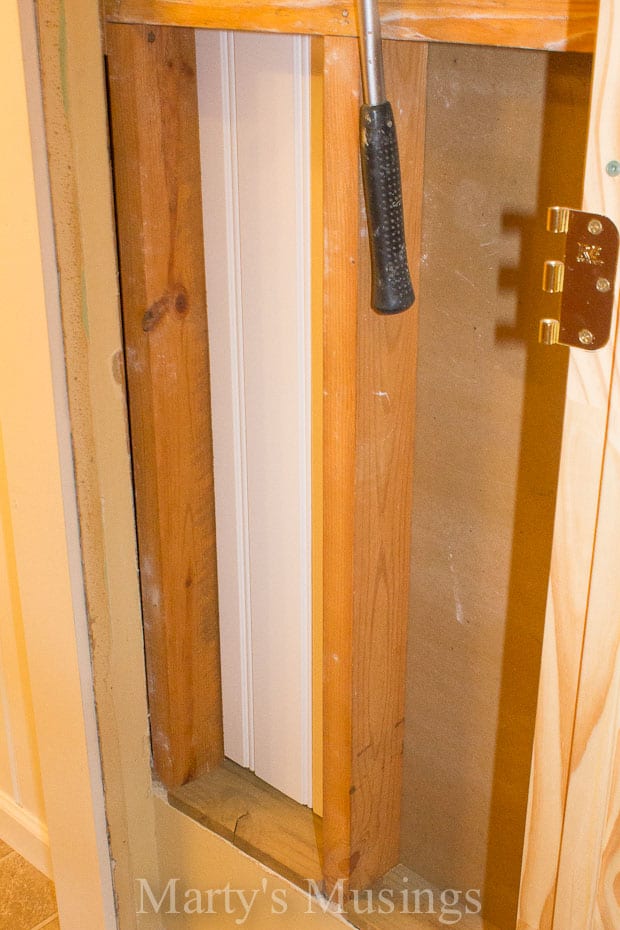
And the discovery process begins! Because I had already exposed some of the sheetrock in the bathroom I had a fairly good idea about where the studs might be. I was hoping one would land in the center of the wall, but we were just a bit off. No problem.
There was no electrical to worry about right now, but I am backing right up to the adjacent bedroom and that light switch will come into play a bit further down the wall. I now realize that there is a stud almost at center and one at the left and right corners.
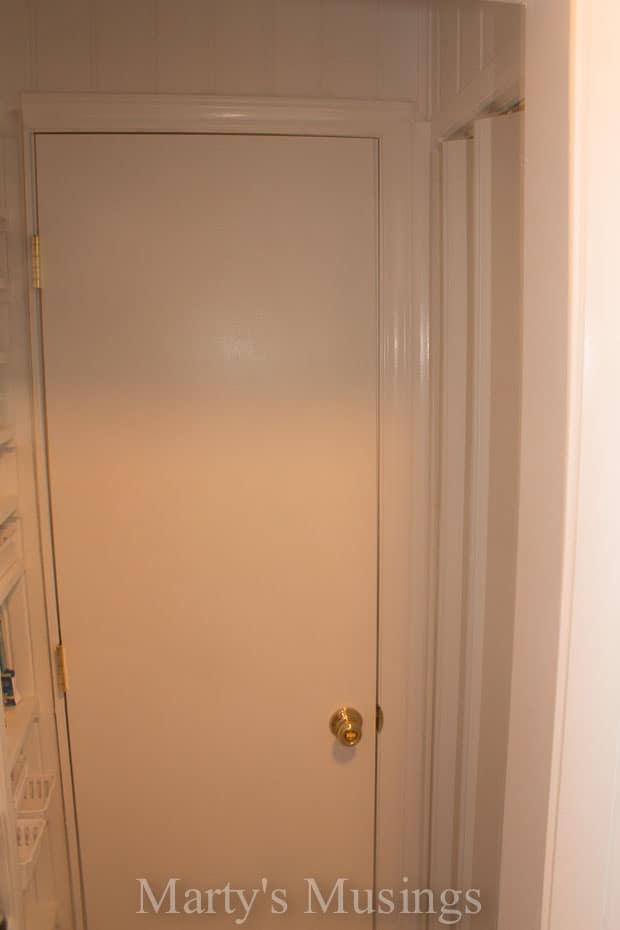
The idea with this built-in storage was to “hide” it as much as possible from outside the bathroom. That is why I did not remove the sheetrock all the way to the ceiling. With the profile matching the open casing (the original door, remember?) as well as the new door, with the door open the storage is hidden. Brilliant!
You sharp-eyed DIY professional may notice my sophisticated sheetrock removal technique and wonder why in the world I didn’t use some kind of saw. Valid, but I have a good reason. DUST! I have cleaned up so many times by this point that one more round of sheetrock dust all over the house would have sent me over the edge. The hammer and scraper were slow but just fine by me.
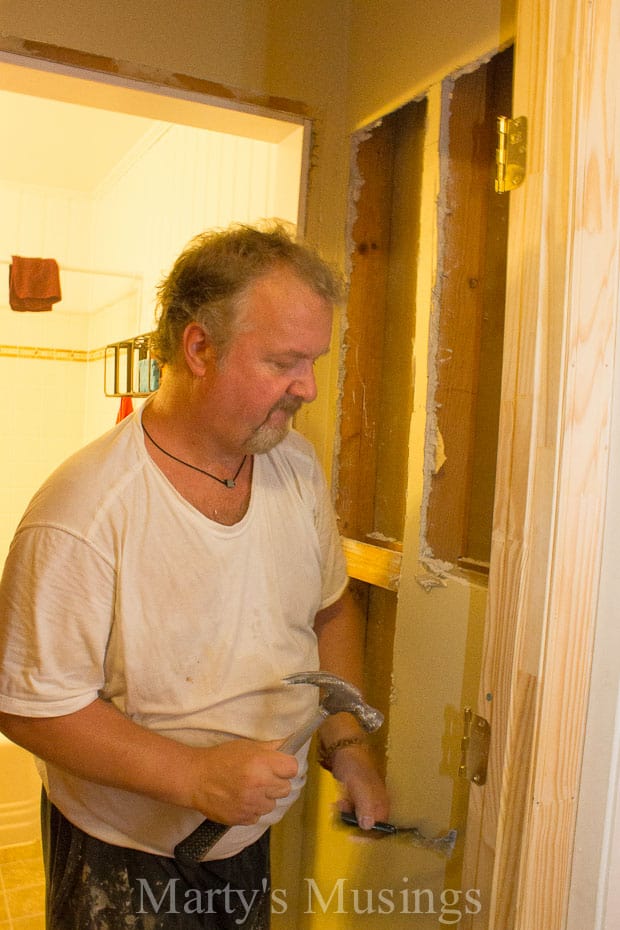
Now, you same DIY-ers that questioned my process may also wonder why I didn’t just rip out the center stud and have a nice clean opening to work with. Another good point, but you see that horizontal piece of wood that my hammer is hanging on (you can see it better in the previous pic)? That is a support that runs the entire length of the wall, all the way from the right casing to the inside corner of the tub surround. It runs all the way around the room and probably around every room that way.

This house was built in the late 1940’s and this technique was used, I suspect, to keep the studs from warping and twisting over time. I chose to leave all that in place and work around it, just to be safe. The white beadboard placed in the lower left slot is just to give us an idea of what it would look like. The entire space, like the bathroom, would be covered in beadboard.
Here is the built-in taking shape, with beadboard installed and everything primed and painted. I was very pleased that the original lumber was in such good shape.
Something to note here is that, because of the age of the house, this was still true dimension lumber. A 2′ x 4″ was really exactly that, 2 inches by 4 inches! You have to take it into consideration when using today’s lumber in conjunction with the original stuff. The small shelves will be installed at various intervals in all four quadrants.
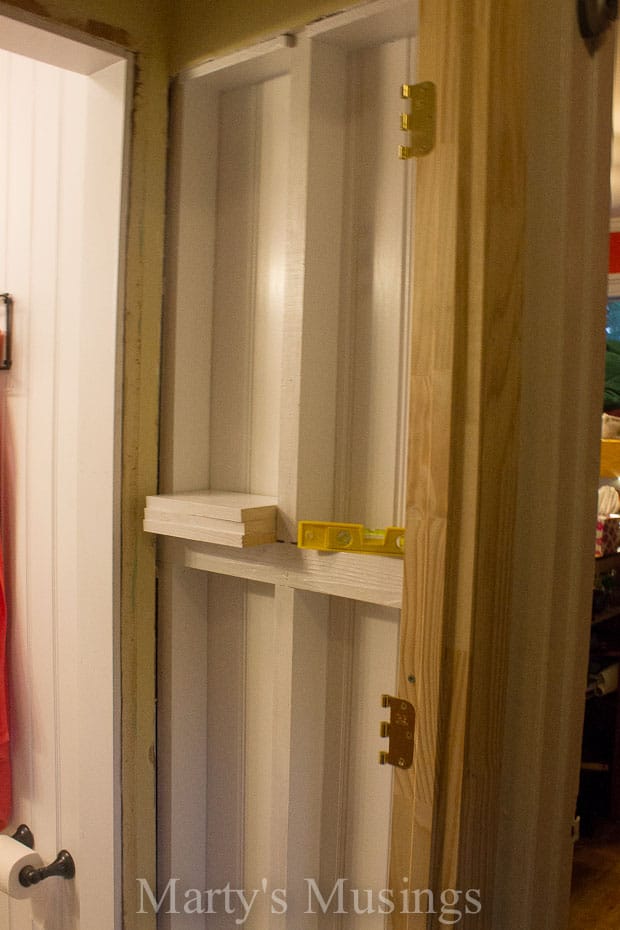
Really taking shape, with beadboard installed, shelves up and some of the finish casing in place. The shelves were supported by simply nailing 1″ x 2″ strips into the studs AFTER they had been attached to the bottom of each shelf. That prevented me from having to nail the shelves to the supports, from the top, in a very tight space.
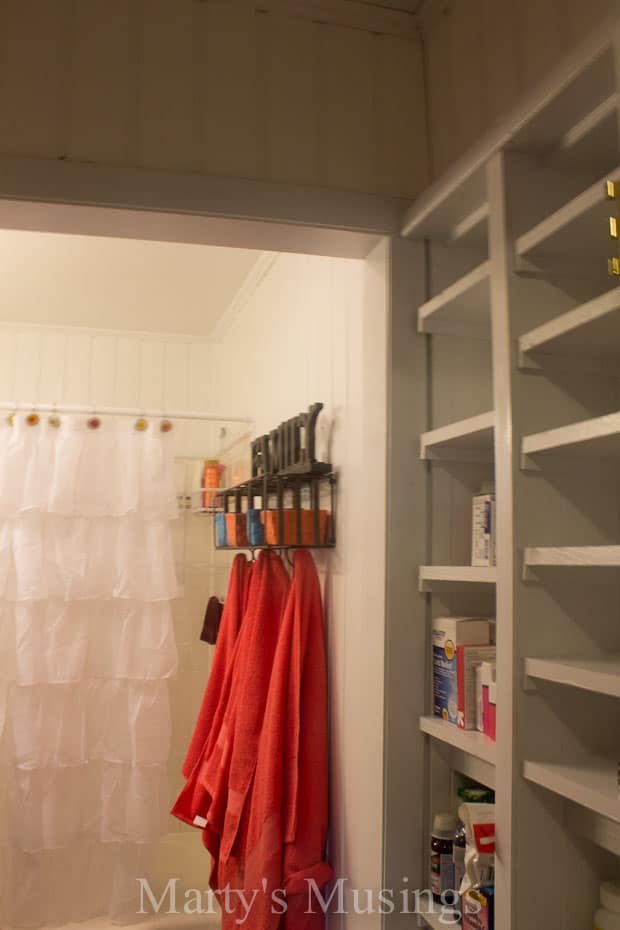
So, you can get an idea of how the door, when open, hides the storage. This was such a unique way to maximize what little space we had and was amazingly inexpensive – maybe $20 worth of lumber.
New door, hidden storage and a glimpse of the new white accordion door where the old closet door was before.
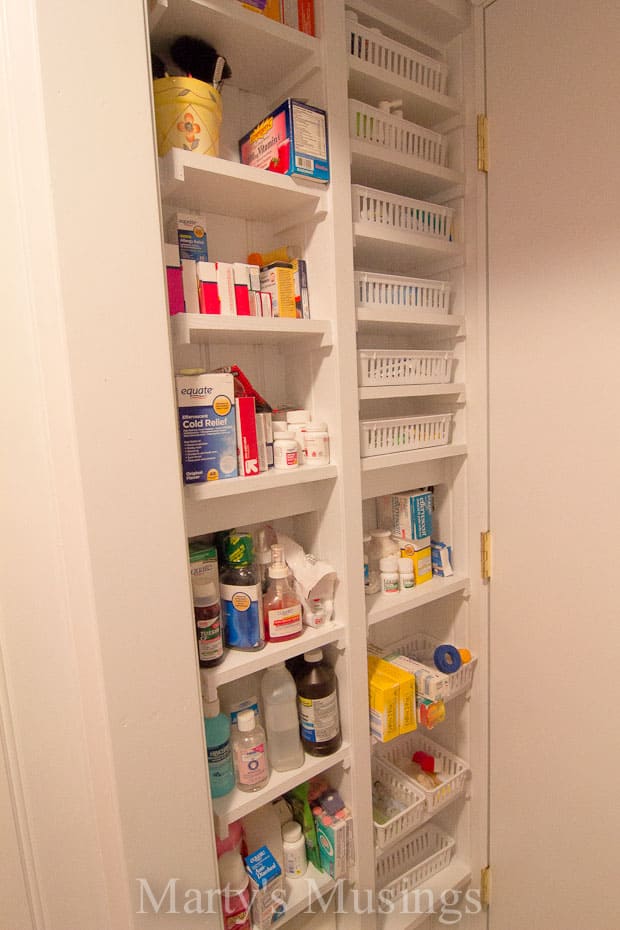
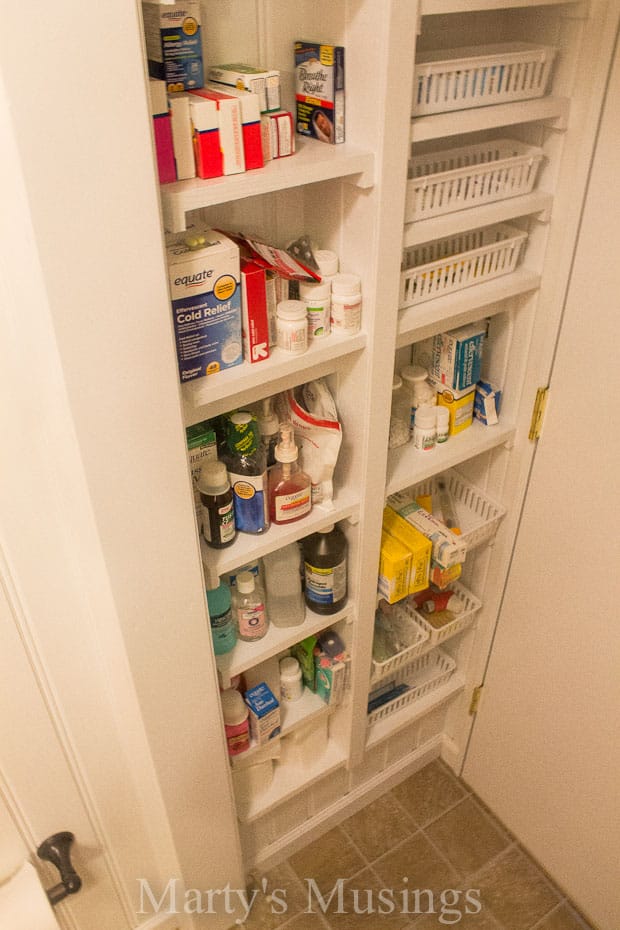
And the finishing touches applied by my incredibly gifted bride! FYI, because these products would be easily viewed by guests who visited the space for a purpose (if you catch my drift), we only put less personal items here…for obvious reasons.
The little baskets were too cute and a great organizational idea and spacing the shelves out allowed for the taller items to be placed in those specific areas. On to the next necessary invention!
Back to Marty: Believe it or not, I really do help with our projects! Tim definitely does the grunt work, my strong man hubby. But I took a few rounds fighting the dust during those long few weeks of construction.
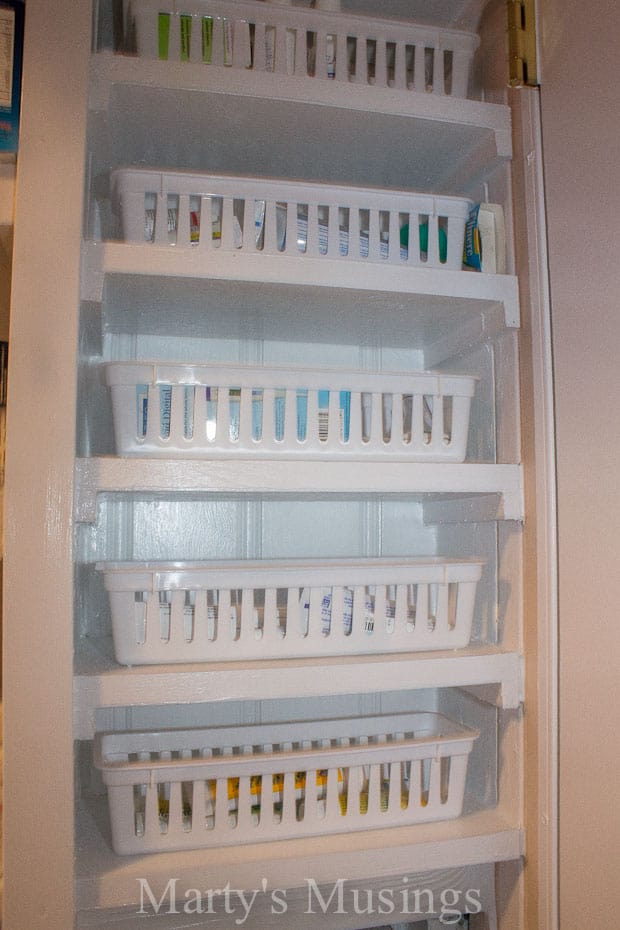
This fabulous use of hidden space gave me a world of shelving to figure out what to do with. The shelves were not spaced completely symmetrical on both sides so I had to shop around for some cheap baskets that would work. I used a combination of rectangular and square dollar baskets from Walmart. Since the depth is so shallow it’s easy to see everything at a glance.
My last task is to label the shelves so someone other than me can actually find what is needed!
Note: This should be obvious, but let me say it anyway. This type of shelving works great for us because we don’t have little kids in the house. This could still be a great idea if your children are small but anything that was poisonous would need to be kept out of the reach of little hands. Or you might want to wait until they get a little older to implement this idea.
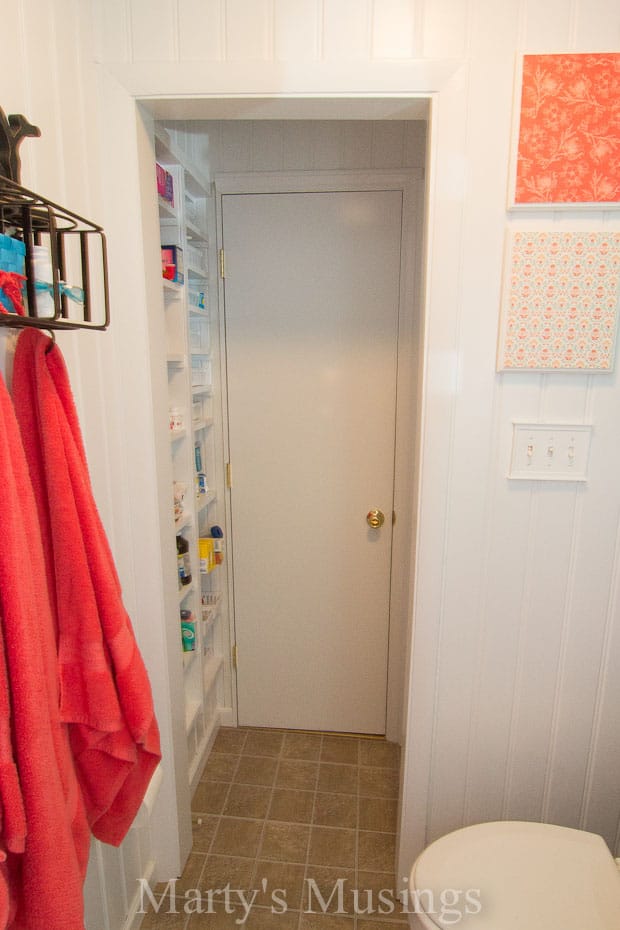
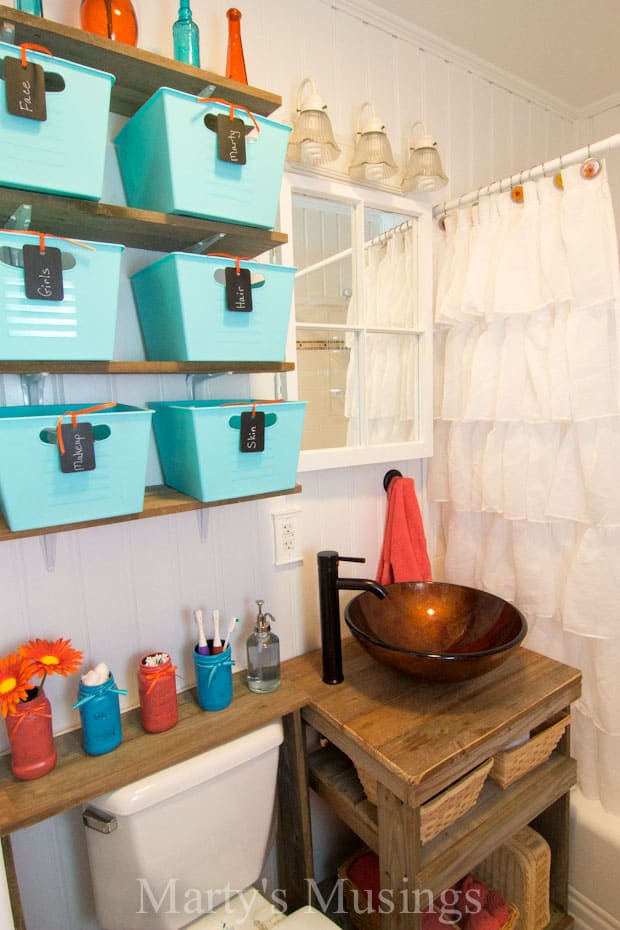
Here’s a reminder of what the rest of the bathroom looks like.
READ ALL THE POSTS IN OUR SMALL BATHROOM REMODEL:
- Rustic Small Bathroom Reveal
- Fence Board Bathroom Cabinet
- Bathroom Old Window Mirror and Glazing Tutorial
- Built-in Bathroom Storage (you are here)
- DIY Shower Tile Part One
- DIY Shower Tile Part Two
- How to Install a Bathroom Exhaust Fan and Electrical Outlets
- How to Install Beadboard Paneling
- How to Install an Interior Door
Question – on one side it looks deeper? Isn’t this space between two regular sides of any inside wall? I think my outside/outside space is only like 6″? was this a closet area?
Hi, Annette. The closet was built in between two walls and the shelves are about 5 1/2″ deep. It wasn’t a closet but an unused wall that we incorporated into the bathroom area when we remodeled it. My husband simple ripped out the sheetrock and put in custom shelves on either side of the center stud. Thanks for visiting Marty’s Musings!
I think bathroom is a very important room in our house because we spend a lot time there. Don’t you think so?
Lau
Marty, this bathroom really is amazing, and all the built-in storage really takes the cake! Thanks so much for linking this post to Grace at Home. I featured you this week! 🙂
Those shelves are amazing. I love this. How creative and so perfect. Thanks tons for joining Inspire Me. Hugs, Marty
Marty, you’re so sweet to always leave comments. That takes a lot of time! Have a blessed week!
Love anything that ends with storage! You are so blessed!
Thanks for inspiring me today and have a wonderful weekend!
karianne
Hey, Karianne! Thanks so much! My hubby did a great job and all I’m missing are the labels. I wanted to go ahead and share his project because I think it’s so clever! Your new craft room is utterly amazing and totally drool worthy. Love it!
What a great job! Such wonderful bathroom storage and a great spot hidden away. I bet you are enjoying finding everything you need right away. You are so lucky to have a handy man in the house. I too feel happy when we do a project and it comes out so well. What a good idea you had with great results !
Thanks, Peggy! We love finally having enough space in the bathroom! We’re all set now until we have little grandkids and have to put things above their little fingers!
You and Tim have done a super job of utilizing every inch of your bathroom. Y’all are awfully brave to cut into a wall without know what’s behind it. Great job and it looks like it really gave you a lot of extra storage space.
Thanks, Suzy! You’re so sweet to comment. We sent to always be flying by the seat of our pants with these projects! That’s so not my nature but I just have to be ready to go when he says he’s ready!