DIY Painted Pumpkin Craft
This post may contain affiliate links which won't change your price but will share some commission. Read more here.Disclosure: The post DIY Painted Pumpkin Craft was sponsored by Behr but I’ve always used and loved Behr Paint!
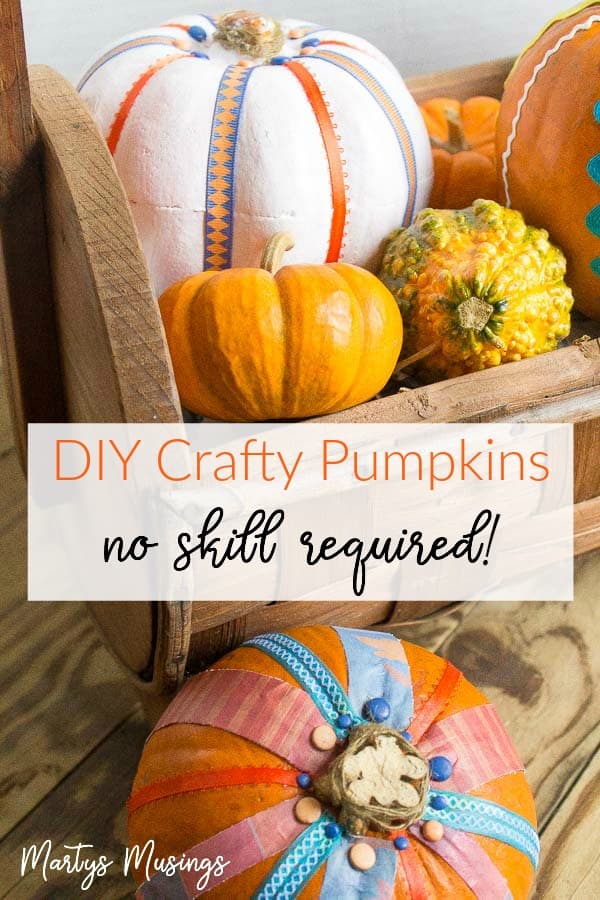
This painted pumpkin craft is perfect for anyone who wants to impress friends and family! All you need is pumpkins and a few decorative accents.
Anybody feeling a bit of pressure about now?
It’s the last few days of fall before the blessed celebration of Thanksgiving and the race into Christmas where sane people lose their minds.
Those who enjoy their home 11 months out of the year suddenly think they need to reinvent the wheel and start over.
From scratch.
All homemade and DIY like.
I know I’m guilty.
But how about you and I make a pact to do just one little crafty project and call it good for now?
This painted pumpkin craft can be done in just a few minutes, with either real pumpkins or fake ones.
You can even hit your local dollar store and really keep it on the thrifty side.
Throw a few of these in different sizes on your Thanksgiving table and your guests will be completely impressed.
Trust me on this.
Painted Pumpkin Craft
Materials:
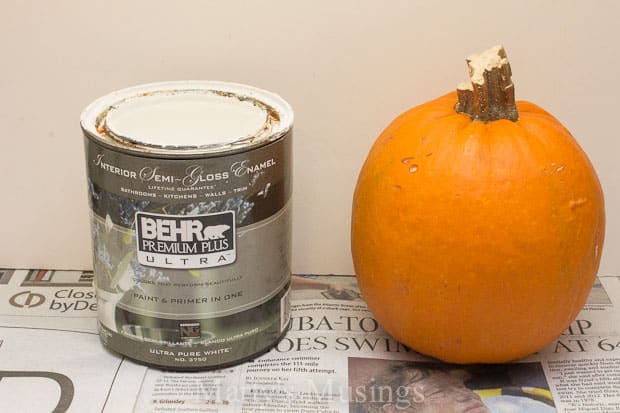
Pumpkins (real or styrofoam ones like these)
Paint
Scrapbook paper (y’all know I have a store full or you can find some here)
Ribbon (use what you have available or I used some similar to this)
Glue (I used Scotch Quick Dry Adhesive)
Hot glue (I use a mini hot glue gun but any kind will do)
Any other decorative elements you want!
Instructions
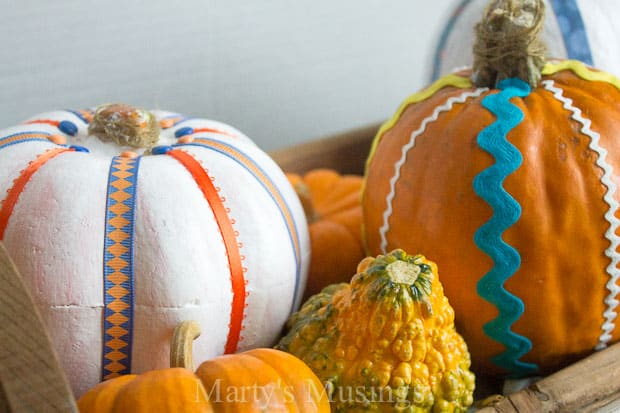
Since my husband is a painting contractor we always have paint handy. I chose Ultra Pure White Behr Premium Plus Ultra paint and primer in one. Here’s my first pumpkin.
And my second one. Can you tell the second one is fake?
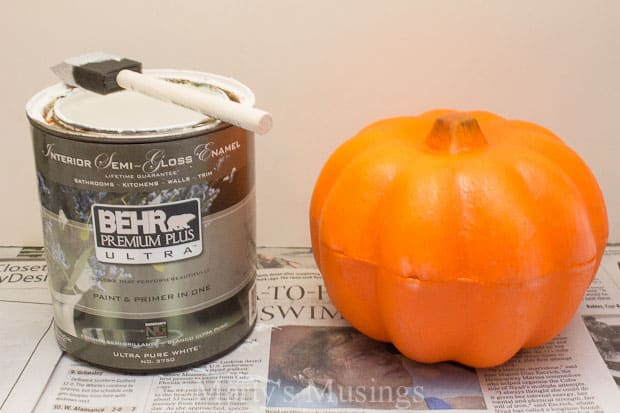
Step 1: Paint the pumpkin
I decided to experiment with both a real pumpkin and a dollar store carvable pumpkin.
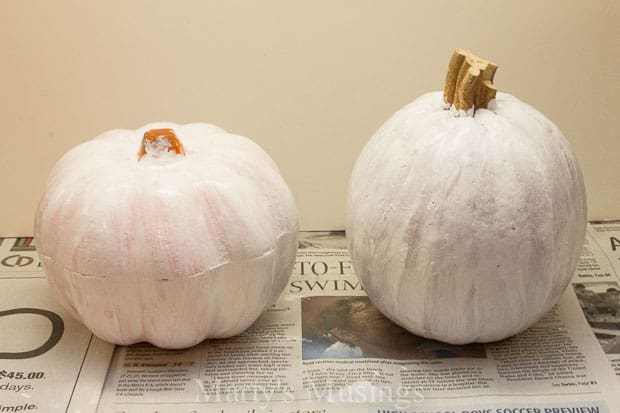

After 2 coats of paint I began having fun. Since I am the queen of ribbon and hoarder of paper I knew all I had to do was shop my own craft room for supplies to decorate the pumpkins.
Step 2: Add decorative accents
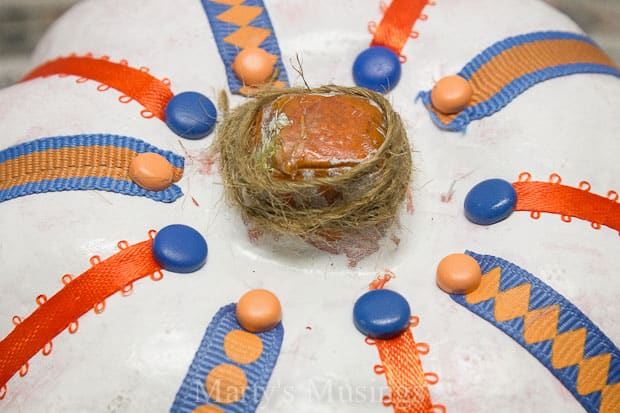
This painted pumpkin is just strips of ribbon
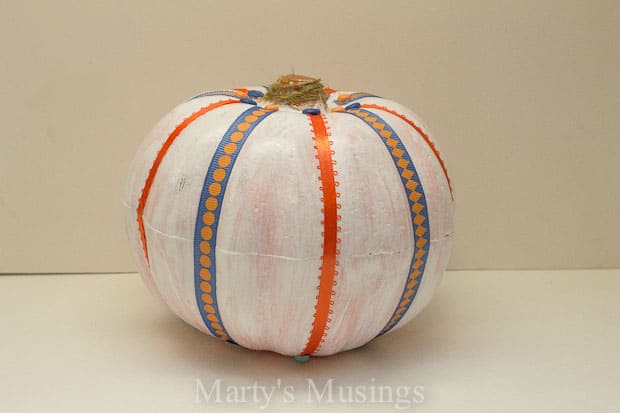
with brads used to secure the ribbon on both the top and bottom. This was so easy to do with the carvable pumpkin.
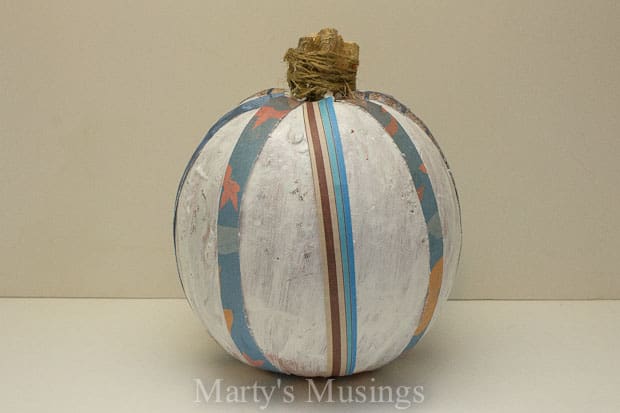
I used the Scotch Quick-Dry Adhesive to glue on the scrapbook paper strips on this unpainted pumpkin
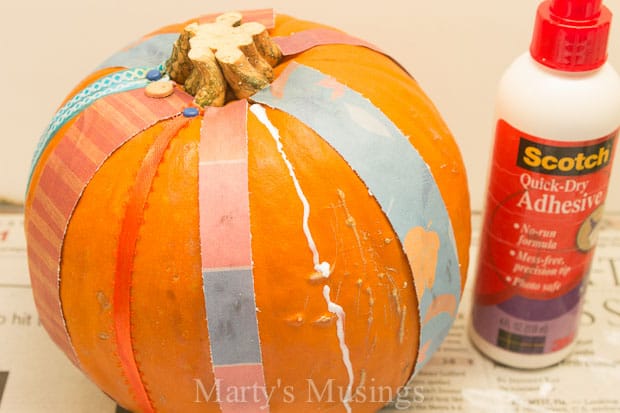
and on this painted pumpkin.
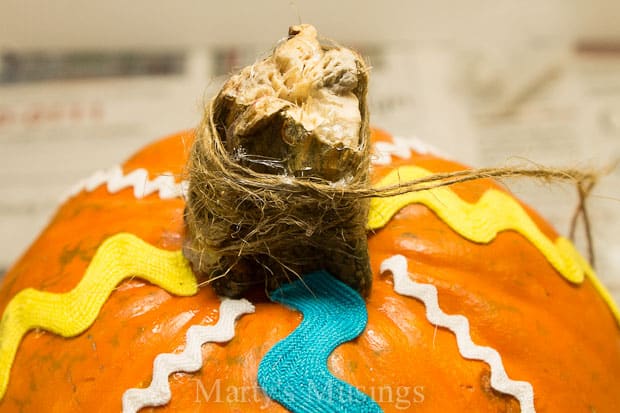
Step 3: Wrap stem
I used hot glue and jute to wrap the stem of each pumpkin.
I nestled the pumpkins in a $2.50 basket I got at a yard sale. (The lady wanted $5 but I got her down to half price!)
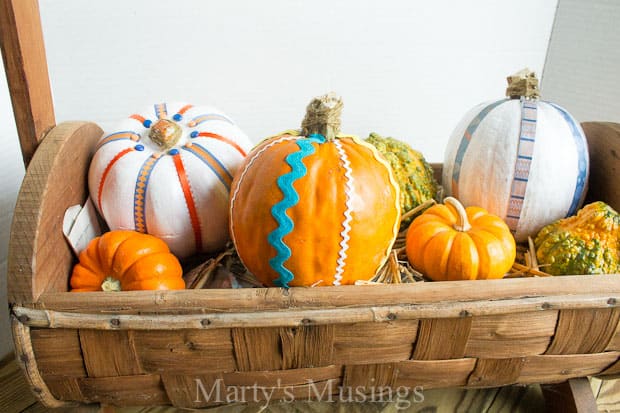
I love the unpainted pumpkin that I fancied up with rick-rack.
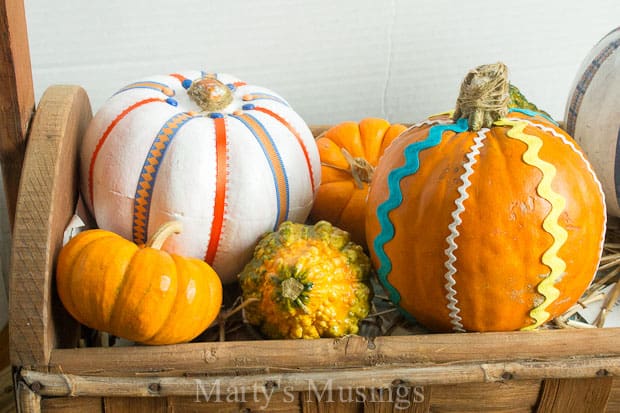
I just added a few mini pumpkins and gourds.
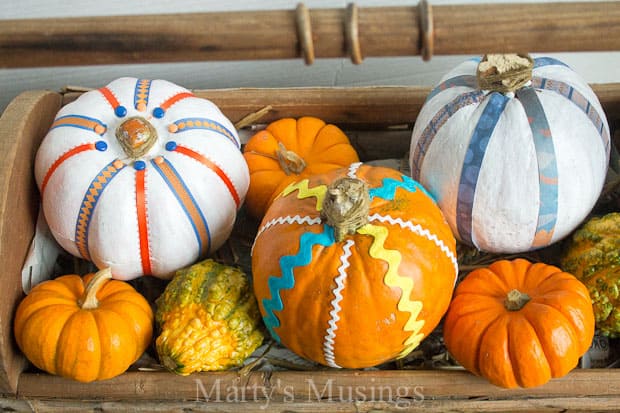
I propped the pumpkins up on an overturned basket to give them some height
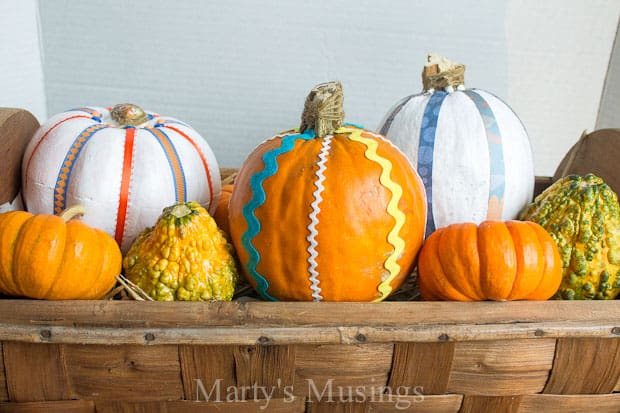
and filled in with some newspaper and hay. Totally easy!
Anyone can do this! A few minutes of time and a couple of supplies and you’ll be surprised at how creative your table and home will look.
If you love this idea I’d be grateful if you’d share or pin it!
This post contains affiliate links, but I only recommend products I love. Read my full disclosure policy here.
![]()
So happy to hear your computer crazy is over, so frustrating. Since we’ve lived out here we’ve had such terrible internet service I have been ready at times to throw this lovely laptop out the back door which I sit about 2 ft. away from. Think must have used up all my patience on raising 4 kids, 3 teenagers at once, yipes. lol. The last kid was worse or I was worse. She started with the mouth at about 11, I was going thru a really bad very early menopause as I had hysterectomy at 31. How my poor husband hung in there have no idea.
We have 2 choices out here, Century Link and Hughes Net, satellite. both of which are terrible and so slow
Love your pumpkins and your basket, good find. I have one foam $tree pumpkin left to decorate so now know what will do with it, ribbon or rick rack depending what I have colors in each. Thanks for inspiration. When I get done with this comment will go see what I have. I do that often, see an inspiration and have to go see what I have so can do it or I forget. Such fun getting older. Hope you get to enjoy Fall.
Happy week
I love this blog post. I can feel your enthusiasm! I probably will never paint a pumkin, but I did decorate this yeaf for Fal instead and out anf I give you the credit for inspiring me! Love ya friend!
Hey, girl! I’m so glad you decorated! Sometimes it just gives me a lift to do a little something. Some years it’s a lot and some years you know I’m operating in survival mode. Both are perfectly fine. It’s our home! Let’s claim it as such! Love ya!
Fun craft, Marty! And a good way to keep me from going too crazy in the Christmas land. 😉
Thanks, Kim! I’m not sure any craft is going to keep you from going Christmas crazy! I can’t wait to see all your decorating goodies!
Thanks Marty, I love the ribbon idea. I can’t wait for Christmas decor ideas…….Smile!
Hi, Diana. So glad you checked out this post and hopefully there will be some Christmas ideas coming soon. But there’s also a BIG BIG DIY project I’ve been mum about so far. News to come soon!
I really like the pumpkins with the ribbon, so easy and change able. Also I really like the color of your hair!
Hi, Julia. I’m glad you like this easy pumpkin craft and thanks for the hair compliment! The color is ever changing these days!
Oh how fun, I love these. Be sure to link up to Inspire Me this afternoon. Such creative ideas. Hugs, Marty