Painting 101: How to Care for Your Brushes
This post may contain affiliate links which won't change your price but will share some commission. Read more here.
I am so excited to have my DIY hubby share some painting basics with my readers.
Y’all, I told him to write like he was explaining it to me.
You know, simple.
No big words allowed.
Painting 101: How to Care for Your Brushes
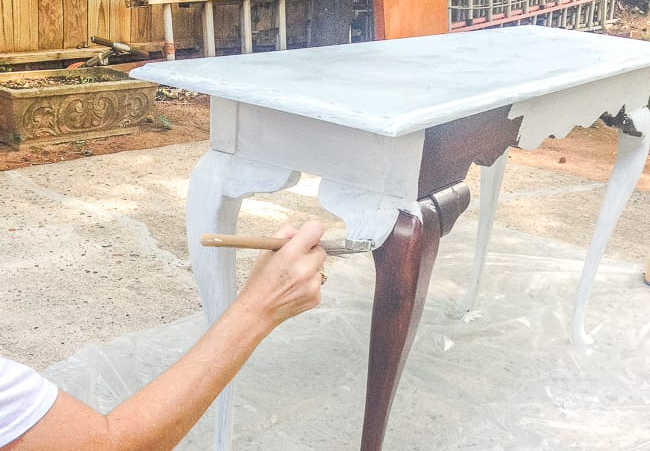
From Tim: One of the most time consuming elements of a painting project is clean up, especially with anything that touches the paint. This tip can save a TON of time if your project extends to multiple days, or if you have to pause for awhile during the project. It is so simple and easy and involves nothing more than plastic wrap, found at any grocery store.
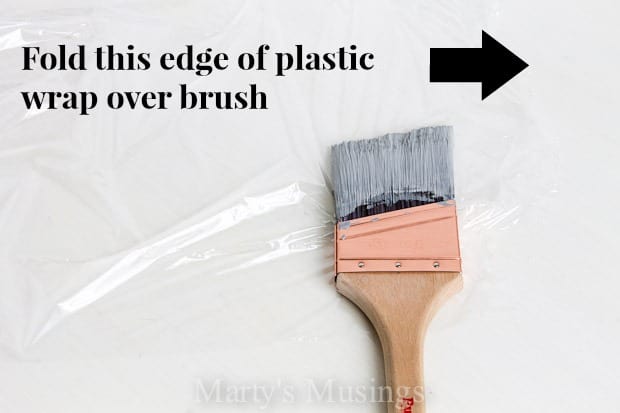
Simply pull out an 8″-10″ piece of wrap and place it on a flat surface.
Place your wet brush near the right edge, a brush-width away and with just a bit of the wooden handle resting on the plastic.
The first fold is bringing that right edge over the brush, right to left, covering the bristles.
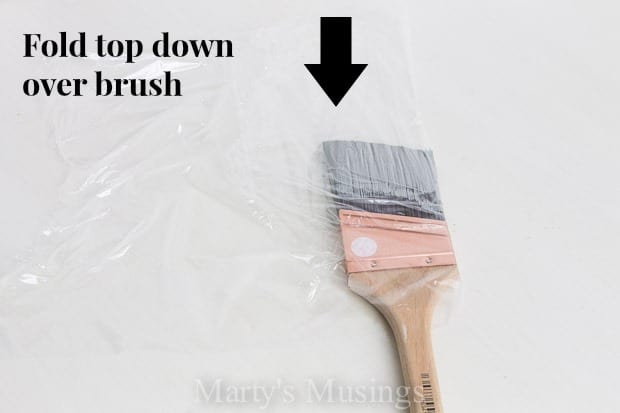
Then fold the top down over the fold that you just did.

Last, flip the brush twice to the left and pinch the wrap around the wooden handle to seal it.
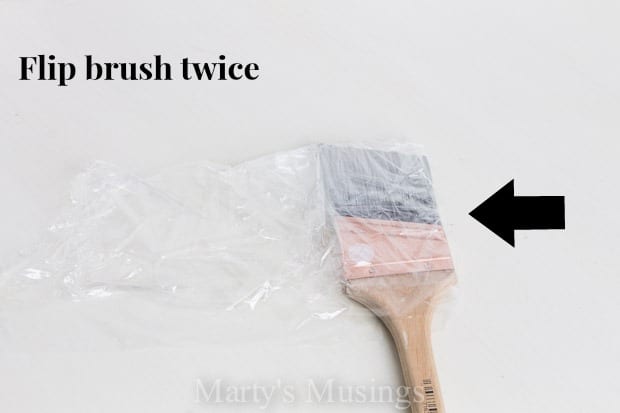
If you have more plastic than two flips, just keep flipping!

For extra protection you can wrap masking tape or painter’s tape around the base of the bristles just to further restrict airflow. That brush will easily keep for the next hour or the next day!
Additional Tips
Now, there are some variations available; you can use a fold over sandwich bag (not the kind with the zip lock) and, after inserting the brush into the right hand side of the bag, just double-flip and you’re done! In a pinch I have used a plastic bag, like a grocery bag, but only if nothing else is available. I have also heard the trick of putting the wrapped brush in the freezer, but it is totally not necessary…and only do that at your own house.
A properly wrapped brush will last for as long as a week, re-wrapping with new wrap at the end of each use. I would suggest not re-using plastic more than twice. The paint on the plastic can begin to dry and then you get debris on your nice, clean brush.
Generally, oil-based paints are much more difficult to do this with and the brush will get “gummy” after the second day. But if you know you’re using that oil paint on day two, wrap it up and save time! I would not recommend this with any primers at all. They are designed to dry very fast and, despite the most diligent wrapper, will not survive any time in a plastic wrap. For those latex projects, this will save hours of clean-up time!
More Painting Tips
Practical painting tips for the home that anyone can use, including chalk painting, accent walls and choosing the right colors.

I have always covered my brushes with Saran Wrap and I drape over the paint tray with a wet squeezed kitchen towel for when I’m done for the day or, for a couple of hours it’s a no fail. So easy.
Hi, Carol. It’s good to know you have such great habits! My husband is teaching me to do better 🙂
Good tip so I added a link to this … from my article about cleaning paint brushes, http://www.hometips4women.com/painting-cleanup-painting-pro
Great tip, Tim! I’m bad for just loosely wrapping my brush in a grocery bag and then wondering why it dried out overnight. lol #notaprolikeyou
Your brush wrap is good but you can extend you down time by puttng brush in refrigerator (for latex) or freezer (for oil based paint). You can go weeks.
Thanks for the info, Joy! My hubby doesn’t ever need to wrap them for that long since he’s on one job until he completes it. Have a great day!