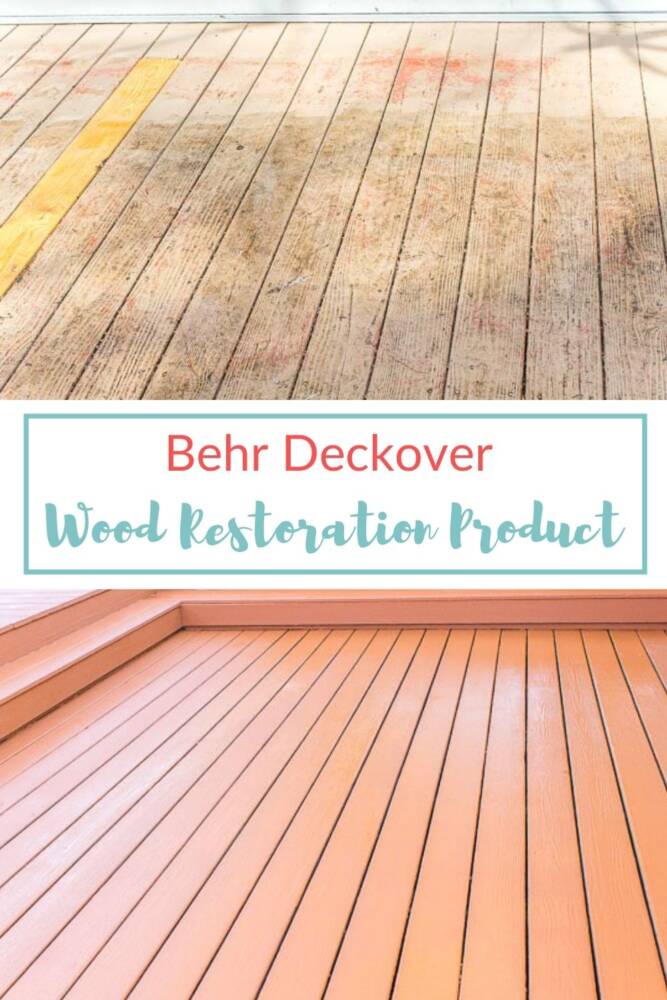
Wood Deck Restoration with Behr Premium DeckOver
This post may contain affiliate links which won't change your price but will share some commission. Read more here.This amazing wood deck restoration project was accomplished using Behr Premium DeckOver. The post includes tips on preparation, application and results.
You can find a followup review of our wood deck restoration here (with additional tips on Behr Deckover.)
The post Wood Deck Restoration with Behr Premium DeckOver® was sponsored by Behr Paint but my DIY hubby and I loved this product!
Quick tips for using Behr Deckover wood restoration product:
- Preparation – the first step in doing any deck project is to clean and prepare it.
- Tips and Tools – you must keep this product stirred. It is also critical to remove ALL the debris off the deck.
- Application – apply a generous amount of product and try to work in the cool of the day,
- Durability – the first few times the product gets wet, you may notice white streaks or even dried white puddles. If this happens wash the entire deck with the hose to remove.
Shortly after we moved into our home 23 years ago my DIY hubby built the lower deck by our back door and then the upper deck around our large tree.
Oh, the stories this deck could tell!
Our kids used to hop on their ride-on toys and race around this tree with abandon!
One of our favorite funny home videos shows our youngest two riding a little bus with a coat completely covering their eyes. You could hear us hold our breath as they veered around the tree, barely keeping from falling off the deck, laughing hysterically in glee.
I don’t remember any major accidents and thankfully we’ve only had one broken bone in all these years!
Throughout our parenting years we’ve hosted birthday parties, cookouts, a surprise graduation party, a sweet sixteen party as well as many holidays for our extended family.
With all the enjoyment our deck has given us the least we could do was take time and effort for a wood deck restoration project! Here’s my handy hubby to tell you all about it!
From Tim: Recent repairs and improvements to the deck left it in dire need of a bit of spit and polish!
So, spit and polish is what it got…along with the most amazing deck restoration product from Behr called DeckOver!
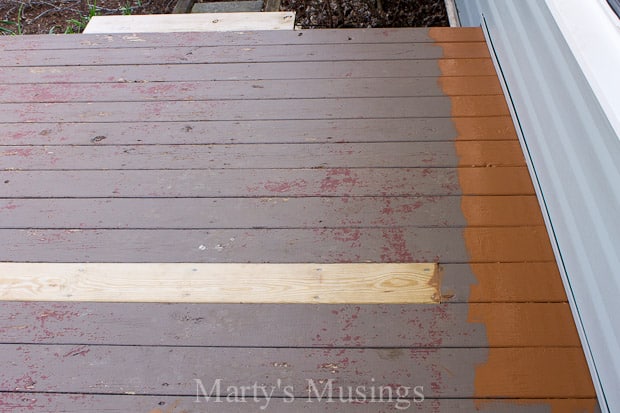
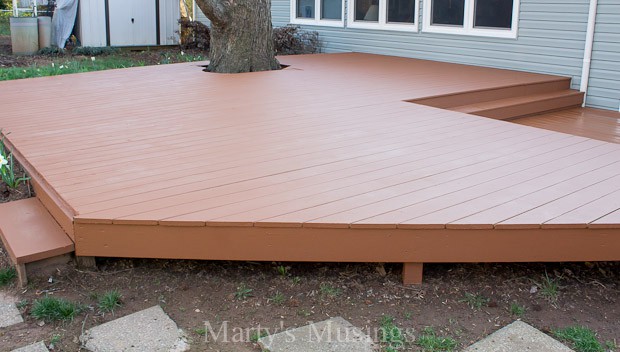
This before picture shows what I was dealing with; old wood, bad stain and new wood. At the very right of this picture I added a wedge-shaped section of deck to fill a corner where a fence used to be.

This is that section and became the new home for the swing…all new wood.

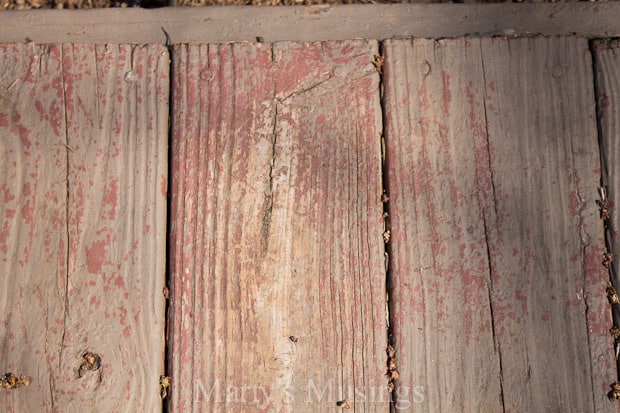
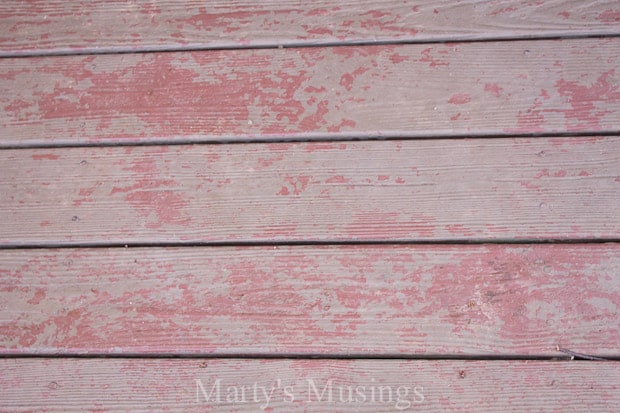
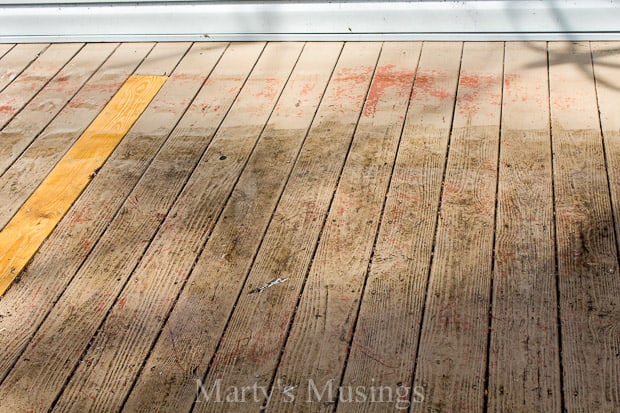
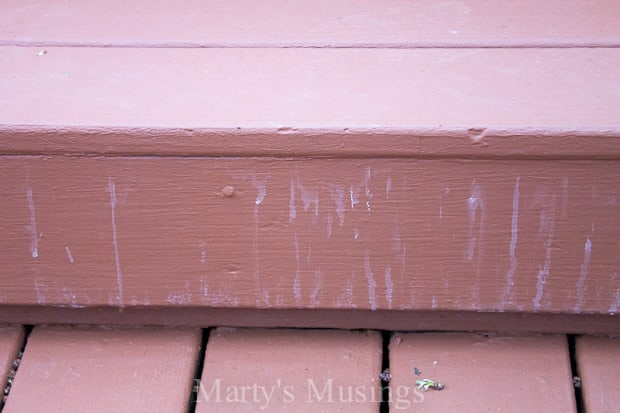
Here is a great shot of how weathered our decking was, compared to new wood.

And another of older stain showing through a different coating that just didn’t hold up. All those cracks would be filled with the DeckOver product…or so they say!
Wood Deck Restoration
(I’ve included some affiliate links for your convenience. Click here to read my full disclosure policy.)
Materials:
Behr DeckOver Wood Coating
Jomax House Cleaner & Mildew Killer
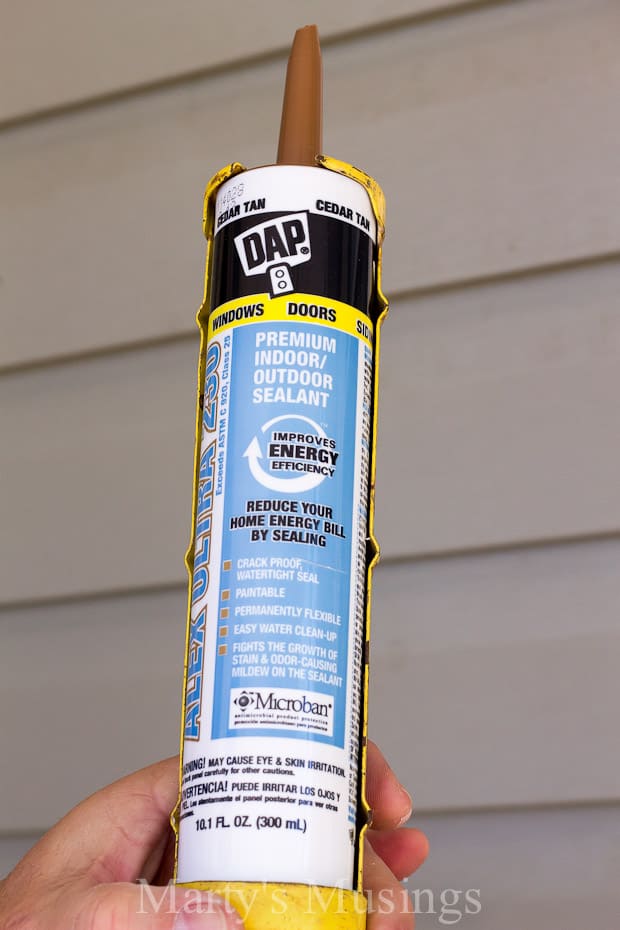
DAP® Premium Indoor/Outdoor Sealant
Industrial paint stirrer
Purdy Roller Covers
Roller frame
Cordless Drill
1. Preparation
The first step in doing any deck project is to clean and prepare it.
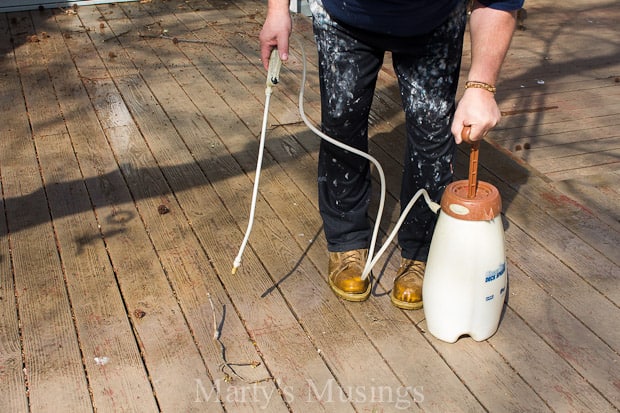
Here I’m using a really good cleaning agent called Jomax House Cleaner & Mildew Killer.![]() It is a concentrate that can be diluted and sprayed on the deck to release the build up of grime and dirt.
It is a concentrate that can be diluted and sprayed on the deck to release the build up of grime and dirt.
Best to let that product sit for about 10 minutes, and then pressure wash.
I am well aware that there is debate recently as to whether or not to pressure wash anymore. I have done it for 23 years and have no intention of stopping now.
It is the only thing that will get the surface clean enough to receive whatever product you will put on. Plus, it saves an incredible amount of back-breaking labor scrubbing with a brush.
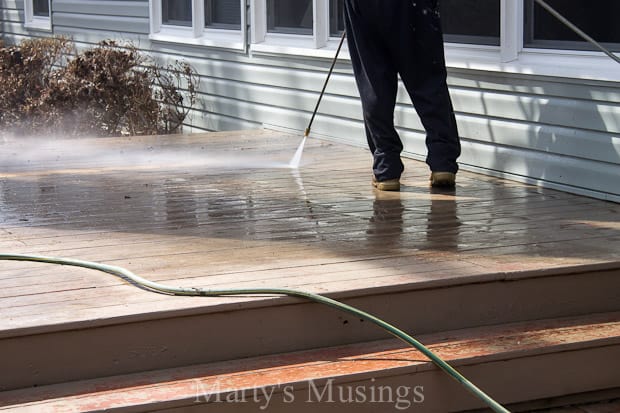
You can see here how one pass with chemical and pressure does the job!
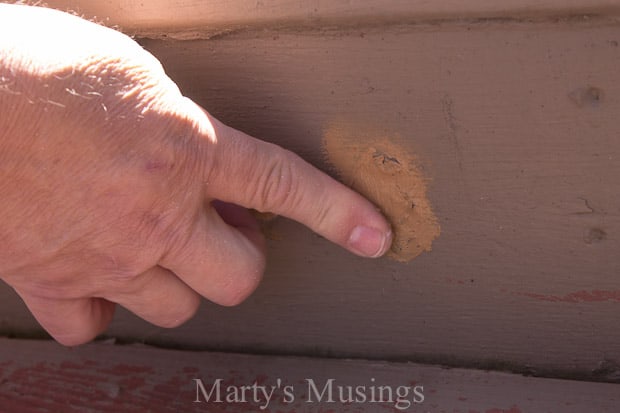
After letting the deck dry for a minimum of 24 hours (and this is true if it rains prior to sealing), I needed to fill some of the bigger cracks and knot holes with caulk.
This DAP® Premium Indoor/Outdoor Sealant![]() is great and was pretty close to the color of the DeckOver we would be using.
is great and was pretty close to the color of the DeckOver we would be using.
These were holes where deck lights used to live. Just squirt and smooth.
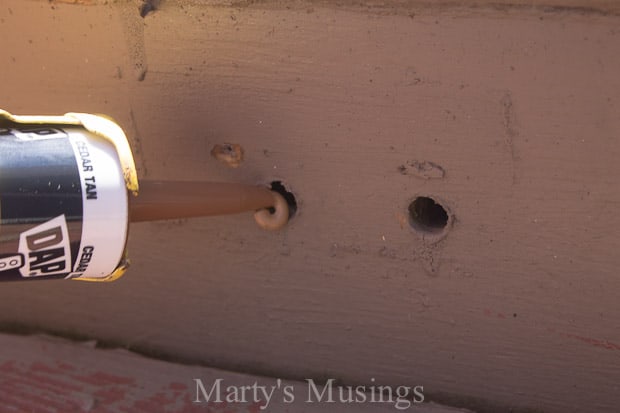
I walked the entire deck filling anything bigger than the DeckOver could handle (1/4″ according to Behr).
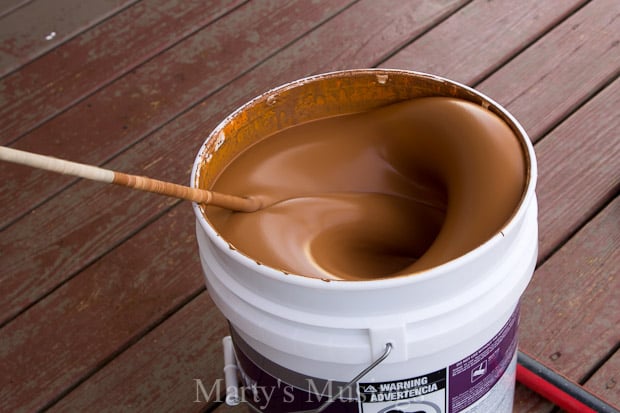
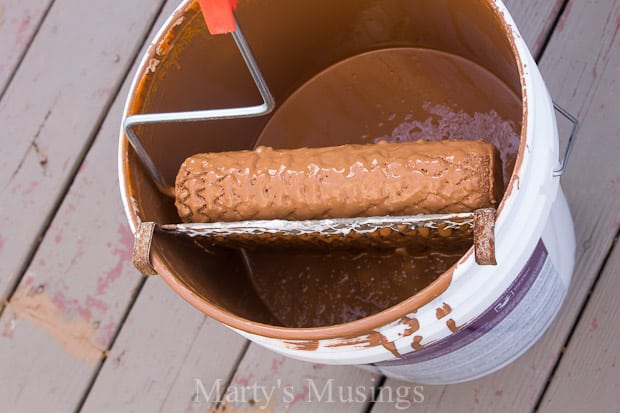
Here is a five-gallon bucket of the product we used, tinted to “Woodbridge”.

2. Tips and Tools
There are many tips for using this product and the first is that you must keep this product stirred.
It is very thick, almost like pudding, so you don’t want any kind of settling, especially when working out of the 5-gallon bucket.


This is an industrial paint stirrer that attaches to any drill and, when used carefully, can totally handle the thickness of the product.
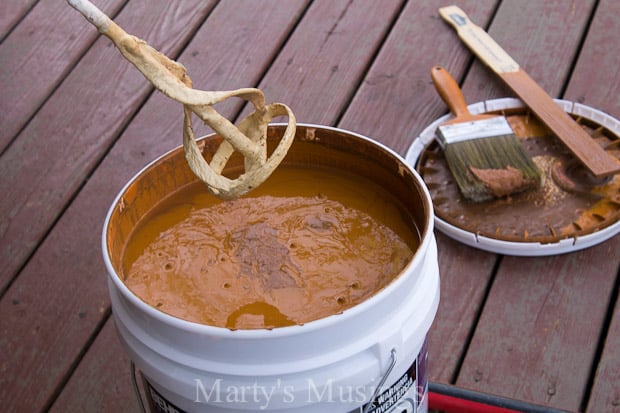
Here’s an action shot and you really get an idea of the viscosity of the DeckOver product.
Before I go further, I really want to stress how critical it is to get ALL the debris off the deck.
Anything you leave between the space between boards will get picked up by the brush and roller and then get deposited back into your bucket or pan, only to be plopped back onto the deck later.
Clean as you go and keep it clean.
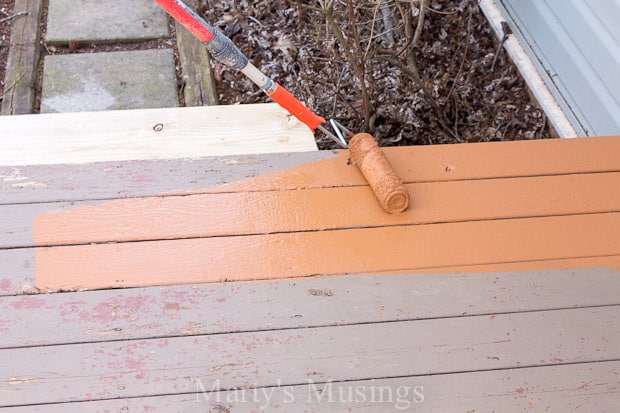
3. Application
The best way to work this product is three or four boards at a time…not like I started to do here! It sets up SO fast that, if you roll back into it, it pulls that product back into little peaks.
In addition, if something drops into your beautiful surface (bug, leaf, dog, etc.) DO NOT dab into that surface to retrieve it! Just leave it for the second coat and pluck it out then. This will be an essential tip on the second coat.
I chose to work right out of the bucket with a roller and paint screen. It is much easier than pouring into a pan and executing re-fill after re-fill.
Once you begin that 3 or 4 board run, you want to move along to the opposite end with no interruptions. FYI, I used a 3/8″ roller cover.
This is the first pass, with the roller on a long handle, and I was immediately in love!
Another good tip is to work in the cool of the day, if at all possible. I began right around 5:00 p.m., which allowed me to work in complete shade.
If you try and apply in extreme afternoon heat, work a few boards at a time and work very fast.
You want to apply a very generous amount of product. Don’t try to stretch this stuff out. Load that roller often and run from one end to the other.
If you have a pretty good space between boards you may need to use a brush first and get those exposed edges. If you have a helper, this is where to use them!
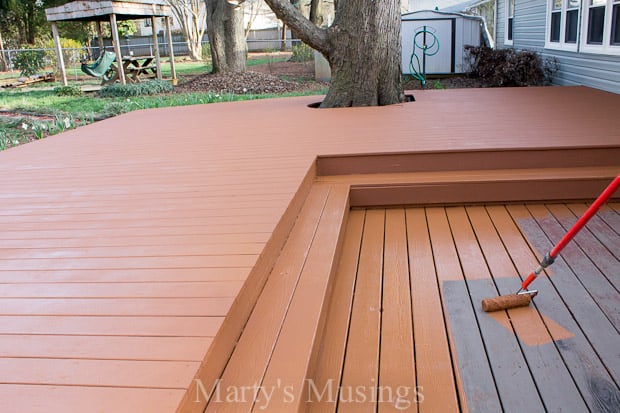
Here I’m just about to finish the lower deck and you can really see the dramatic difference!
I have been a Painting Contractor for a long time and have never used a restoration product. This truly lives up to the claims it makes.
The look after application is not glossy but will appear that way until it dries completely.
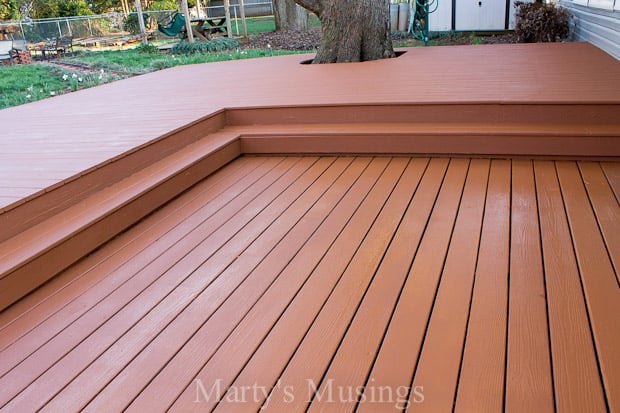
And here is the end of the first application! For the record, the upper deck is around 24′ x 26′ and the lower is 16′ x 16′.
I actually got better coverage than the instructions suggested, but I am guessing that it is because I have no railings, benches or substantial steps.
Since I had leftover product, I asked about a third coat and was told to hold off for now. In the future, another coat can be applied after light cleaning and brought back to this appearance.
4. Durability
A good question you might have is about durability. I had the same concern since I have dogs that think the decks are their personal potties, lots of foot traffic, birds and tree debris.
At the time I write this post, I am pleased to say that the product has not lifted off anywhere…after two months! I just wash it off with a garden hose and I’m back to clean.
Now, here is something I’ve read can happen with this product and it happened to me. The first few times the product gets wet, you may notice white streaks or even dried white puddles that looks like somebody spilled milk all over your beautiful deck.
Not to worry, this is called “surfactant leaching” and is a bi-product of a material used in formulating the product. Surfactants are soapy carrying agents that help the product be distributed on the surface.
If you wet your fingers and touch these streaks, you will get a soapy sensation. I have seen this in some exterior paints and it really is nothing to worry about.
Mine appeared after a rain and I just washed the entire deck with the hose and they went away. I believe I did this one more time and they have never returned.
I really love this space, especially with the enormous silver maple tree, and the DeckOver was a welcome enhancement.
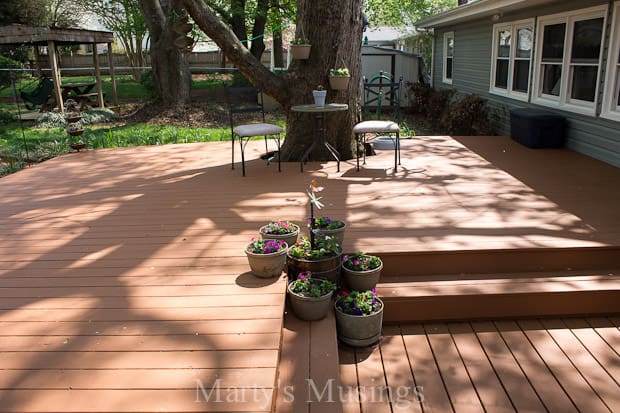
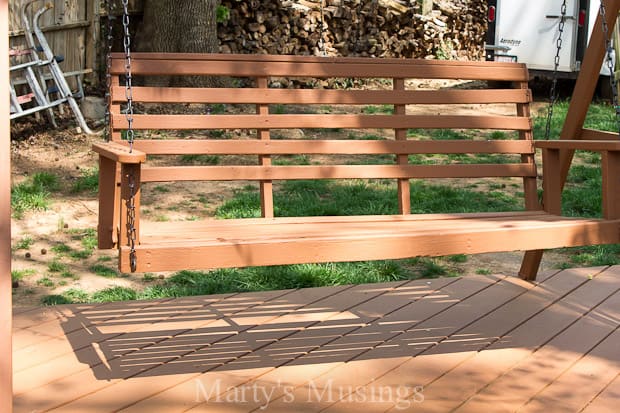
And, at the risk of being accused of being all “matchy, matchy”, we also did the swing and a picnic table!
We love it, and I can’t recommend Behr Deckover enough! Work it right and you can achieve the same results and even better! Good Luck!
From Marty: My husband did a great job on the deck and the difference has been amazing. Do you have a deck you need to tackle? Let us know if you have any questions about the Behr wood restoration product!
***The Deckover color we used was Woodbridge.
More Painting Tips
Practical painting tips for the home that anyone can use, including chalk painting, accent walls and choosing the right colors.


Hello. Wish we’d discovered your website a week or so ago! Hubby painted deck using an “extra textured deck over roller cover.” Unfortunately the surface is uneven…looks rough in some spots and “less rough” in others. Hubby thinks adding a second coat will resolve the situation. And I’m not to sure. Any advice? Thank you!
Hi, Diane. Is the surface uneven purely because of the roller cover? Or are there imperfections in the deck itself?
Because of the roller…
Hi, again! My husband said it could be because the application wasn’t consistent. The paint is so incredibly thick it makes applying it a challenge. The hubby is a painter by trade so he understands all the ins and outs. Hope you’re able to get satisfactory coverage. Good luck!
I love that deck color that you chose, and that you matched the swing as well. I have been too nervous to start this project by myself, it is nice to see your journey was a success. I will have to look into this color and see if it will match the color of my house.
I have a deck that I am thinking about using this on .I have put a couple of layers of paint on it but we have put some cleaner on it and pressured wzshed it and got some paint off .my question is what if all the paint dont come off will it hurt this stuff here? Will it peel off ??
Hi, Tina. Pressure washing should get off all the loose paint and then you can apply the Behr product over whatever paint is left. Hope this helps!
You have such beautiful taste! I’ve always like the look of a tree coming up from the deck. It sounds like you guys have so much fun and have a strong family. My wife and I thought about building a new deck one day soon. I think some new looks will give us joy and allow us to finally have people over. Thank you for sharing this Marty!
I love the color! My wife and I wanted to build a new deck and I went with stain. I love what you did with the tree! This looks like a great spot to unwind and read a book with a glass of chardonnay. I love the work you did and am happy I found this post, I’m inspired.
Not sure if it is too late to ask… how long did the deck over hold up on your deck? I see this post is from 2014?
Hi, Chelsea. We are just this year (2018) looking to apply a stain over the Deckover. We’ve got some repair work to do (replacing some wood) due to the age of our deck (over 20 years old). We will then use a stain on top of ALL the wood. The Deckover did a great job for us in helping restore and preserve our deck. BUT we don’t live in a harsh winter area although our summers stay in the 80’s and 90’s. Hope that helps.
This Behr DeckOver product is a complete disaster in areas where weather conditions vary. Our deck looked as beautiful as yours after we prepped and completed our project with DeckOver in the Fall of 2016. In the Spring of 2017, the entire surface is bubbling up and peeling off! Behr has not been cooperative; will only “replace the product” for re-application by us! We have NO CONFIDENCE in this product, feel it is being falsely marketed IN SPITE of all the failures and complaints the prove this product does not ‘live up’ to it’s marketing, as a simply do it yourself project! Still being sold at Home Depot with no disclaimers re: weather or climate. I think this equals FRAUD. Home Depot will only refund the purchase price; offers nothing for the damage caused by using the product or the cost of labor to correct it. I am thinking of joining a lawsuit to sue Behr and Home Depot over knowing misrepresentation of this product that they continue to market, claiming it is the solution for worn decks in varying weather conditions.
Hi … I’m about to start applying DeckOver to an older, faded composite deck. Its been powerwashed once and will do it one more time with a cleaner product. Paint drips while painting the house last year with Behr Ultra seem to stick like glue, so I think adherence won’t be a problem. My question is regarding the frequent afternoon rain we get here in Denver this time of year. Do you see a problem with painting early in the morning when its cool, waiting for the product to become dry to the touch, and then covering it with plastic sheeting to avoid rainfall while it finishes drying. Thanks for any input.
Hi, Frank. Here’s my hubby’s response: The key to a successful result with the DeckOver product is to keep moisture away from it until each coat completely cures. Even though you may be able to apply each coat before any potential rain, the plastic may only create another moisture issue. In our part of the country, humidity is such that the plastic will collect moisture on the underside and then drop it right back on the surface. At your altitude, this may not be an issue. I would get a scrap piece of wood, any kind will work, and conduct an experiment. Apply the DeckOver to the test piece, let it dry approximately the length of time you mention, and then cover it with plastic. Let the whole thing set up overnight and see what you get in the morning. My guess is that the surface will look milky, almost like you stirred milk in the product. This is called “surfactant leaching”. Surfactants are the soapy carrying agent in paint that helps the application process. If you touch it (which is fine), it will feel like dish soap. Anyway, this is a by-product of moisture being introduced too soon on the surface. The good news is, if this happens on your deck, it can be washed away with a garden hose. Be gentle, and it might take two passes, but it will go away. I would give it a test run and see what you think.
Good Luck!
Sorry, but all your adoring “friends” are flattering you. All you did was paint the deck. Not something to write a mundane “article” about. Don’t quit your day job.
Thank you for sharing that, I just bought deckover had to start by the sliding glass door because getting new siding I rather get it in the old siding the new siding, only got 6 boards done with first coat I tell you part of deck looks well the 6 boards anyway. Better then the stain we have bought never again I will buy stain, deck over recommend it make old deck look new.
I see that you applied this over old stain/paint but they recommend stripping. Do you see any difference between the portion of the deck that was new wood vs. the previous painted/stained wood?
I was just curious about how your deck had held up. We are deciding if we want to paint or stain ours. It’s in pretty bad shape.
Hi, Ashton. Sorry to be so late getting you a reply to your comment. Here’s what my hubby says: For a restoration product, the DeckOver has done its job. While nothing lasts forever, I have been pleased with the longevity and durability. However, wherever water is allowed to stand for long periods of time (planters, rugs, tubs, etc.), and where there is extensive repeated water exposure (leaking gutter, hose, etc.), you will have product failure. The saying is, “Water always wins.” And it does! Additionally, because this product sits on top of the surface and does not penetrate like an oil stain, it does show dirt fairly quickly. It will clean nicely, but you will clean often.
Bottom line? Only resort to this product as a last effort to hold out longer before tearing the deck down or re-surfacing. It will buy you some time.
I stumbled your post today and found it informative and engaging. These are the great tips for wood deck restoration. Thanks!!!
This is great! The hubby and I need to redo our back deck and this is probably the way we should go. The easier the better! Thanks for sharing this great post!
Linda
Thanks, Linda. I’m getting ready to share a follow up on how the deck has held up since last year. You can look for it this next Monday. Have a great weekend!
do u use a brush around the stairs and edges? If so do u do that first or last?
Hi, Haley. Here’s my husband’s response: Any obstacles on or around your deck (steps, house, posts, planters, etc) will require brushing unless you choose to protect them with tape and plastic. I always like to maintain what is called a “wet edge” (you never paint into a dry spot), so I usually just brush the immediate area I’m working. For example, on my deck I worked six deck boards at one time. So I began at the house by brushing those six boards right next to the house. This is called “cutting-in”. Then I rolled those six boards all the way to the opposite end. Repeat! Anything that was an obstacle was cut-in and then rolled around.
As for steps, it’s pretty much the same process. Just don’t paint yourself out of an exit! I can tell you that this process is more important on the first coat because the product will simply dry faster on the unsealed surface. The second coat will sit just a bit longer on the surface before it dries. However, beware of heat and direct sun! That is a game changer!
Oh, a couple of tips; put your roller on a pole and save your back, roll out of a 5-gallon bucket and screen (if possible) and keep stirring that product, keep your surface extra clean, and don’t try and beat the rain!
Good Luck!
What a great transformation! It turned out beautiful!! Thanks for sharing at Fridays Unfolded! Featuring you this week 🙂
Thank you, Denise. We have loved how the deck turned out.
We are looking at various products to repair our old deck. The deck is 30 plus years old. Looks similar to your photos. The previous owner painted it with Forest Green Behr exterior paint, which is wearing off. I am reading different things about Deckover, some saying it peals after winter. How did your Deckover hold up over the past year? Also, staining issues, did you experience staining?
Hi, Karen. I’m sorry to take a while to get back to you. I am actually posting a follow up in a couple of weeks. We have had a great experience with the Behr product but it’s all about how well you prep it, which my husband goes into with great detail in this post. We don’t live in extreme climate but it does get below 30 on occasion and into the 90s regularly. I think most of the problems with online reviews are people that didn’t do the prep work properly. We have been pleased with the product. Thanks!
Wow that was quite the transformation – love your deck. Thank you for sharing your very detailed tutorial with Share It One More Time. Cathy
Looks like a new deck! Great transformation. Thanks for sharing at the #HomeMattersParty
This looks amazing! Thanks for sharing with Small Victories Sunday Linkup last week. Pinning to our linkup board and hope you joined us again this weekend.
We just did this on our deck and really like the results. Thanks for sharing on the #ShareTheWealthSunday link up
I haven’t heard of this brand but have heard of another one. I desperately want to do our little front porch (the back deck is too far gone for this and we want to expand it anyway). I love seeing it done from an actual person, not just the ad from the company.
(visiting from This is How We Roll Thursdays)
we followed all the steps, wait the time allowed between steps and it looked beautiful for a season. The next spring it started bubbling and peeling. Now it is a real disaster and don’t know what to do. It is a very large deck. Any suggestions?
Hi, Kathy. Here’s what my husband says: It is very difficult to diagnose what might have gone wrong with your project, since there are so many variables. If you have complete product failure, that is, if the DeckOver is coming off everywhere, your best bet is to get in touch with the BEHR people and explain what has happened and go after some kind of warranty agreement. I can tell you that they will likely want some kind of proof about your prep work, application process, coverage, weather, etc. If you didn’t go “by the book” the best you can hope for is product replacement. It will still be on you to make it right. That looks like scraping and/or sanding and re-applying with like or similar product. Ideally, you want to get a BEHR representative out to look at your issue. Take pictures and dig up any you might have taken in process.
Good Luck!