Upcycled DIY Potting Bench from Changing Table
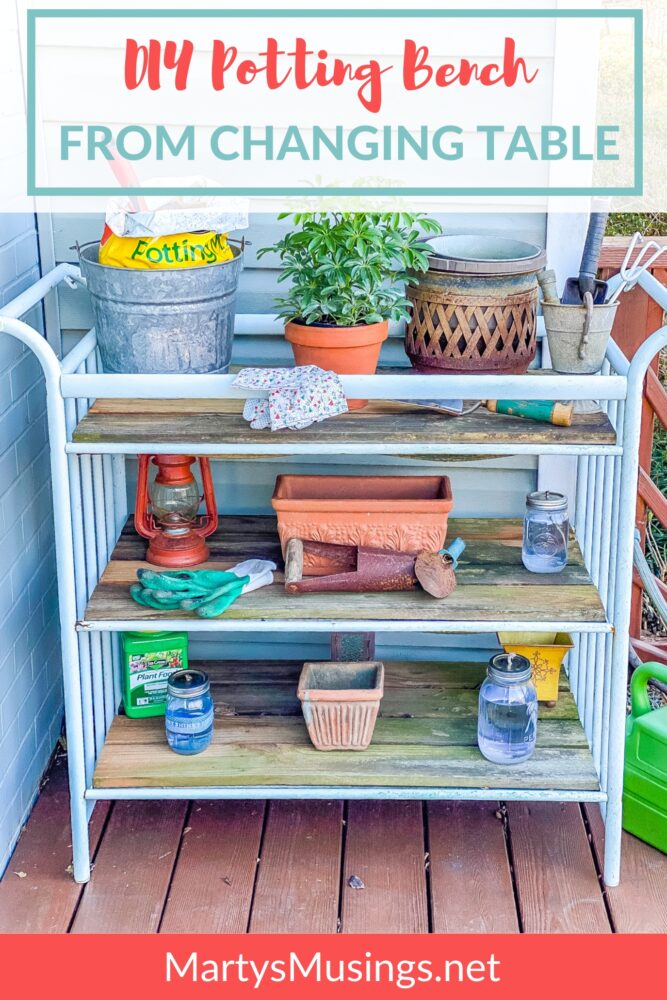
This post may contain affiliate links which won't change your price but will share some commission. Read more here.Here’s a great, fully-functioning upcycled DIY potting bench made from a changing table! Tutorial includes step-by-step instructions.
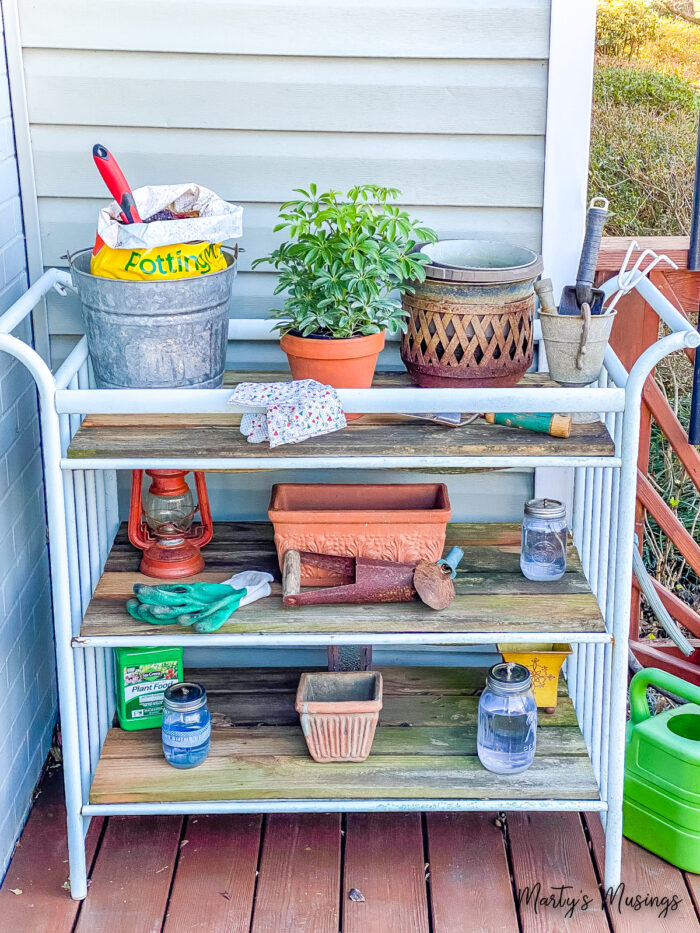
I love to repurpose things others would throw away. (All my repurposing ideas are here.)This unassuming wood changing table was bought for $15 at a yard sale. I knew I could make something both useful and pretty out of it!
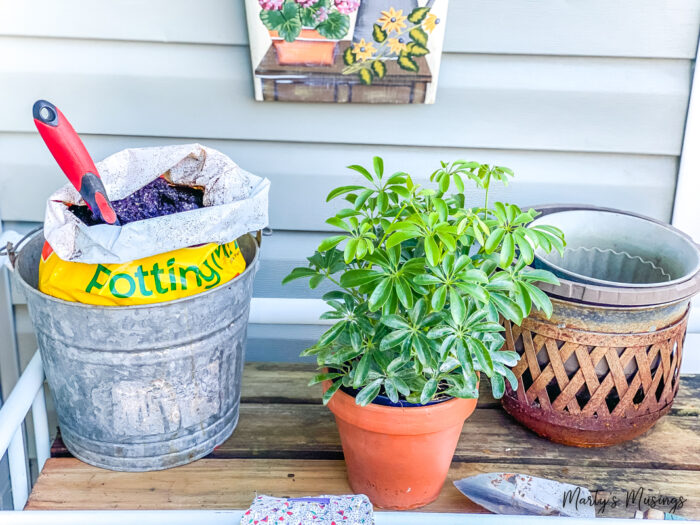
The finished product has been used in both my previous ranch home (on the deck) and in my new cottage home (off the back patio.) I’ve used it as a decorative piece and as a potting table for my garden tools, potting soil and as a work surface.
Potting Bench Ideas
Here are some potting benches that don’t require any DIY skills!


Step 1. Gather materials.
This changing table was a yard sale find but you could also check your local thrift store or transform a piece of furniture to create your own potting bench. Get creative and think outside the box!

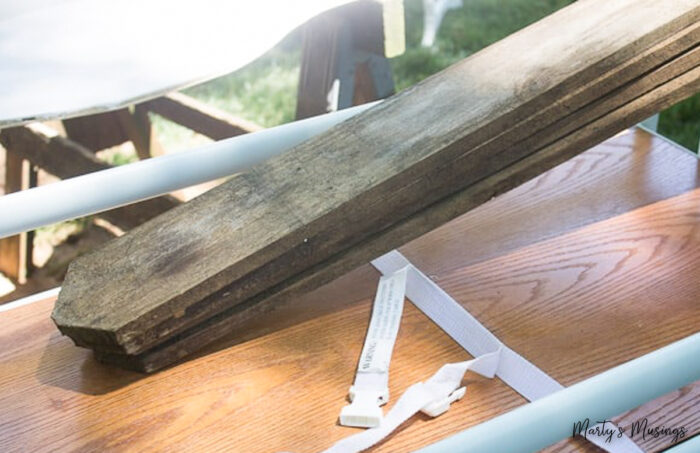
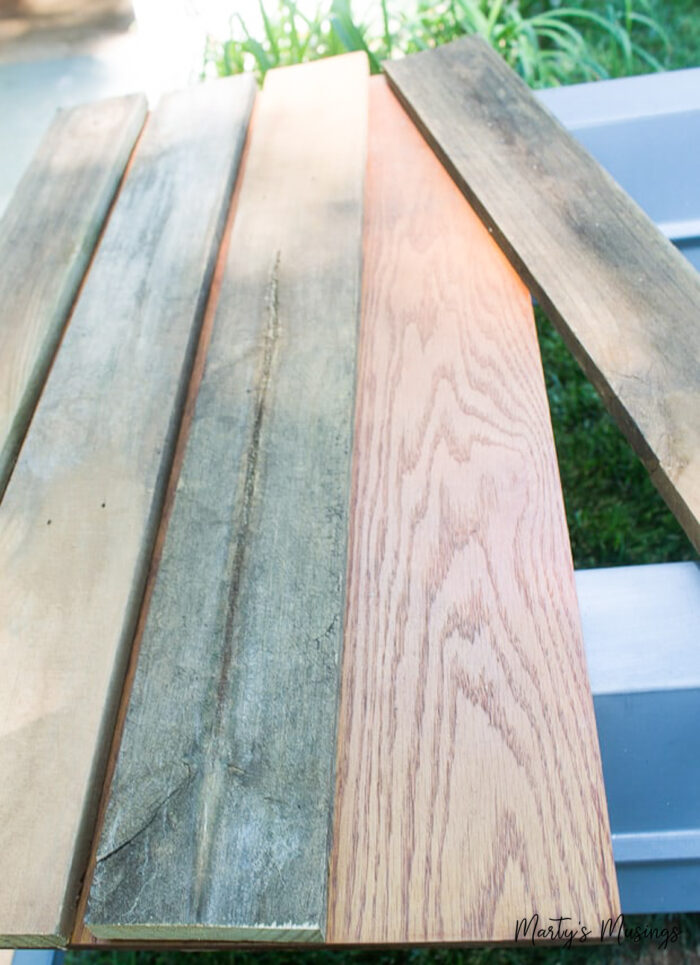
If possible, use wood you already have in your collection. I find repurposed fence board slats to be easily accessible and very hardy! I often pick them up discarded on the side of the road or friends know I love to use them in projects so they’ll send them my way. Reclaimed wood is the best!
If the project is going to be used inside your home make sure the wood is clean and dry before using. It’s fine to let them weather outdoors for an even more rustic look!
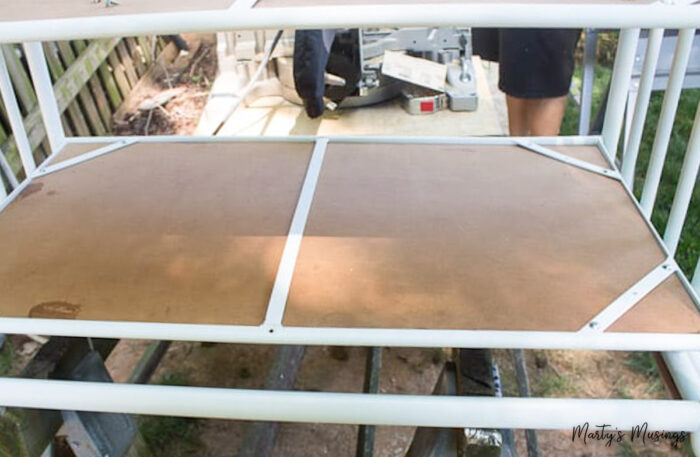
Step 2. Remove changing table shelves one at a time.
The shelves were made of press board and not ideal to withstand the weather so I wanted to beef them up with my favorite fence board slats.
Step 3. Cut fence slats to same length as original shelves.
Rather than rip one board its length to make up the last little difference (if the slats were all pushed together), I just spaced them out evenly.
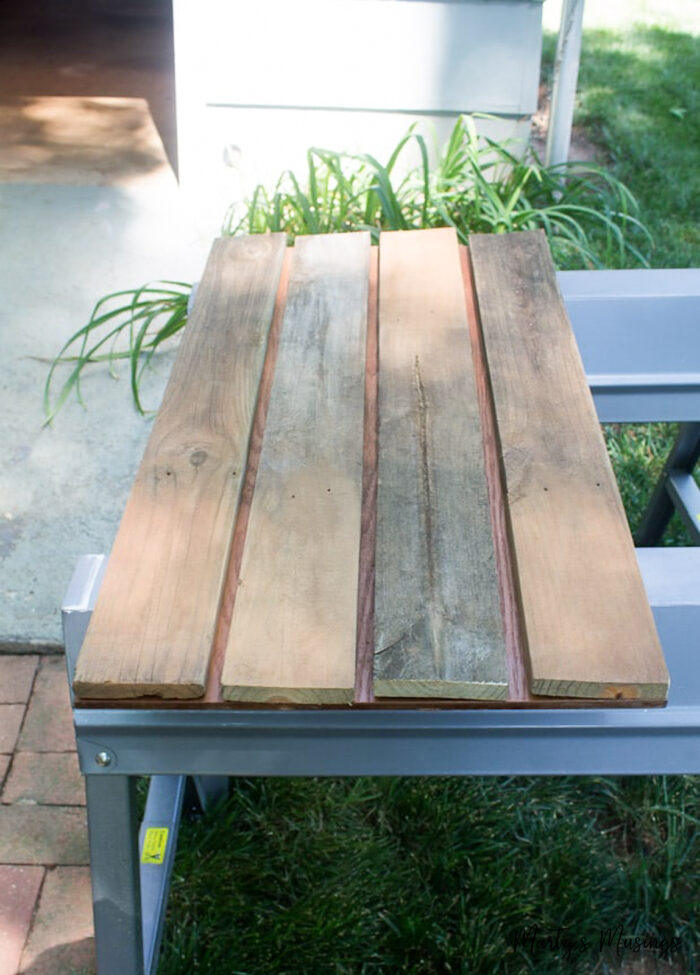
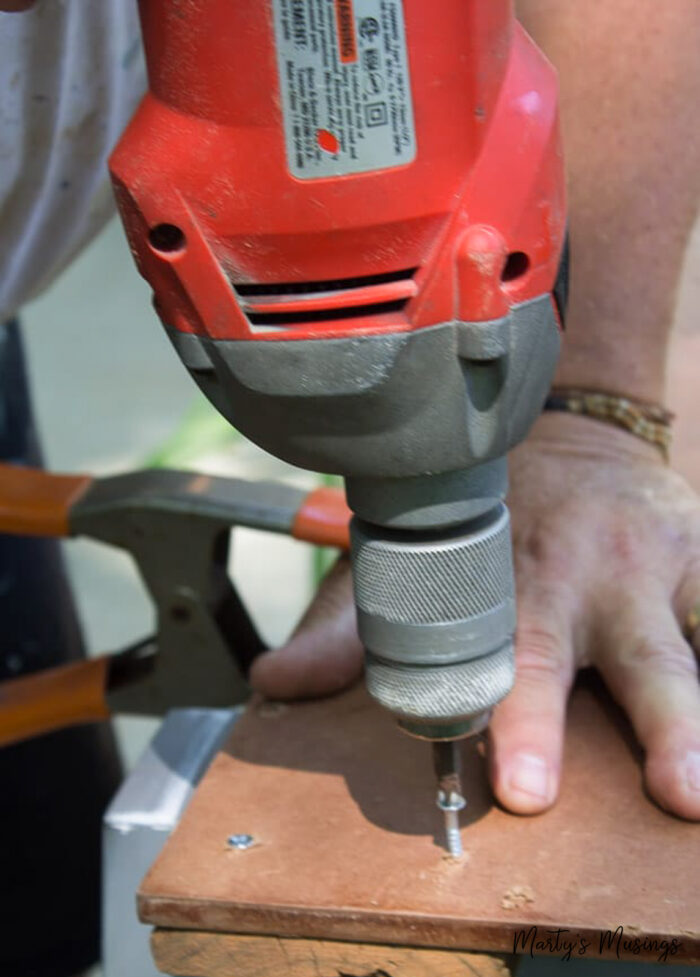
Step 4. Lay the slats on top of each shelf and screw from underneath.
These slats would then be attached to the top of the shelf, but from underneath. The original shelves were too thin to get a screw to “bite” if screwing from the top down into them. The solution was to flip them over and screw through the original shelf up into the slats. Good bite and hidden screws!
Step 5. Reattach each shelf, screwing up through the bracing and back into the shelf and slats.
This picture shows the changing table flipped upside down. The support structure is ideal for me to reattach the shelving, screwing up through the bracing and back into the shelf and slats.
Nothing fancy in putting a couple screws at each end and two more sets evenly spaced down the length of the slat.
Step 6. Remove curved side pieces, prime, paint and reattach.
Outdoor paint is ideal as is a coat of polyurethane to make this potting table durable. The side pieces were also made of press board so I removed them and gave them a new coat of paint as well.

As you can see below the curved pieces didn’t weather very well so they were removed altogether.
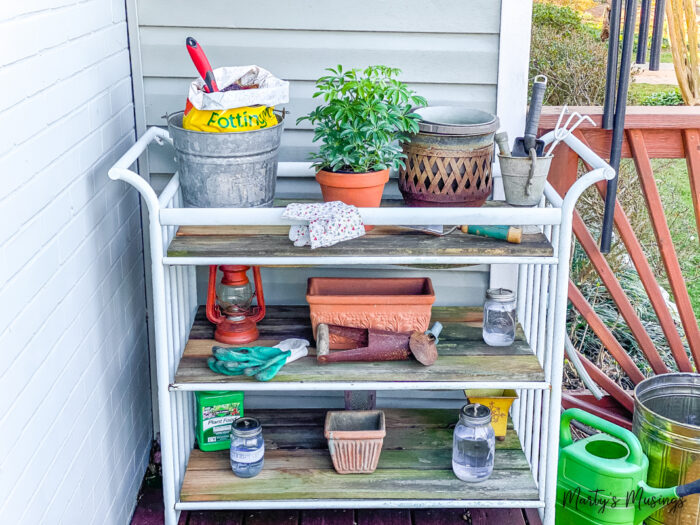
Step 7. Set the potting bench in its location and add hooks for tools if desired.
When I first added the potting bench to our front deck I used an old door behind it for an accent. It went with the casual, distressed vibe on the deck!
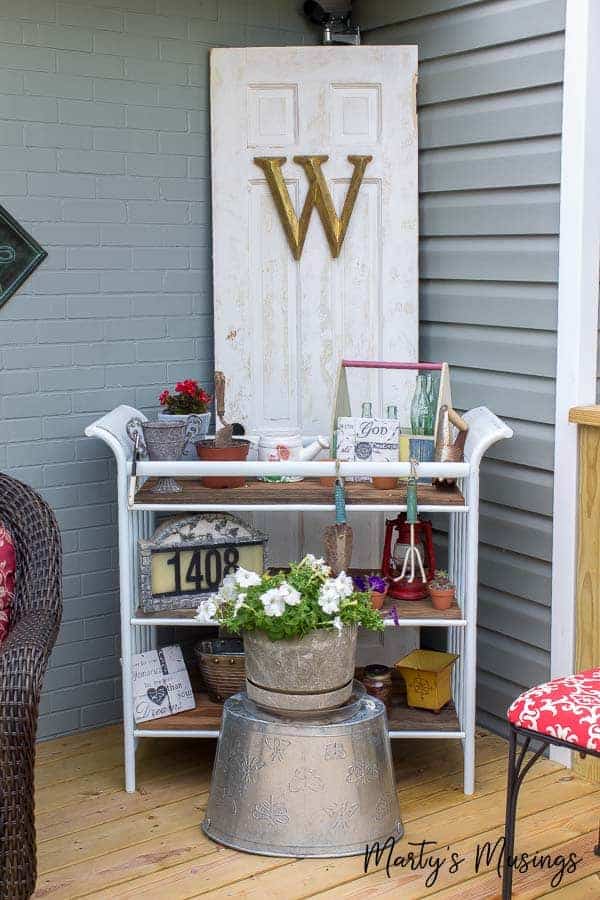
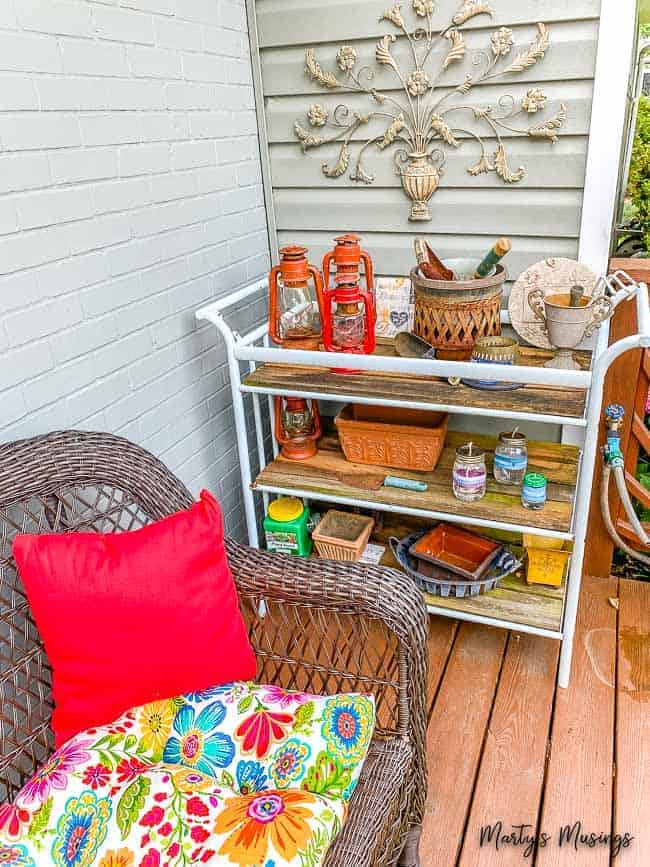
Then I moved it into the corner and added a few more garden touches.
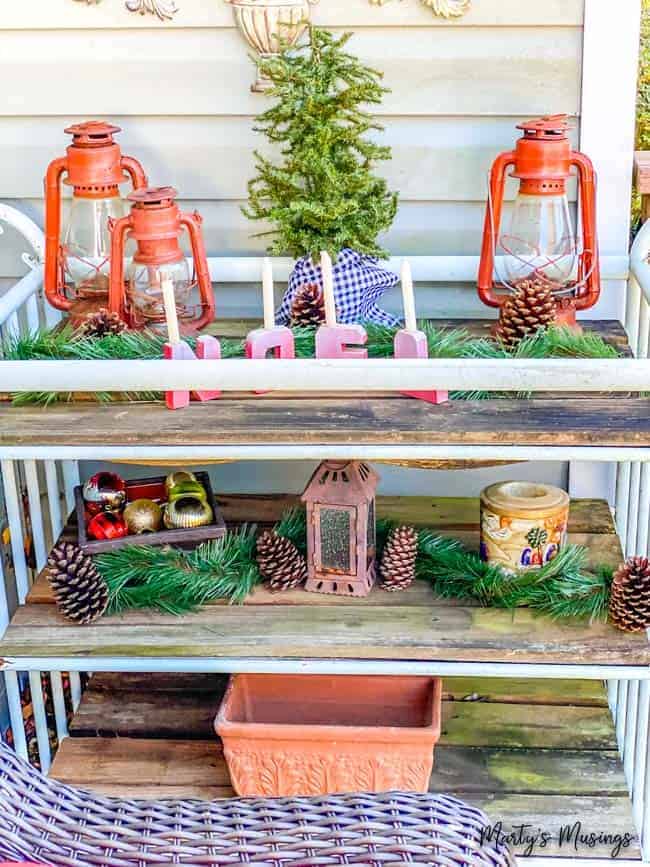
Christmas was a favorite time for simple porch decorations!
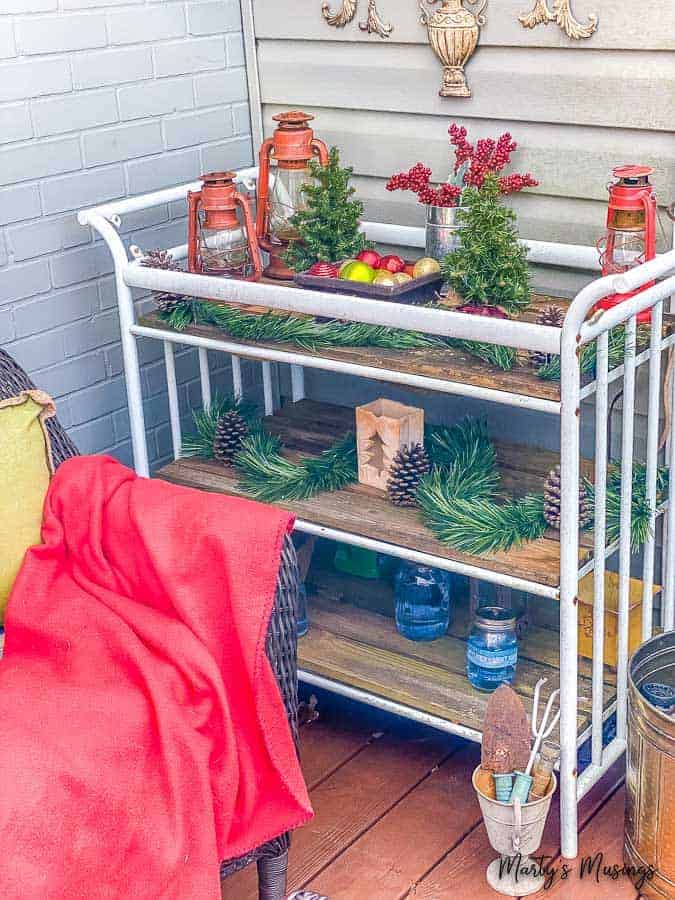
Each year I did something a little different!
Some tips for making this bench idea:
- Decide how you want to use these bench plans and where you want to put it before getting starting with this amazing DIY.
- Some other possible uses could be as an outdoor bar, extra storage space for outdoor paraphernalia such as buckets, hand tools or hardware necessities.
- Some benches have an outdoor sink which is amazing if you have the knowledge and desire.
- You could also use this in your garage as a drop zone, on the back porch as storage for pet supplies or even as a bar for entertaining.

FAQs about DIY Potting Bench
More Repurposing Ideas
Chocolate bar marzipan jujubes jelly-o carrot cake caramels. Tootsie roll cookie jujubes powder icing lemon drops. Pastry brownie topping oat cake chocolate cake jelly candy gingerbread tart.

Upcycled DIY Potting Bench
Instructions
- Gather materials.
- Remove changing table shelves one at a time.
- Cut fence slats to same length as original shelves.
- Lay the slats on top of each shelf and screw from underneath.
- Reattach each shelf, screwing up through the bracing and back into the shelf and slats.
- Remove curved side pieces, prime, paint and reattach.
- Set the potting bench in its location and add hooks for tools if desired.