DIY Headboard from a Closet Door
This post may contain affiliate links which won't change your price but will share some commission. Read more here.Wait until you see this DIY headboard from a closet door! This clever DIY project was chalk painted and distressed into a shabby chic beauty!
I’m not sure why all our DIY projects seem to take FOREVER but it could be that we’re just like you and have full time jobs and family obligations and church activities and on and on.
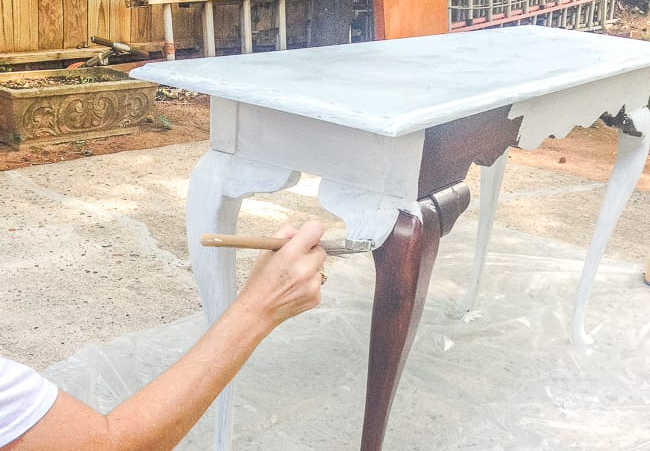
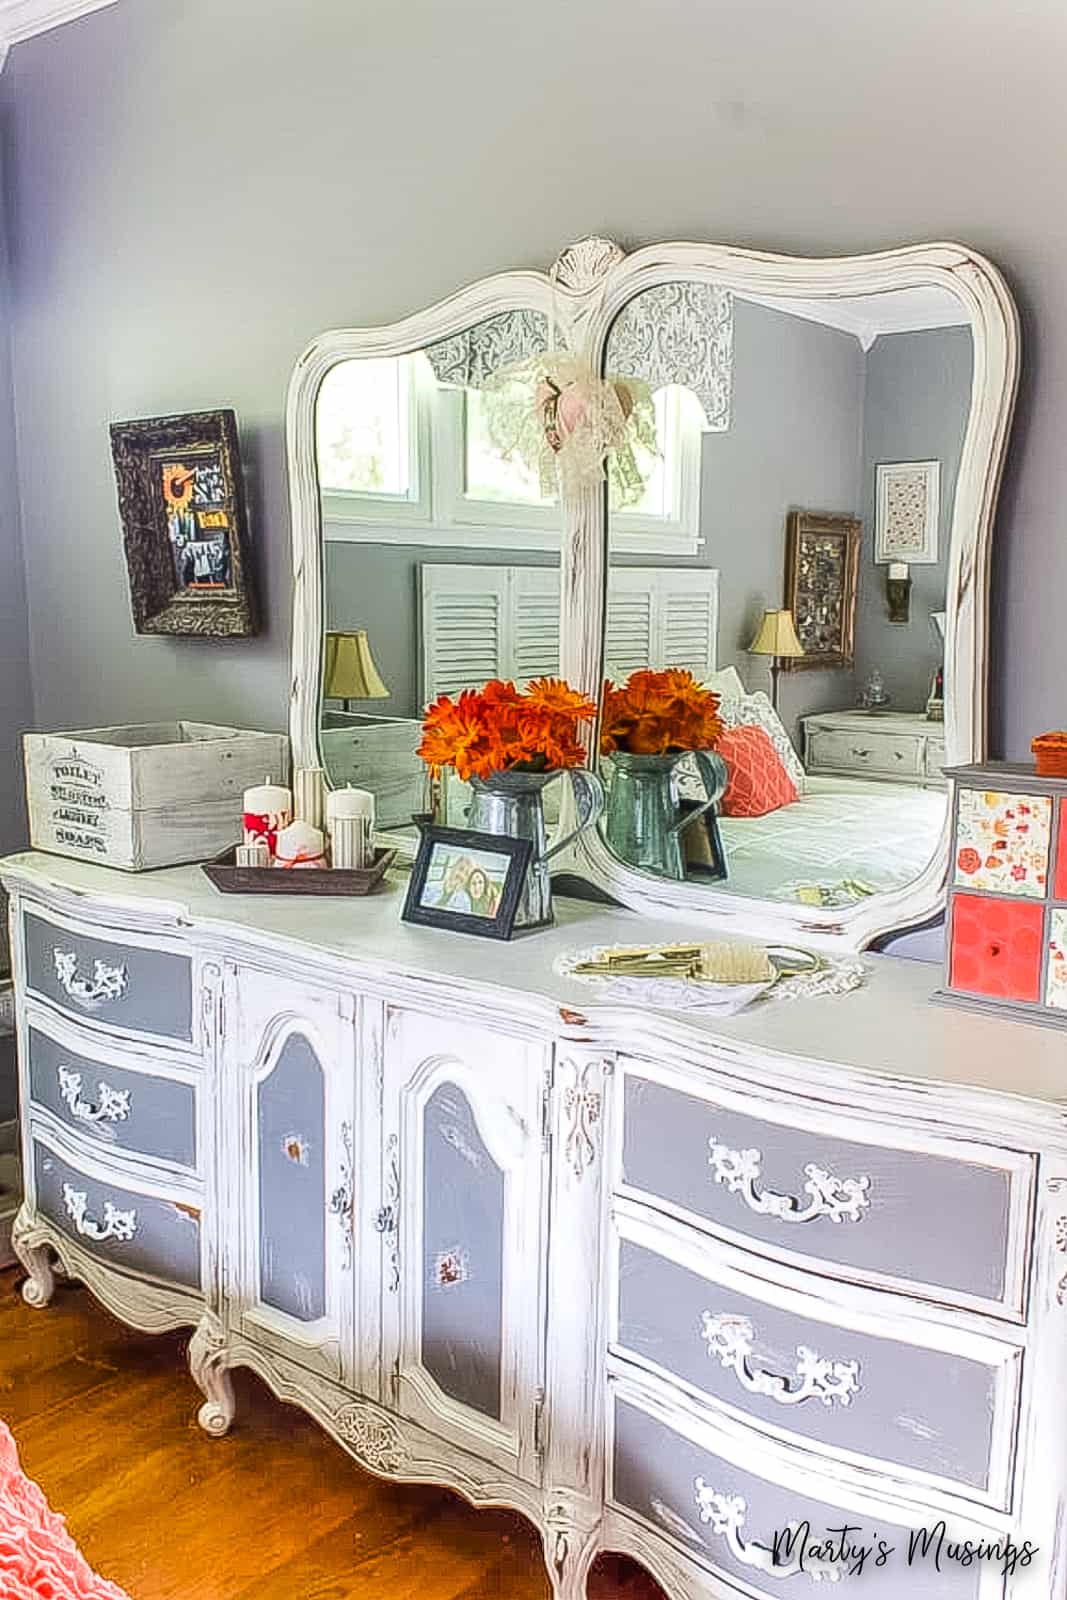
Our budget master bedroom makeover stemmed from the ghastly gold walls and hodge podge accessories. It.was.not.pretty.
If you look closely enough you can see the headboard matched the furniture.
Okay, maybe you shouldn’t look TOO close.
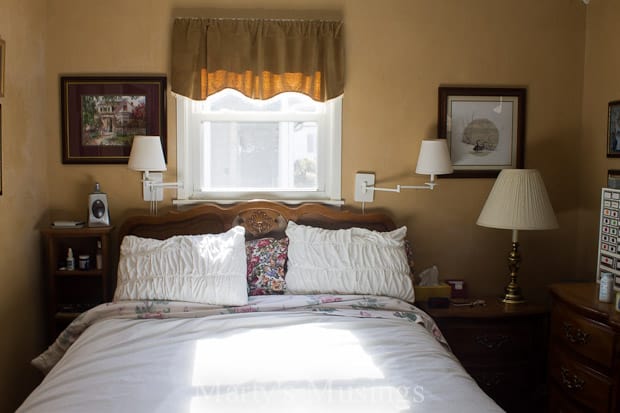
Y’all that room gives me the shivers! Glory, how far I’ve come! I’m living proof it’s possible to teach an old dog new tricks!
I actually (and yes, that was me!) chalk painted the headboard to go with the rest of the room makeover before we changed directions and gave it to our newlywed son.
Sometimes you just gotta try something to see if it works and when it doesn’t try something else!
My DIY hubby and I love to repurpose old free stuff and make it uniquely fit our style.
So here he is to share all the pertinent details on how we created a DIY headboard from a closet door. Amazing!
DIY Headboard from a Closet Door
(I’ve included some affiliate links for your convenience. Click here to read my full disclosure policy.)
Materials:
Makita 7 1/4″ Circular Saw
Rustoleum Metallic Silver spray paint
Deco Art Americana Chalky Finish Lace
Deco Art Americana Creme Wax Clear
Always Kiss Me Good Night Sign
From Tim:
One of the perks of being in a construction-related business is that you can claim any discards from job-sites that might be re-purposed. Such is the case with this project and these louvered closet doors.
I salvaged these from a client that preferred new solid wood doors installed, and they made the trip home!
I didn’t know what they would become, only that they would become. The day came when that need was revealed…a DIY headboard from a a closet door!
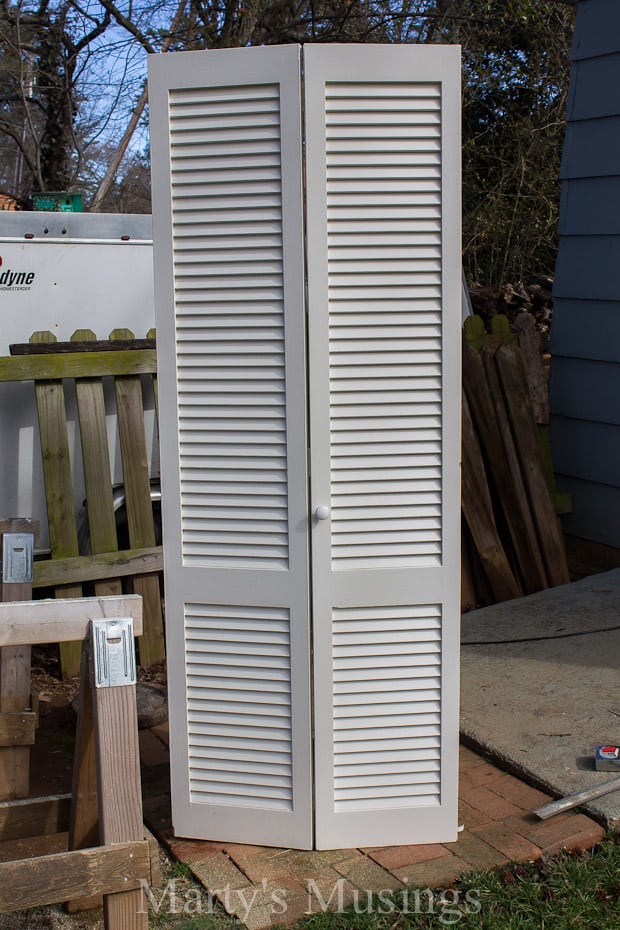
Given the structure of these doors, I really only had two choices as far as sizing the headboard; using the larger top section or the shorter bottom section.
In either case, the door would be cut horizontally at the center brace.
This is far easier than cutting through the slats and then trying to re-build the door. I was also pretty sure that I wanted more headboard to show above the mattress and bedding than the small section would allow, once installed.
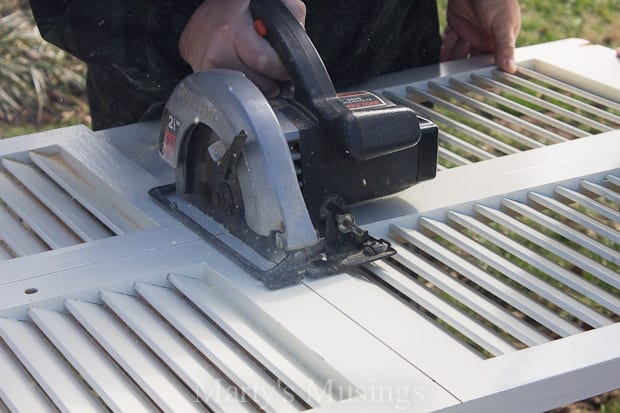
Step 1. Mark your lines
After that decision, I just marked a line across the center of the brace where the door would be cut. Each of two sets received the same treatment from here forward.
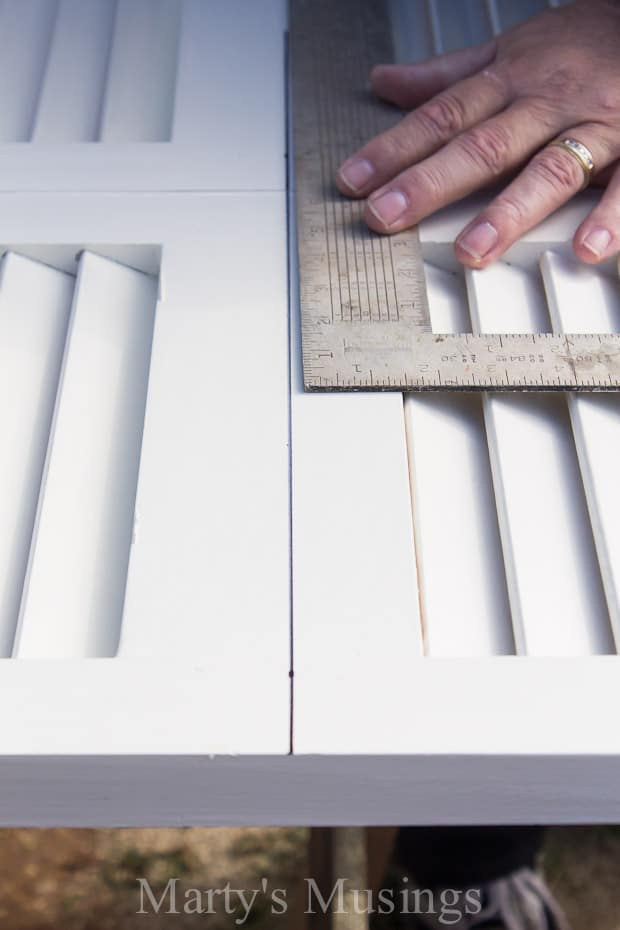
Step 2. Make cuts
Flat on saw horses…cut with circular saw. Nothing much more at this step.

That really is it as far as cutting and sizing! Here is my headboard ready for the paint department to take over…oh, wait. That’s me, too!
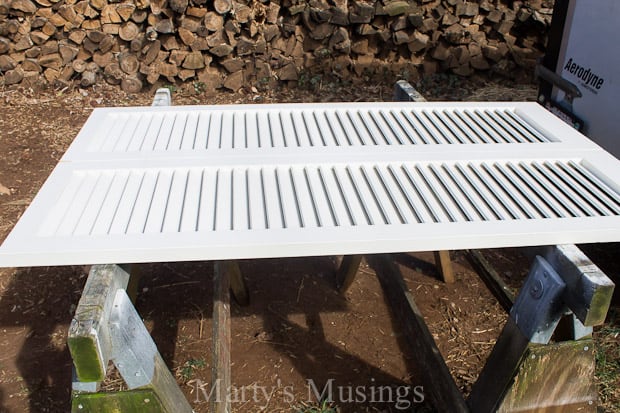
Now, here’s the interesting part. We knew we wanted a distressed look, but doing so through white paint over pine was not going to provide the desired result.
Step 3. Spray paint
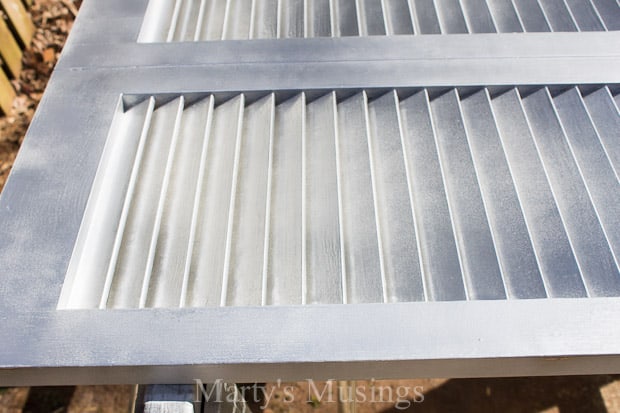
So, I sprayed a light coat of Rustoleum metallic silver aerosol paint over the entire surface. This would allow me to chalk paint (white) over the silver and then distress back down to expose the silver.
Sounds like an extra step, but it made the difference we were looking for.
I’m guessing you could get a similar result by just chalk painting and using a dark wax to achieve the distressed look, but I just don’t like that dark wax.
Why metallic paint? It’s just what I happened to have in my shop! No sense buying something when you can use what you already have.
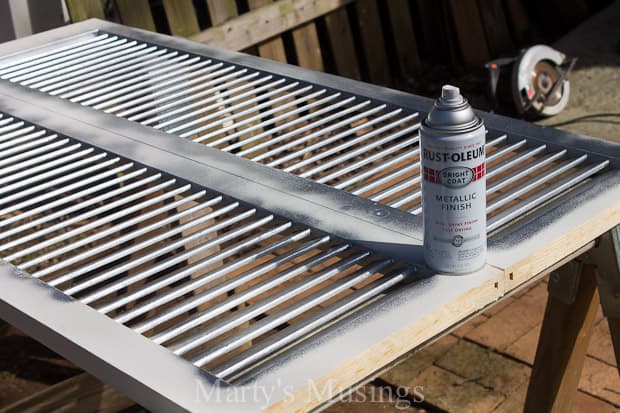
This didn’t have to be solid coverage. I just wanted enough to show through when sandpaper was used to distress. Two light coats did the trick.
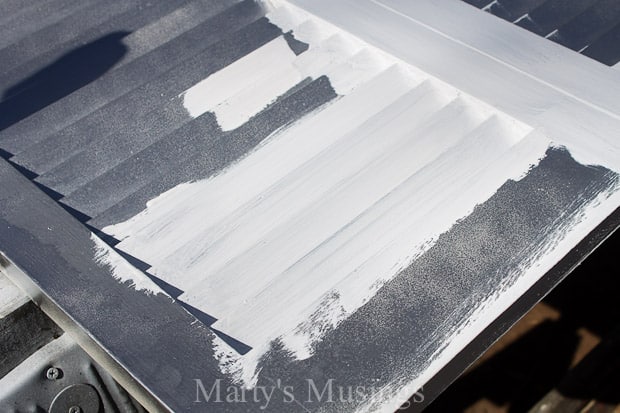
Step 4. Chalk Paint
This picture shows the process of chalk painting over the top of the silver spray paint.
Painting louvered doors is a pain! It is one of my least favorite surfaces to tackle, so it’s a good thing you don’t have to be perfect with chalk paint!
I used two coats of Annie Sloan Pure White and a clear wax, but Marty has also used Americana Chalky Paint from DecoArt on home decor accessories and it’s a cheaper option with tons of color options. (You can find the paint here, as well as the wax.)
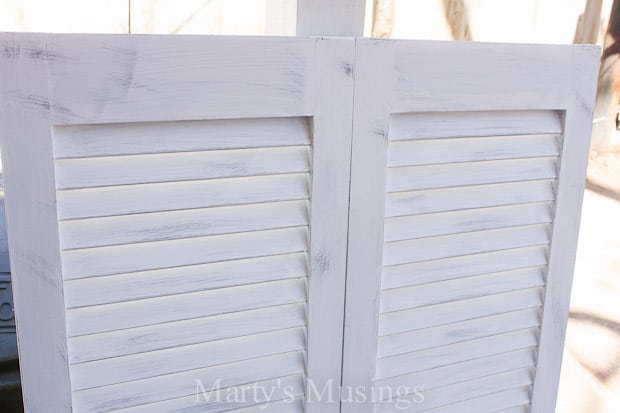
Step 5. Distress
Now on to the distressing! (Marty: I did that part! Because it’s kinda hard to mess it up!)
Step 6. Sand if desired
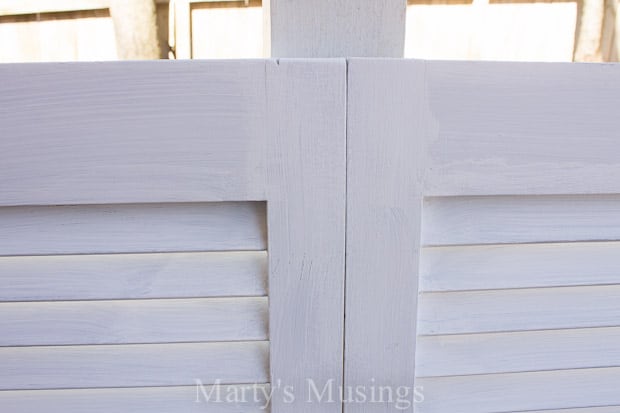
And here we are, all sanded and ready to use! Remember, I used two sets of doors, so there are four panels, attached with hinges at the center joint.

Step 7. Wax
Just a closer look at the other two panels. Oh! Don’t forget to wax! I used clear wax.
Step 8. Install
And here they are installed. Ideally, you want to screw through the panels into the wall studs. If that’s not possible, just pre-drill the holes, marking the wall where the screw lands.
Install wall anchors of your choice and then drive screws through the panel and into the anchors.
I originally also attached the bed frame to the panels, but everything squeaked with the slightest movement, so I nixed that and just left them independent of each other.

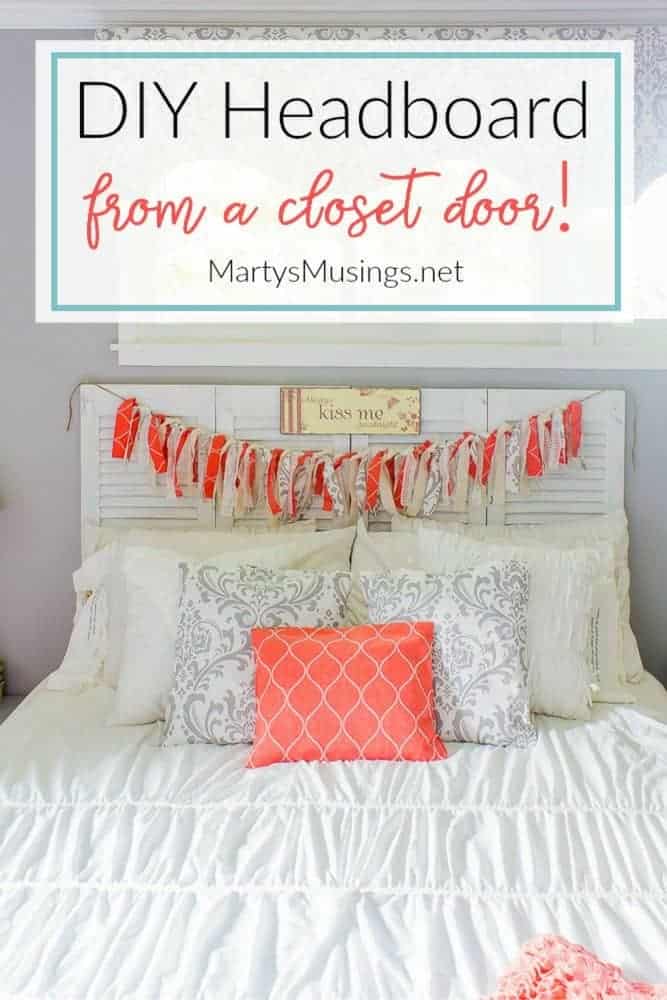
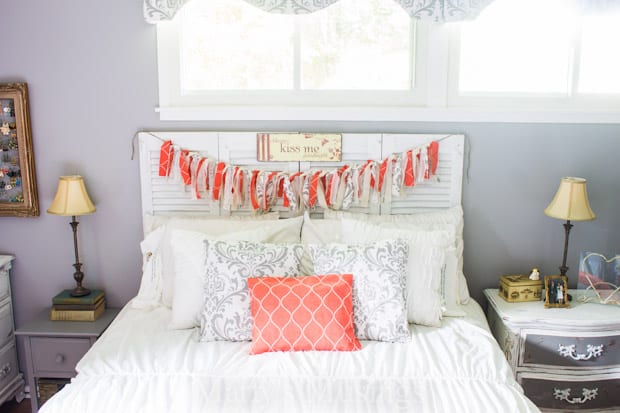
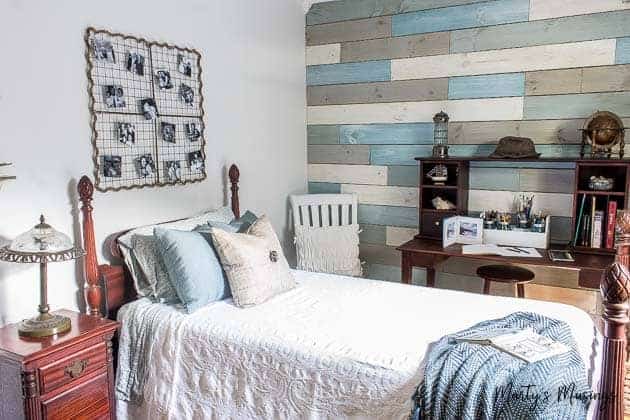
From Marty: Here you can see my new DIY headboard from a closet door installed, but I wasn’t quite done with the finished piece.
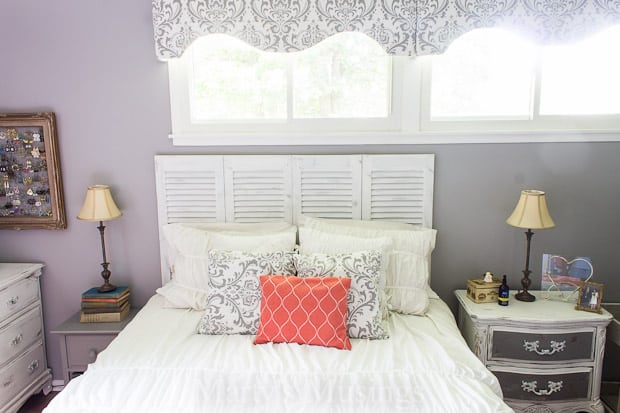
The fabric rag banner (all the details here) and the “always kiss me goodnight” sign just completed the makeover, don’t you think?
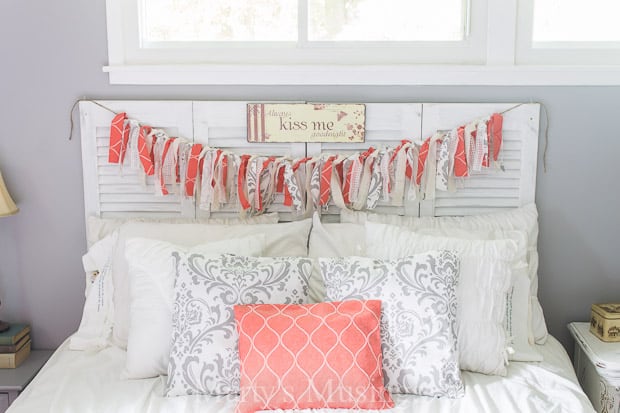
I couldn’t be happier with my new master bedroom that I decorated for practically nothing.

More Painting Tips
Practical painting tips for the home that anyone can use, including chalk painting, accent walls and choosing the right colors.
What a great budget buster. I see these doors at Goodwill all the time and never thought of a headboard.
Hi, Rosemary! You know I love a good deal + repurposing = so fun!
What a lovely way to add personality and style to any bedroom. I am excited to try this for my guest bedroom. Love it!
Hope it turns out well for you, Meegan! And as always, thanks for sharing my content!
love this1 The finished color is lovely.
Thanks so much, Linda! I love how it turned out!
Absolutely perfect! Such a beautiful transformation. Your attention to detail never goes unnoticed and everything fits wonderfully. Thank you for sharing your DIY project with us.
Thanks so much for the sweet words, Brooke. And thanks for sharing!
Such a great idea, Marty! Love how it turned out!
What a great idea! I love repurposing things, so this is right up my alley! 🙂
Me, too, Libbie! Especially when it’s free!
This is great! Love how it turned out! I made something similar using shutters!
Love the look of shutters as a headboard! So unique!
The headboard turned out so cute. I need to redecorate one more room in our house and I’ll have to consider this for the headboard. Great idea!
Thanks, Denise. I need to update this room but it’ll have to wait a while!
Gorgeous!!! Love the whole look and all the special little bits you added afterward. It looks so special
Thanks so much, Michelle. I need to do a refresh on this room but it’s down the list!
What a great repurpose just up my street. You did an awesome job.
Thanks, Anita! It’s a favorite project of ours!
I loved the basic idea of this cuz everybody is upgrading their homes if they can. The only thing I would consider doing differently would be mounting the shutters on a piece of plywood. Even with the possibility of even some thin firm cushion material Btwn the back of the shutter slats. You can buy that kind of material at a fabric store or even an area of dept store that carries upholstery area. Measure and cut the cushion material with an electric knife. The whole reason is because if lay against, or kids plop in your bed whatever and put too much pressure on those slats- they could break or even pop loose. You know how we like to prop up in bed against a pillow Btwn you and the headboard. Just a thought to give that area more support. Thanks fir the DIY!!
Wonderful transformation and I love it! Thanks for sharing this amazing post.
Beautiful job on the headboard Marty! Thanks for sharing 🙂
Hi, Tammy. Thanks so much! We love the fact that it’s unique and has held up so well!
I’m amazed at this headboard! This is such a cute idea!! I love the colors of you pillows, too!
Navy Wifey Peters @ The Submarine Sunday Link Party
Hi, Marty! Just wanted to let you know that we loved this post SO MUCH from last week’s #HomeMattersParty that we featured it this week! Check it out, if you like! http://theroadtodomestication.com/2015/06/12/home-matters-linky-party-41/ Happy Friday!