How to Install an Interior Door
This post may contain affiliate links which won't change your price but will share some commission. Read more here. 
Our small bathroom remodel is the biggest DIY project my husband Tim and I have undertaken.
We make a great team. He’s the brawn and I’m the brains.
No, not really. He has tons of his own ideas and is the best problem solver, but on this project one idea of mine was key to making our small bathroom work for us. We want to show you how we moved our bathroom and the process on how to install an interior door in your home.
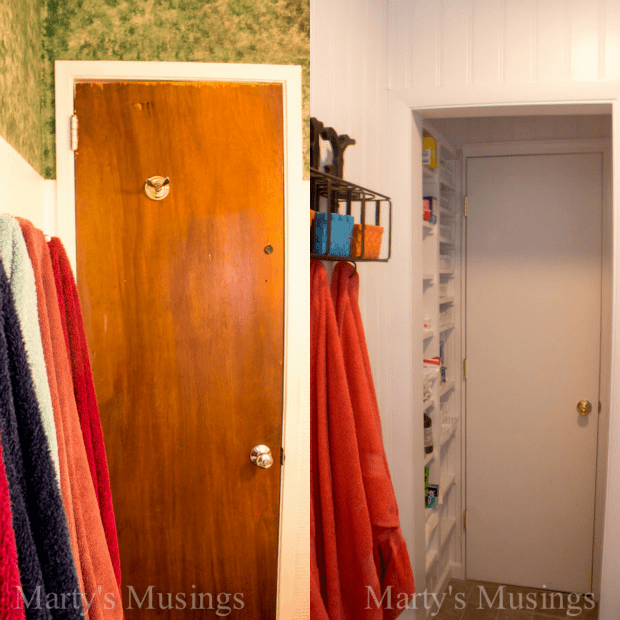
In the left side of the picture below you can see the before of the door. The best part was that when you sat on the toilet your knees were right at the door opening! Even better when you have little kids who don’t think mama needs to go to the bathroom by herself!
Our space was snug beyond belief. It’s never been a bathroom to be shared, unless you include the countless baths I gave our 5 kids over the years!
On the right side of the picture below you can see the built-in shelving we carved out of unused space. This was just a brilliant idea of my husband’s that gave us plenty of necessary storage space.
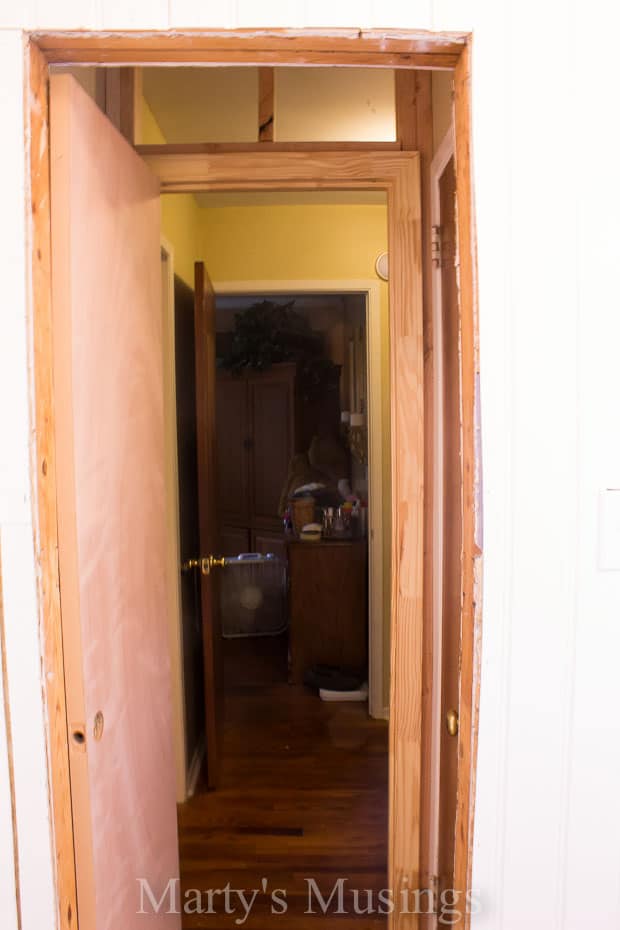
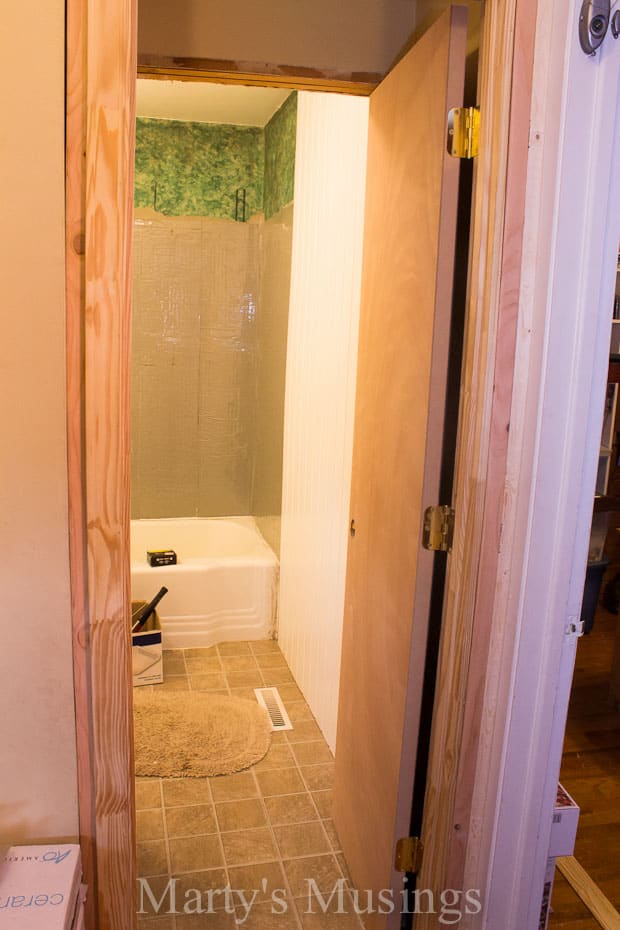
From Tim: Well, we really jump right in with this picture, don’t we?! I thought this was the best way to show where the old door was and the new door was installed. The perspective is from inside the bathroom looking out to the hallway.
We picked up 3 square feet of space (woo-hoo, right?), but that also allowed the storage closet to be included as part of the bath. Trust me, that 3 feet we gained is HUGE when you’re…well, enthroned!
I decided to go with a pre-hung luan door because it just made the project faster. A pre-hung door comes already installed in a simple frame with inside and outside casing included. It increases the cost about $100, but the ease of installation makes it worth it, especially if you’re NOT a framing carpenter – like me.
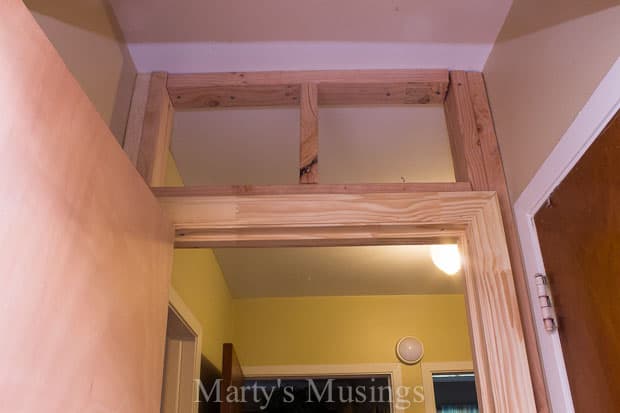
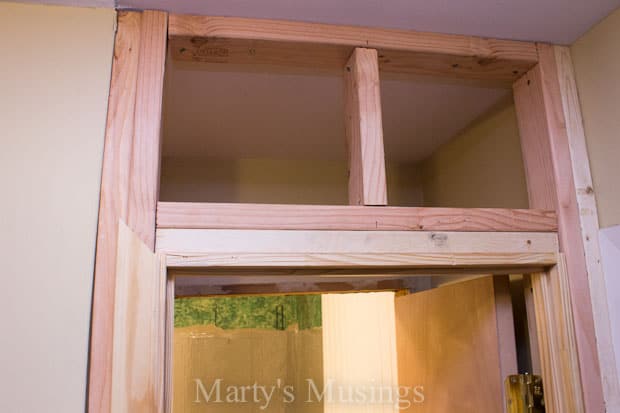
The opening I was working with was just perfect for a doubled 2″ x 4″ vertical support on one side and a single on the other, since I was working right into a corner. I have only seen the framing above the door in some new houses/additions I’ve worked in as a Painting Contractor, so I just tried to remember what was correct. Plus, we’re only talking about a 3′ span that was not going to carry any weight, so this looked like the right way to proceed. You carpenters will correct me, to be sure.
So, there really is no trick to this once you are framed and prepared to receive the door. Everything needs to be level OR tweaked to accommodate your opening. This was important in our house as it is a 1940’s build and hardly ANYTHING is square or plumb anymore. In fact, if you hang it true it is going to look out of place!
Simply have a helper hold the unit in place or shim it into place and screw through the framing into the support studs you installed first. I think I used 1-1/2″ hex head screws so that the bit wouldn’t bounce out halfway through the drive.
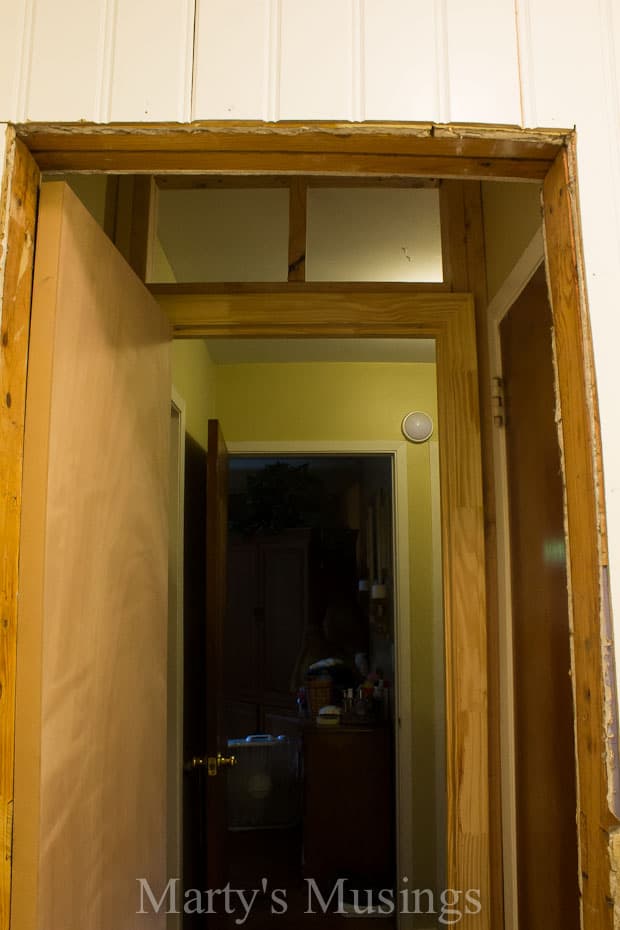
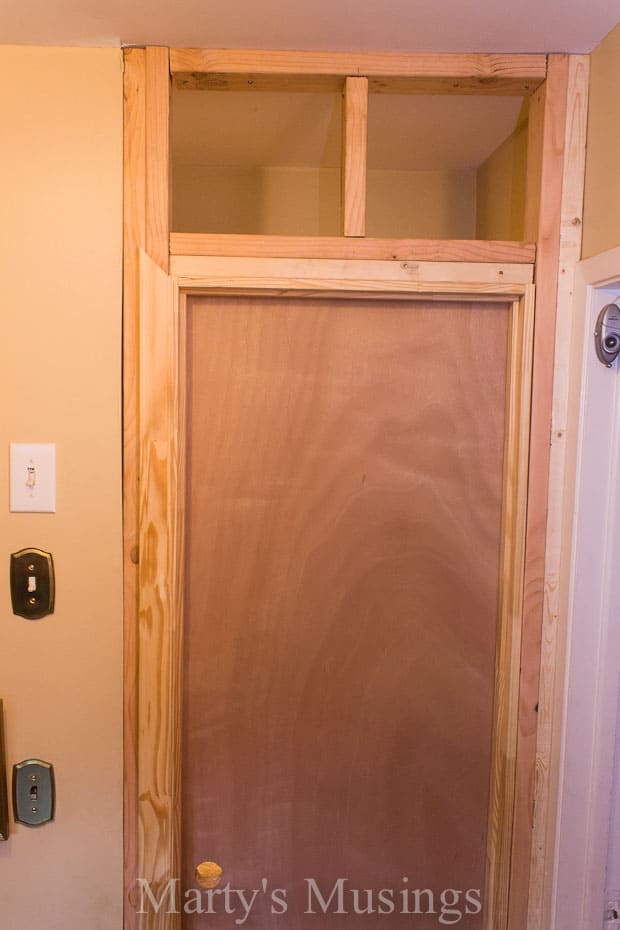
The perspective is now from the outside looking into the bathroom. These unions were a bit more critical to get right, although the right side (in this pic) is at a corner and is easily dealt with at the sheet rock seam.
Remember we’re covering with sheetrock to match the rest of the existing hallway, so that left side transition is the one to get right. You’ll notice I removed the top casing on order to install the sheet rock behind it and then nail it back up. I also removed the right hand casing…well, OK, it fell off! No problem.
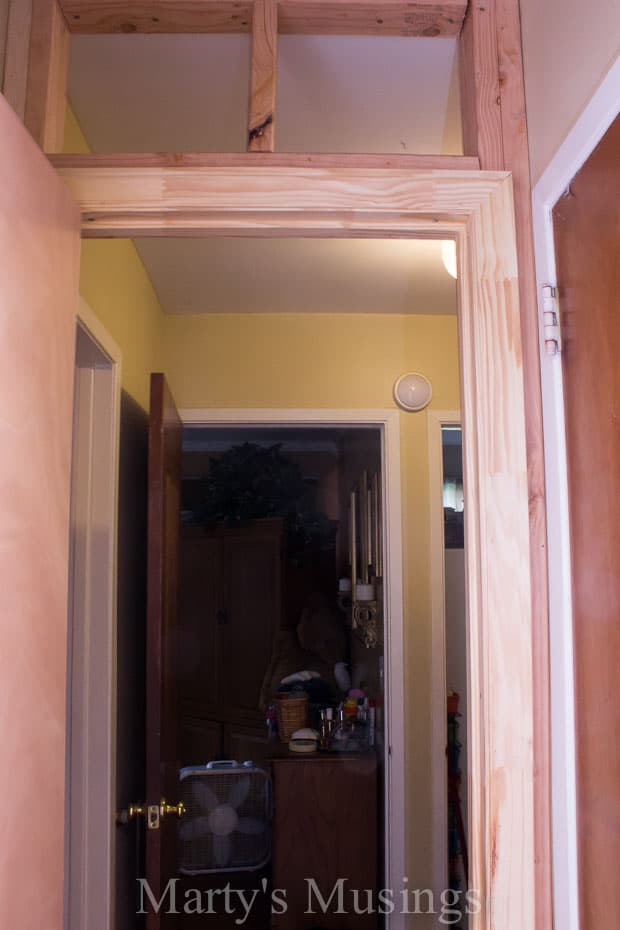
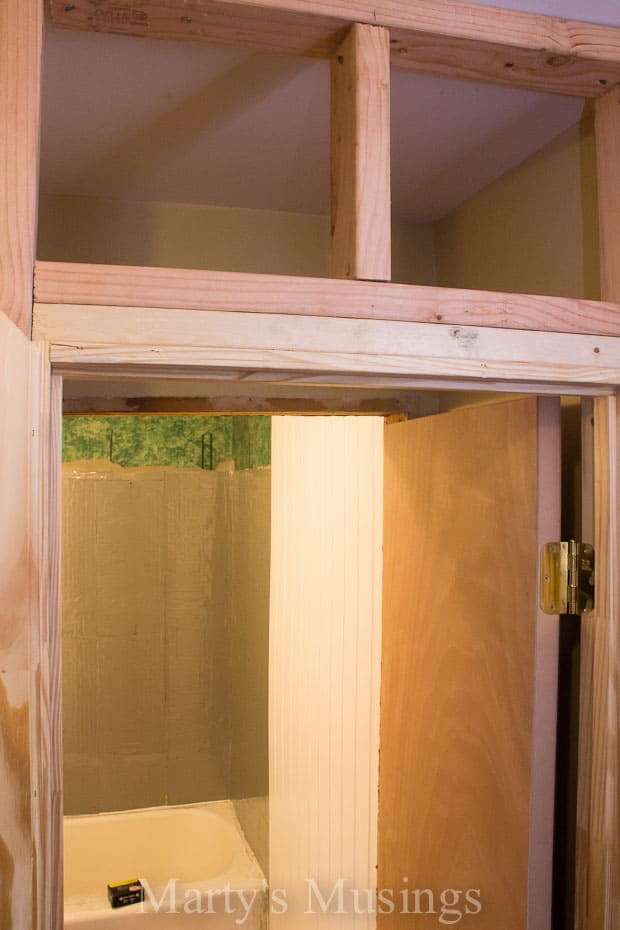
Just a close up to show you the framing work. Also notice that the beauty of a pre-hung door is that the hinges have already been set on both the door and the casing! The holes have even been properly set and cut for the handle and latch assembly, so all you need to do is select and install! It is important to remember to determine whether you need a left-hand or right-hand swing…just flipping it over doesn’t work!
This is almost ready to begin finishing. The sheetrock goes above the door, the right casing covers most of the transition into the corner, and the left side transition will be completed with fiber tape and spackle.
Oh, yes! Make sure to check and make sure the door opens and closes freely! You can adjust slightly with a shim on the bottom of either casing and/or shaving the bottom of the door off as needed.
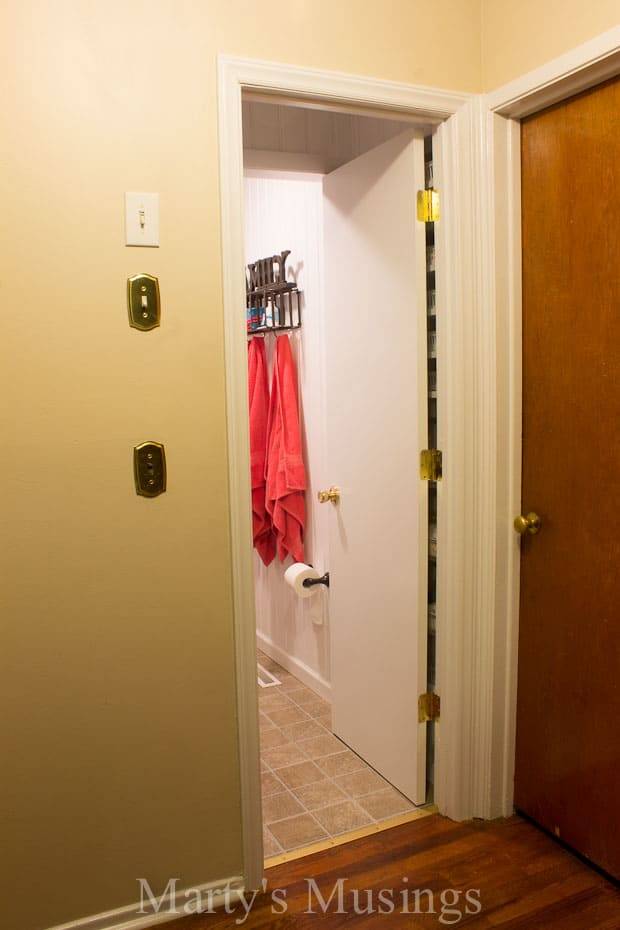
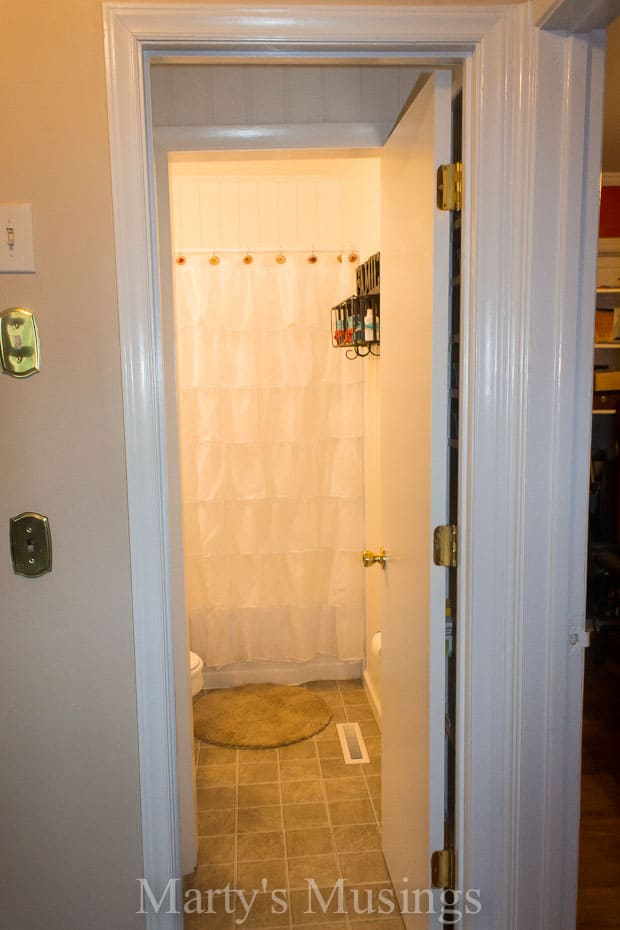
And here is the finished product, again from the hall looking in. All the wood, including the door, was primed with an oil-based primer and then two-coated with a semi-gloss latex paint, both sides. You can tape off those hinges or just be extra careful. The handle assembly can also be removed or loosened and taped. I ended up painting the entire hallway to change colors, but that was no biggie.
You get a glimpse of the beadboard we used in the bath here, which was also used above the new door. Pretty easy to work with and fabulous results.
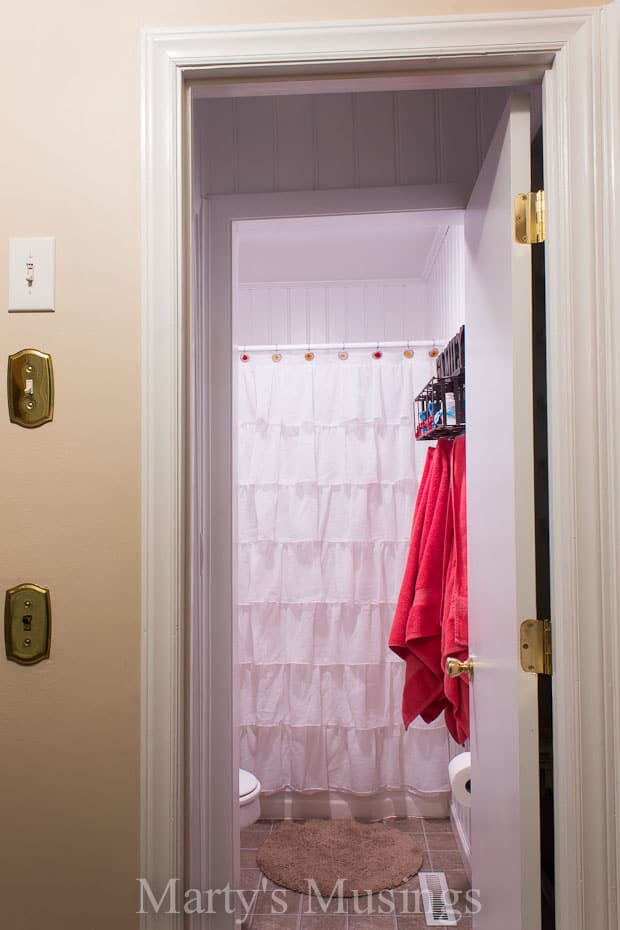
And here is our finished project! Moving a door is a great way to alter the space in an area and nothing you should be afraid of tackling. With planning and some good conversation with your spouse, the results can be dramatic…or just a magical 3 feet!
Now, I know some of you are wondering what in the world are the three switches for on the wall? The lower is for the hall light, the middle for attic lights, and the upper for the whole-house fan. Just didn’t want to leave you hangin’!
Marty here: I can’t even begin to tell you how much 3 feet of extra space changed our bathroom! Sometimes I get an idea and hubby has to stomp on my dreams tell me that it just won’t work. On this project I got it right and have enjoyed the benefits immensely!
READ ALL THE POSTS IN OUR SMALL BATHROOM REMODEL:
- Rustic Small Bathroom Reveal
- Fence Board Bathroom Cabinet
- Bathroom Old Window Mirror and Glazing Tutorial
- Built-in Bathroom Storage
- DIY Shower Tile Part One (you are here)
- DIY Shower Tile Part Two
- How to Install a Bathroom Exhaust Fan and Electrical Outlets
- How to Install Beadboard Paneling
- How to Install an Interior Door (you are here)


I didn’t realize so much went in to installing a door….Smile. The bathroom looks so good now, excellent job.
Isn’t it a great thing that I have a handy hubby? I am so grateful for him! Have a blessed day, Diana!