Set Up a Temporary Kitchen During a Remodel
This post may contain affiliate links which won't change your price but will share some commission. Read more here.Kitchen torn apart? Everything you need to know to set up a temporary kitchen during a remodel plus tons of practical tips for surviving the process!
This post contains some affiliate links for your convenience. Click here to read my full disclosure policy.
Do you gaze longingly at the beautiful homes on Pinterest or watch the amazing transformations on Fixer Upper and think, “if only that were my home?”
I’m guilty. They’re amazing.
It’s been over three months since we began our own kitchen remodel and we’re still waiting for the floors to arrive. Most everything else is DONE.
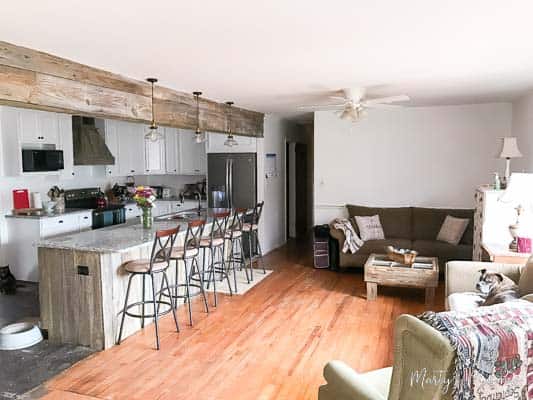
While we’re waiting to pull everything together I wanted to share some of my best tips on how to set up a temporary kitchen during a remodel.
The first one is very important.
For the love of everything that is good, DON’T START TWO WEEKS AHEAD OF SCHEDULE AT CHRISTMAS TIME!
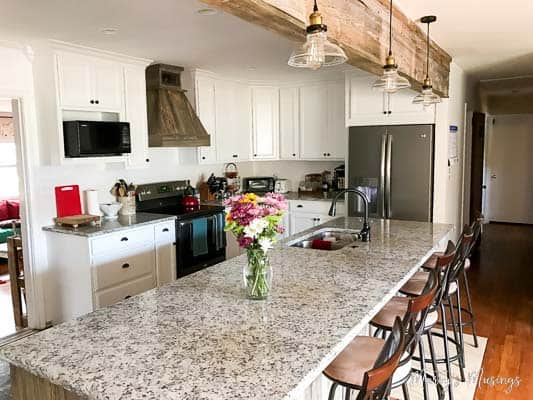
We spent weeks researching and planning (read all about that process here) before we made the decision to go all Fixer Upper and take down the wall between the kitchen and living room and totally gut the room. I had great plans for freezer cooking a month’s worth of menus.
I was in the process of gathering everything together when our contractors decided we could go ahead and take the wall out TWO WEEKS EARLIER THAN PLANNED. Before the Christmas holidays.
Nix the freezer cooking plan and cue the “we don’t have any boxes, call the storage pod people, this is exciting, “help me” freakout!
How to Set Up a Temporary Kitchen During a Remodel
If you’re going to undertake a kitchen renovation there’s no way to avoid some inconveniences. Depending on how in depth the project is and how much you do yourself, it will be a pain in the backside.
Here’s what we did to survive living without our kitchen during the worst of the construction.
#1 Can I stay in my house during a kitchen remodel?
Our family did because finding a place to live while construction is going on can be a pain. Plus, it may add on costs to the job. You may have to switch things around but it’s certainly doable!
#2 Pack up everything you don’t absolutely need.
If possible go ahead and declutter while you’re packing up. Unfortunately I didn’t have time to do this so when I began setting up the new kitchen I was totally stressed because I needed to eliminate some things for space reasons.
We rented a Pod for a month so we had a place for almost all of the furniture in our living room, kitchen and the contents of our cabinets.
If you have a garage or storage building this is an option as well. There are going to be workers in and out of your home so remove as much as you can to give them space to work.
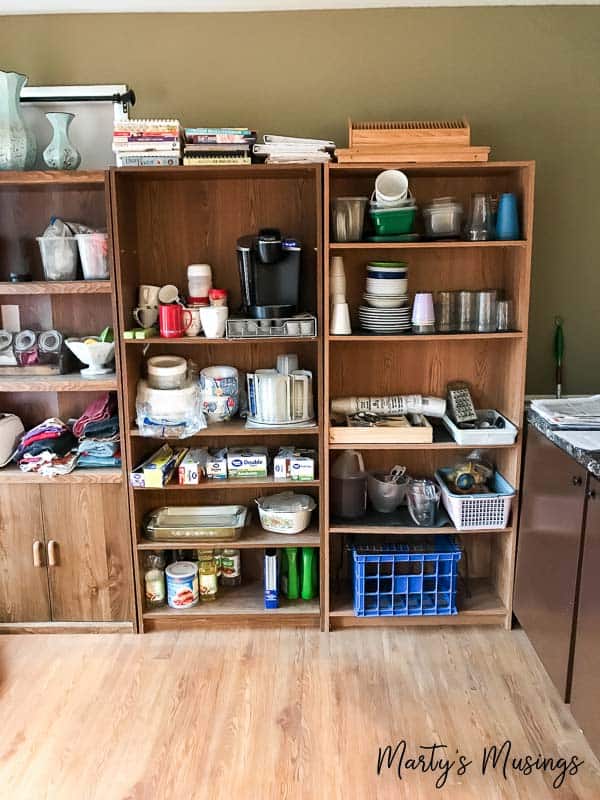
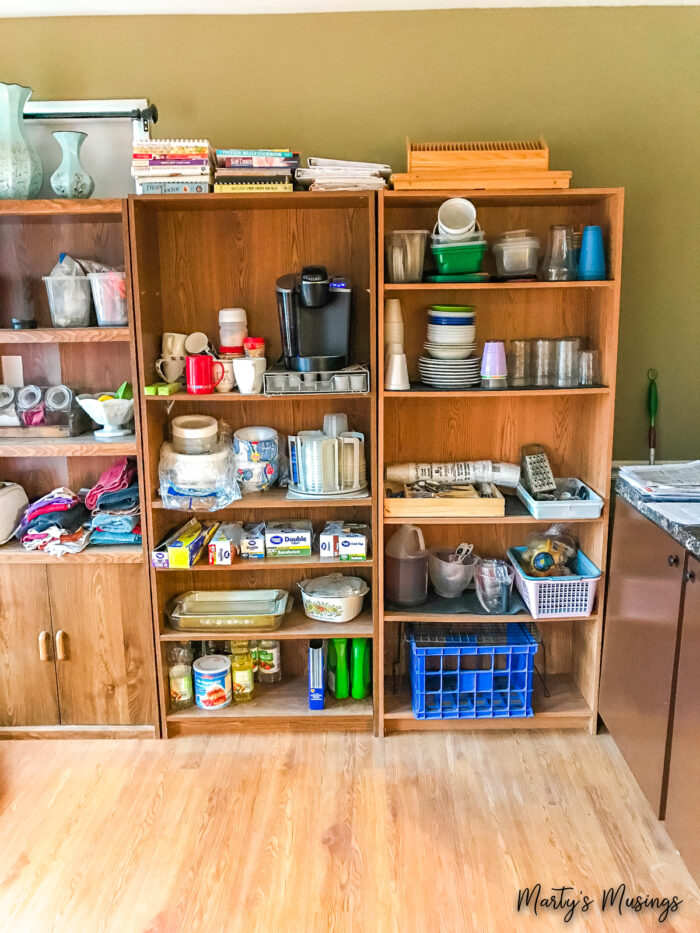
Think through the bare necessities for daily meal prep and eating during the estimated time the kitchen will be out of commission. You probably don’t need cake decorating supplies or every pot and pan you own. You probably WILL need a coffee station!
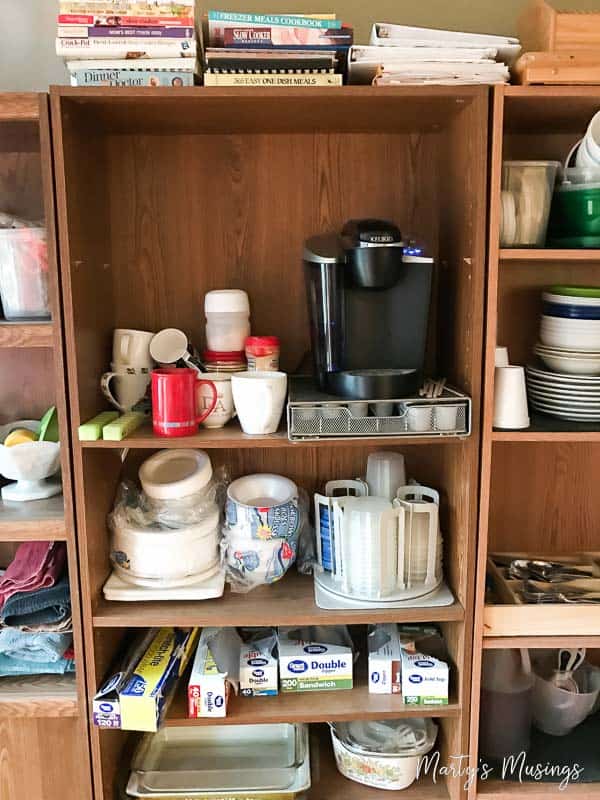
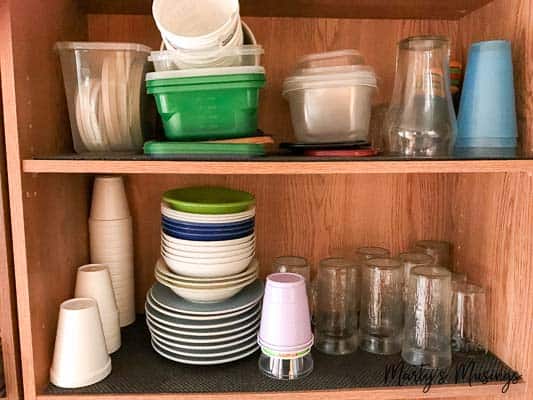
I kept out some plastic dishes and some regular glassware because we had room on the shelves we set up. Don’t forget plastic containers for leftovers!
#3 Make a plan for meal preparation.
For some families one of the biggest expenses during a kitchen remodel can be eating out. With two teenagers this was not an option for us.
We only had $5 footlong subs one night and pizza on another occasion. THAT’S IT.
I put out an SOS on my Facebook page for suggestions for survival tips and gained valuable insight including tips such as using rotisserie chicken, frozen veggies and which small appliances could replace larger ones, etc. We all love to share our opinions so ask your friends for ways to save money without eating out.

#4 Stock up on paper goods and plastic utensils.
I really don’t like paper plates and plastic silverware in general. Using regular dishes and silverware all the time is my normal but destruction is not the time to be all fancy.
Everything gets more difficult when you’re remodeling so make it simple when you can! Use paper plates, bowls, cups and napkins any time you can. You’ll be glad you stocked up!
#5 Easy is good enough!
This is also not the time for gourmet meals. (You can find all my crock pot meals here. I’ve used ours so much I’m in the market for a new one now!)
Also, don’t be hesitant to let other people drop by food or take you out to eat. It can be hard to accept help but I find it’s a gift for the giver and receiver! God gave us friends for a reason!
#6 Carve out a work space.
If you’re going to create a temporary kitchen during a remodel, this is one of the hardest elements of the process. We didn’t completely figure this part out until we started deconstruction (taking the kitchen apart).
Are you going to lose your stove and/or refrigerator for some or most of the construction time? This is the biggest question to ask your contractors or take into consideration if you’re doing the project yourself (And if you’re DIYing it, I can give you the number for a marriage therapist, lol!)
If you don’t have a working kitchen you’re more likely to eat out, which adds expenses on to the budget.
The answer to this question will possibly hinge on how much empty space you have available in your home. Because we chose to rent a Pod we had room to set up a temporary work space where our dining space usually was.
We took the leaf out of the table, pushed it flush against the wall and moved both the refrigerator and stove to that end of the kitchen.
(I can’t believe I didn’t take a better picture but you can see the frig and stove set up below in the back of the kitchen.)
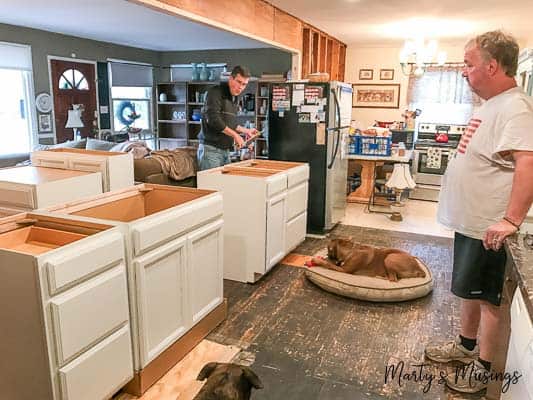
Since we needed so much electrical work done we specifically asked our electrician if he could run a line so we didn’t lose the stove. You never know unless you ask questions (read how to save thousands on a kitchen remodel) and this was an important one for me.
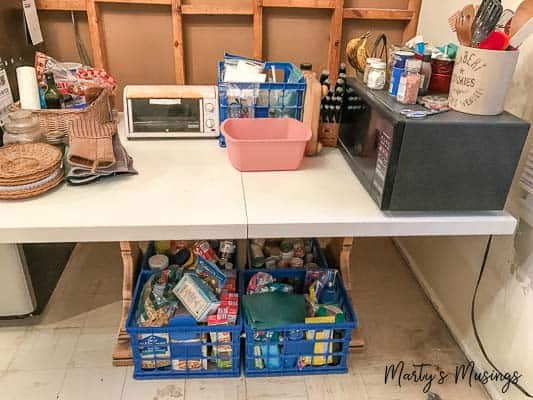
Find a place for small appliances such as microwave, toaster and crock pot. An electric skillet or hot plate might be a good option for you.
#7 Decide on a storage solution for food and everything else.
We have a separate pantry/laundry room off our kitchen but I stored food from the kitchen cabinets I didn’t think we would need during these weeks.
This is also a perfect time to check expiration dates and throw some of that food AWAY! Who needs a stray box of instant potatoes you got on sale five years ago?
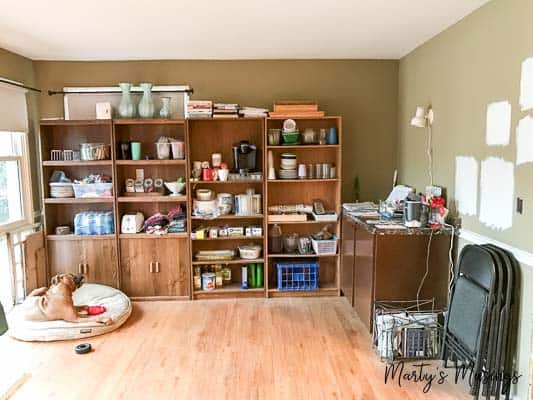
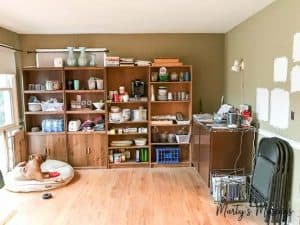
Instead of storing our bookshelves in the Pod we moved them into the corner of the living room to use as storage for a little bit of everything.
We also used some of the crates I organized the laundry room makeover with for food storage under the kitchen table. (You can find more storage options here.)
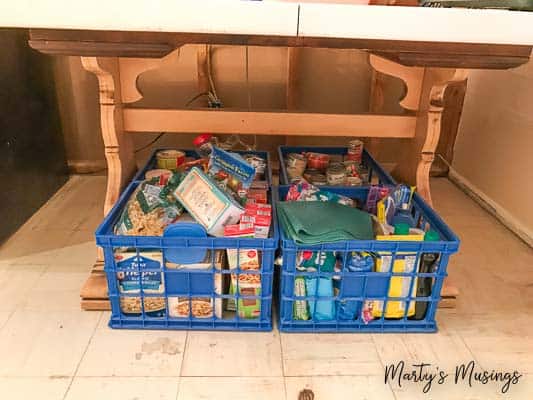
Make the best use of available space to find what works best for you during your remodel. Making adjustments and staying flexible throughout the process is a necessity!
#8 Find a place to wash dishes.
This was a tricky one for us. We originally started this entire process because we have a bathroom we need to gut as well (see our first small bathroom makeover here).
Unfortunately the kitchen took more of the budget than we anticipated (yep, always happens) so the bathroom will have to wait a while.
The point of that little side trail is I really wasn’t sure where we would end up doing dishes when we lost our kitchen sink.
I tried our bathtub but that wasn’t fun so my hubby just used a small bathroom sink in our second bathroom. It worked just fine as long as we kept up with dirty dishes (thus, the advice to use lots of paper products!)
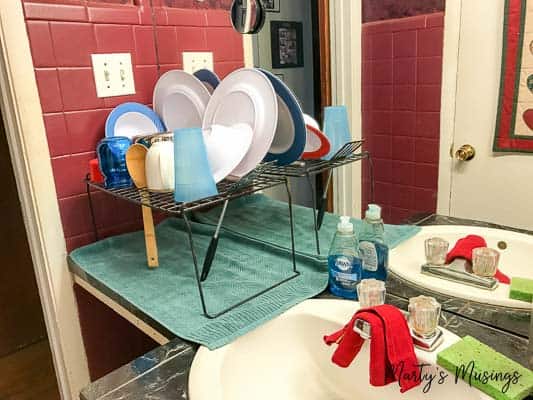
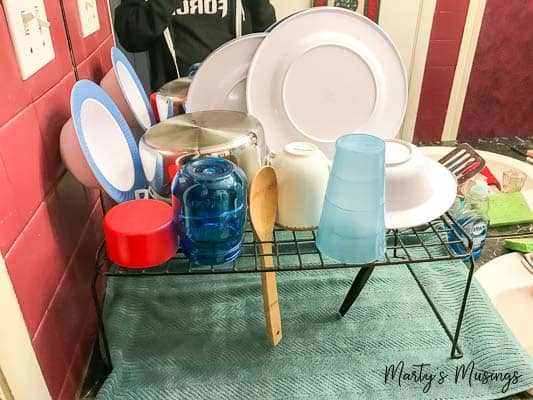
We used this wire shelf (get one like it here) for drying the dishes. You just need to find a space that works for you. It might be a utility sink in your garage, a guest bathroom or even a portable sink that can be rented.
It could even be outside rinsing with a hose and boiling water on a camp stove for washing. You do what ‘ya gotta do!
Since we were changing the entire footprint of the kitchen our contractors allowed us to leave up our old sink for as long as possible and then put the same sink into the new plumbing while we were waiting for the granite on our island to be delivered.
It takes about two weeks from the time the template is measured for granite until it is delivered and installed. That’s a long time without a sink so the solution of using our old one (with plywood for temporary countertops) was a lifesaver.
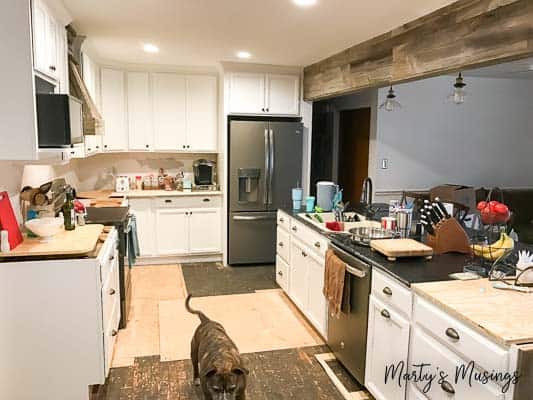
Plan for a simple station for washing dishes and accept the inconvenience as only temporary.
#9 Be flexible.
Even with all my planning I never knew from day to day where the workers would be at any given time. Our contractors were good about giving us a general idea of the steps in the process.
If a lot of electrical work was happening I knew to plan for a crockpot meal because I was going to lose circuits at some point during the day. A crockpot can be plugged into any available working outlet if necessary or make something easy like sandwiches.
There were also days equipment was all over the place and I could barely even see the refrigerator or stove. I just had to tell myself it was MY house and tiptoe around the tools and obstacles. Our workers always cleaned up at the end of the day.
I can’t emphasize enough how important it is to educate yourself as to what you want, what can be expected and how your contractor will be communicating with you during the project.
(I was given these Property Brothers gnomes during a blogger Christmas party and they were our “Gnomes on the Shelf” during Christmas and beyond. Find humor where you can, my friends!)

#10 Keep the end result in mind.
A brand new kitchen WILL be worth it, but you still have to live with the people in your home once you’re done! Show grace and treat this as an adventure. Attitude really is everything!
I’d love to know if you’ve ever been through construction in your home and how you handled it! Just comment below and let’s share!
Our Ranch Style Home Kitchen Remodel:
♥ Small Ranch Home Kitchen Remodel: The Dream Begins!
♥ How to Save Thousands of $$$ on a Kitchen Remodel
♥ 5 Practical Tips on How to Choose Flooring for Your Home
♥ How to Take Care of Your Pets During Your Remodel
♥ Set up a Temporary Kitchen During a Remodel (you are here)
♥ How to Install Laminate Flooring: DIY Tips and Tricks
♥ How to Choose Kitchen Cabinet Hardware
♥ How to Build a Sliding Barn Door
♥ How to Remodel a Ranch Style Kitchen
♥ DIY Floating Mantel out of Barn Wood
How to set up a Temp Kitchen During a Remodel
Instructions
- How to set up temporary kitchen during a remodel
- Pack up everything you don't absolutely need.
- Make a plan for meal preparation.
- Stock up on paper goods and plastic utensils.
- Easy is good enough!
- Carve out a work space.
- Decide on a storage solution for food and everything else.
- Find a place to wash dishes.
- Be flexible.
- Keep the end result in mind.
- All posts in Ranch Style Home Kitchen Remodel


I just started my second stint of living-at-home-during-remodel. The first one was 3 years ago: a demo of the original 1990 bathroom, gutting and rebuilding the shower, then installing new tile and toilet (two trades: plumber and tile guy)….but I had my full kitchen during the job. Now it’s the same tile guy replacing the flooring in the kitchen & living room while I “camp out” in the bedroom with my stash of bottled water, ice cooler of beverages, and non perishable groceries . No crock pot, hot plate, toaster, microwave, etc. Everything is hobo style directly from the can/box.
I’m single, no kids or pets, and I’m still feeling the pinch of having my familiar routines disrupted. It doesn’t matter how many trades are involved, apartment versus single family house, or how long it takes to get the work done. A week can feel like it drags on as long as two weeks or two months, but I know the big payoff will happen before too long, and I’ll be enjoying my new kitchen floor for years to come, just like I’m still enjoying my new bathroom. In the meantime I’m choosing to look at this latest remodel adventure as “glamping”.
Oh, and I forgot to mention that you have to cross the tile guy’s workspace to get in and out of my apartment, so I am on what feels like house arrest in the bedroom for the length of the job. No one can walk on the tile until the grout sets…..but I can take all the showers I want!! Six of one, half a dozen of the other!! 🙂
Hi, Kimberly. It definitely sounds like your life is disrupted but it’ll all be worth it! Hang in there!
Yes it WAS totally worth it!! The job got done this past Wednesday morning, Oct. 8th, and I moved back into my kitchen/living room the next afternoon. Because the job only took a few days it was the perfect “practice run” in how to live at home during renovations. If I had to move to a hotel it would have been the exact same set of challenges, but at home I got to sleep in my own bed and use my own bathroom! One thing I learned for next time is to use a larger electric cooler or camper size refrigerator. Interfacing with a bucket of melted ice in a cooler is messy and no fun, especially when the styrofoam cooler springs a leak during the night and floods the bathroom counter! Never a dull moment, huh? 🙂
There are always things to learn, don’t you think? And nothing ever goes perfectly! So happy you’re pleased with your remodel!
I’m in the middle of a kitchen renovation. Here are my tips.
1. ALWAYS text with your contractor vs. phone conversations. You will have a record of what was said.
2. Keep a three ring binder with sheet protectors for all receipts and warranties.
3. Get a detailed/itemized list of the renovation.
4. Get a timeframe!!!! Make sure your contractor texts you daily to let you know what is happening the next day. Many times I was walking out the door and I noticed someone was pulling up to work.
5. Pick EVERYTHING out before you start. Fixtures, paint, pulls etc.
6. Know exactly what you want. Pinterest , friends opinions … draw it out.. give one to contractor and keep one.
7. Know it’s going to be chaotic and crazy and you’re not going to eat the way you normally do.
8. Breathe!!! Find a good friend to vent to!
Hi, Becky. Such good information! Thanks so much for sharing it with my readers!
#8 “You’re not going to eat the way you normally do”
That’s the understatement of the year! I’m at the beginning of a re-flooring reno of the kitchen & living room (ceramic tile throughout) and I lost my stove and fridge in the process. No small appliances for quickie cooking, either! l I now have the same eating regime as a picky three year old…but at least I won’t starve to death. 🙂
Kitchen renos are TOUGH!! But you gave some awesome suggestions. Thank you for sharing!
I’m looking at starting a complete kitchen gut when my husband returns from Mexico this summer.
We are relocating stove and fridge but sink will remain in same location. I’m not sure if the lingo but I think that qualifies as a new footprint?
Current kitchen is crammed in a corner. Is a small U layout. You can stand in the middle of the kitchen and chop an onion on the paninsula, turn, cook, turn, wash a dish all without taking a step. Take one step and you access the fridge. The dishwasher is in the paninsula, which I have to open to access a drawer and it doesn’t open the way down because the oven door is in the way leaving the dishwasher unusable.
I’d really like to meet the person who designed this kitchen. Trust me, my confusing description does not do it’s idiocy justice.
Anyway, I’ve designed a new kitchen on Lowe’s version kitchen designer online.
It includes a place to eat I am so excited!
My plan is to move the fridge to the screened in back porch. Use our gas grill and camping equipment to set up our makeshift kitchen. I have a half bathroom right by the door to access hot water. There is electric already it there for fridge, coffee pot, microwave, etc.
My biggest concern is my makeshift kitchen will be so much better than my current kitchen I won’t be in a rush to finish the new kitchen 😉
I’m actually thinking about seeing it up early to use and just let this one sit.
Question…
We currently have carpet and tile. The living room and kitchen have cathedral ceiling, open only separated by paninsula which were supposed to sit on living room side to eat, I guess. (Only eating space in this 840 square foot home.) We are taking out old flooring replacing with wood laminate throughout.
Would it be better to do new floor after the gut job or after new cabinetry is placed?
Hi, Jody. Sounds like you have quite a project ahead of you but it’s exciting! We actually did our floors with laminate as well and you can read about it here: https://www.martysmusings.net/2017/06/how-to-install-laminate-flooring.html The floors were the very last thing we did and typically they’re last after the cabinets. I hope your kitchen turns out like you want. Good luck!
I know how it feels to be in the middle of a remodel. Our toilet had a leak and ruined our vanity in our guest bathroom. We decided after a few weeks we would remodel the bathroom. What started as a simple replace the toilet, tile and vanity became a total gut with new tub, tile, toilet, vanity, electrical, and lighting. There has been no part of this project that has been easy, but it has taught me patience and what is really important. We are going on a year with this small bathroom remodel and we are still not done but looking back I have enjoyed the crazy frustrating moments with my husband, thankful for the money we had to do this project and of course the luxury of having a second bathroom. I am still working on the being content part but even that is getting better.
Hey, Melissa! Are you guys doing the bathroom yourselves? What is it about bathroom remodels that are so hard? Ugh. I feel your pain. And half two bathrooms is definitely a luxury. Our second one is just so bad and I’m grateful we have one that was gutted and redone. I’m working on the content part, too! It’s funny that I hardly notice our kitchen/living rooms floors are totally messed up now. They’ve been that way for over 3 months! I just can’t blog about the whole thing until that final piece is DONE. But it’s okay. I have a bedroom and office I’ve never shared. ~eye roll~
Give the Walden girls a hug for us!
We did a temporary kitchen remodel in 2011 when we had to tear the master bath and laundry room apart due to water leaks. I also used paper and plastic and everything else was packed into boxes and put into our 3 empty bedrooms. As for my coffee, that went into my bedroom since I couldn’t use the other bathroom (we had to use that for showers and I didn’t want hair all over, yuck). Somehow we survived and are still married. Then in 2014 we had another leak in the extra bathroom so we had to tear that apart. That was fine because no one used that bathroom. We decided last year it was time to tear apart the 3 extra bedrooms. We scraped popcorn ceilings, tore off sheetrock, pulled up the carpet. We started in March and finished all 3 rooms by August. In July a mirror fell on my leg and filleted it and sliced my ankle on the other leg open. 19 stitches later and being told to stay off them for 3 weeks-that was interesting we were still able to finish on time. This was all done by my husband and myself (and the 2 dogs). Now we have the family room, dining room, living room, our bedroom and pull out cabinets in the kitchen. We ended up tired of remodeling so who knows when that will get started.
Hi, Danna. Wow. You are hardcore DIYers, too! I thought my husband and I were always in the middle of something but I think we take much longer breaks in between than you do! Of course, we still have our last two kids at home so they still want rooms to live in, lol. I’m so sorry about your leg! That sounds awful and I’m thinking you probably had a hard time listening to your dr. I don’t know anyone like that (2 carpal tunnel surgeries and a recent gallbladder surgery. Major eye roll here!)
Thanks so much for reading and enjoy our adventures!